On this tutorial, we’ll information you thru the method of making a Vue.js app and reworking it right into a progressive internet app.
In a digital panorama the place customers more and more demand seamless experiences regardless of community situations, progressive internet apps (PWAs) emerge as a transformative answer. Progressive internet apps are internet functions that leverage trendy internet capabilities to ship an app-like expertise to customers. They mix the perfect of internet and cell functions, offering quick loading, offline performance, and seamless person experiences.
Key Ideas: Service Employees and Manifest Recordsdata
In PWAs, service staff and manifest recordsdata are elementary elements that contribute to the improved efficiency and offline capabilities of internet functions.
Service staff
Service staff are JavaScript recordsdata that function as background processes, separate from the primary browser thread. They empower your Vue app with the power to deal with duties like caching assets, intercepting community requests, and enabling options resembling push notifications.
Manifest recordsdata
Manifest recordsdata, sometimes named manifest.json, function a blueprint on your PWA. They include metadata concerning the app, defining the way it ought to seem and behave when put in on a person’s system. manifest recordsdata specify important particulars such because the app’s title, icons, begin URL, and show preferences.
Now that you’ve a strong understanding of those key ideas, let’s begin turning your Vue.js app into an offline-ready progressive internet app.
Getting ready Your Vue.js App
Earlier than reworking your Vue.js app right into a progressive internet app, you’ll want to arrange a Vue.js challenge. In the event you haven’t created a Vue.js app but, comply with the steps under. Alternatively, when you have an present Vue.js app, you’ll be able to skip the set up part.
Creating a brand new Vue.js app
To create a brand new Vue.js app, you’ll want Vue CLI (command line interface). In the event you don’t have it put in globally, you are able to do so by working the next command:
npm set up -g @vue/cli
As soon as Vue CLI is put in, you’ll be able to create a brand new Vue app utilizing the next instructions:
vue create my-vue-pwa
This command initiates an interactive setup course of the place you’ll be able to select varied configurations on your Vue.js app. Make sure that to pick the default preset, and when prompted to manually choose options, be certain that you select the PWA possibility.
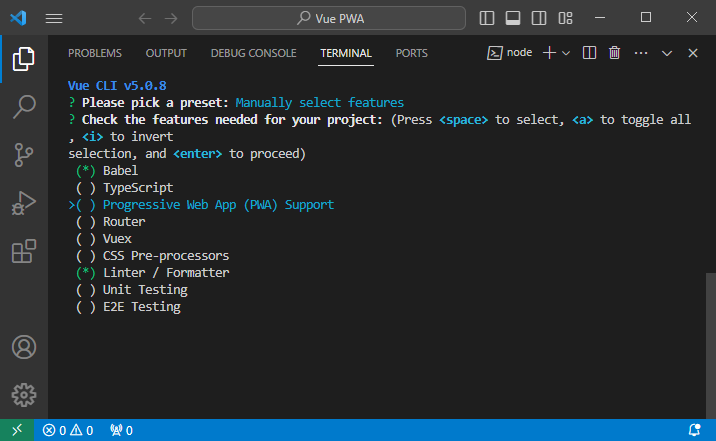
This may arrange your challenge with the required configurations for progressive internet app options.
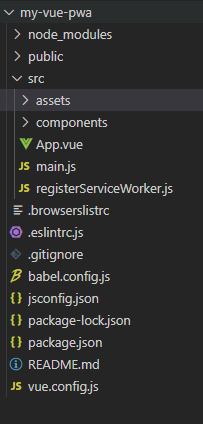
Notably, the collection of the PWA possibility throughout app creation will robotically generate a registerServiceWorker.js file. If, for any purpose, this file isn’t created, you’ll be able to make the most of the next command so as to add the progressive internet app options to your Vue.js challenge:
vue add pwa
This extra command ensures that the required dependencies and configurations for progressive internet app options are seamlessly built-in into your challenge.
Create a easy todo checklist app
For demonstration functions, let’s create a easy todo checklist app on the house web page of your Vue app. Exchange the contents of App.vue with the next code:
<template>
  <div class="dwelling">
    <h1>Todo Checklist</h1>
    <div>
      <enter v-model="newTodo" @keyup.enter="addTodo" placeholder="Add a brand new todo" />
      <button @click on="addTodo">Add</button>
    </div>
    <ul>
      <li v-for="todo in todos" :key="todo.id">
        <enter kind="checkbox" v-model="todo.accomplished" />
        <span :class="{ 'accomplished': todo.accomplished }">{{ todo.textual content }}</span>
      </li>
    </ul>
  </div>
</template>

<script>
export default {
  information() {
    return {
      newTodo: '',
      todos: [
        { id: 1, text: 'Learn Vue.js', completed: false },
        { id: 2, text: 'Build a PWA', completed: false },
        { id: 3, text: 'Deploy to Netlify', completed: false },
      ],
    };
  },
  strategies: {
    addTodo() {
      if (this.newTodo.trim() === '') return;
      this.todos.push({ id: this.todos.size + 1, textual content: this.newTodo, accomplished: false });
      this.newTodo = '';
    },
  },
};
</script>

<type scoped>
.accomplished {
  text-decoration: line-through;
}
</type>
Within the above code:
- We’re modifying the content material of the
App.vuefile to create a todo checklist. - The template consists of an enter discipline for including new todos, a button so as to add them, and an inventory to show present todos.
- Todos are represented by objects with properties like
id,textual content, andaccomplished. - The
v-fordirective dynamically renders every todo merchandise within the checklist. - Checkboxes are included for every todo, and their completion standing is managed by the
accomplishedproperty. - The checkboxes are sure to the
accomplishedproperty utilizing thev-modeldirective, enabling interactive marking of duties as accomplished or incomplete. - The
addTodomethodology permits the addition of latest todos to the checklist, with enter validation to forestall empty todos. - A easy styling is utilized to accomplished duties, visually indicated by a line-through textual content ornament.
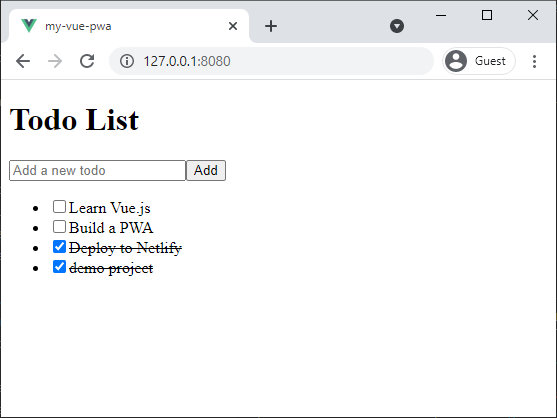
This todo checklist app serves as a baseline for reworking your Vue.js software into an offline-ready progressive internet app.
Modify the Manifest File
Now that you’ve your Vue.js app arrange, together with a primary function, the subsequent step is to reinforce its progressive internet app capabilities by configuring the manifest.json file.
The manifest.json file performs a vital position in defining how your PWA seems and behaves when put in on a person’s system. As a result of PWA module being utilized, this file can be robotically generated throughout the construct course of, making certain it incorporates the required data for a seamless PWA expertise.
Configure app metadata
The manifest.json file consists of essential components that contribute to the PWA expertise. To replace this data, you’ll be able to modify your vue.config.js file, which acts because the configuration hub on your Vue.js app. Open the vue.config.js file (create one if not already current) within the root listing of your challenge and add or modify the next part:
module.exports = {


  pwa: {
    title: 'My ToDo App',
    short_name: 'ToDo',
    description: 'A ToDo progressive internet app',
    start_url: "https://www.sitepoint.com/",
    show: 'standalone',
    background_color: '#ffffff',
    theme_color: '#41b383',
    icons: [
      {
        src: '/img/icons/icon-72x72.png',
        sizes: '72x72',
        type: 'image/png',
      },

    ],
  },
};
Manifest file properties:
- title: the complete title of your app.
- short_name: a brief model of your app’s title for limited-space environments.
- description: a quick description of your app.
- start_url: the web page that hundreds when your PWA is launched.
- show: defines the show mode; right here, standalone ensures it seems as a standalone app.
- background_color: the background shade of the app.
- theme_color: the colour of the app’s theme.
- icons: an array of icons for various system resolutions.
By updating the vue.config.js file, you make sure that your Vue.js app’s PWA module generates the manifest.json file with the required configurations throughout the construct course of. This dynamic technology simplifies the upkeep of your PWA metadata, permitting you to make adjustments straight in your challenge’s configuration.
Implement Service Employees
Service staff are a significant part of progressive internet apps (PWAs) chargeable for enabling superior options resembling offline capabilities, background synchronization, and push notifications.
The service employee file can be robotically generated throughout the construct course of, making certain its inclusion within the manufacturing surroundings. In improvement mode, service staff should not included by default. This omission is intentional and serves to forestall potential points.
Enabling service staff in improvement might result in cached property getting used, doubtlessly inflicting discrepancies with the most recent native adjustments.
To construct the Vue.js app and generate the service employee file, the next command may be utilized:
npm run construct
Executing this command triggers the Vue construct course of, which incorporates the creation of the service employee file in a dist listing for manufacturing deployment.
Register the service staff
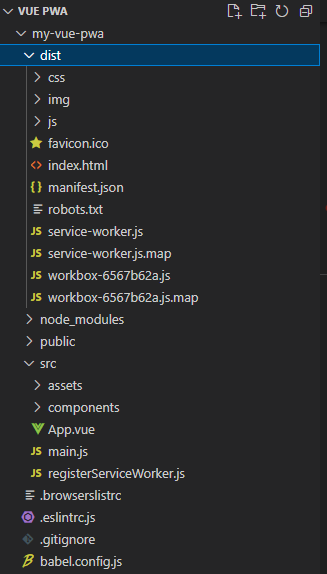
The registerServiceWorker.js file is robotically included in your Vue.js challenge when generated with Vue CLI or pwa module. This file performs a vital position in integrating service staff into your Vue.js software. Its major goal is to facilitate the registration of the service employee script, enabling your app to leverage progressive internet app options, resembling caching and offline capabilities.
Let’s delve deeper into the code and perceive its key elements:
import { register } from 'register-service-worker'

if (course of.env.NODE_ENV === 'manufacturing') {
  register(`${course of.env.BASE_URL}service-worker.js`, {
    prepared () {
      console.log(
        'App is being served from cache by a service employee.n' +
        'For extra particulars, go to <https://goo.gl/AFskqB>'
      );
    },
    registered () {
      console.log('Service employee has been registered.');
    },
    cached () {
      console.log('Content material has been cached for offline use.');
    },
    updatefound () {
      console.log('New content material is downloading.');
    },
    up to date () {
      console.log('New content material is obtainable; please refresh.');
    },
    offline () {
      console.log('No web connection discovered. App is working in offline mode.');
    },
    error (error) {
      console.error('Error throughout service employee registration:', error);
    }
  });
}
Code explanations:
-
Surroundings test. The
if (course of.env.NODE_ENV === 'manufacturing')situation ensures that the service employee is registered solely in manufacturing mode. It is a crucial consideration, as service staff are supposed to improve the efficiency and offline capabilities of the app within the manufacturing surroundings. -
Registration perform. The
registerperform is imported from'register-service-worker'and is chargeable for the precise registration of the service employee script. -
Callbacks. The callbacks throughout the configuration object deal with varied lifecycle occasions of the service employee.
prepared. This callback is triggered when the app is being served from the cache by a service employee. It signifies that the app is efficiently working offline.registered. Alerts that the service employee has been efficiently registered.cached. Signifies that content material has been cached for offline use. It is a key function of PWAs, making certain that customers can entry the app even with out an web connection.updatefound. Informs that new content material is at present being downloaded. That is a part of the service employee’s means to fetch and cache up to date property within the background.up to date. Alerts that new content material is obtainable, prompting the person to refresh the app to load the most recent model.offline. Notifies the person when there’s no web connection, and the app is working in offline mode. This ensures a seamless person expertise even in difficult community situations.error. Logs any errors which will happen throughout the service employee registration course of.
Customise Service Employee
The registerServiceWorker.js file in your Vue.js challenge gives a versatile framework that lets you customise the conduct of your service employee. Whereas the default configuration makes use of console.log statements for logging, you’ll be able to improve the person expertise by incorporating popups or notifications. Let’s discover how one can obtain this stage of customization.
You possibly can change the console.log statements with popup notifications to offer a extra visually partaking expertise for customers. To attain this, you’ll be able to leverage in style libraries like SweetAlert or native browser APIs.
Utilizing SweetAlert
-
First, set up SweetAlert in your challenge:
npm set up sweetalert2 -
Modify the
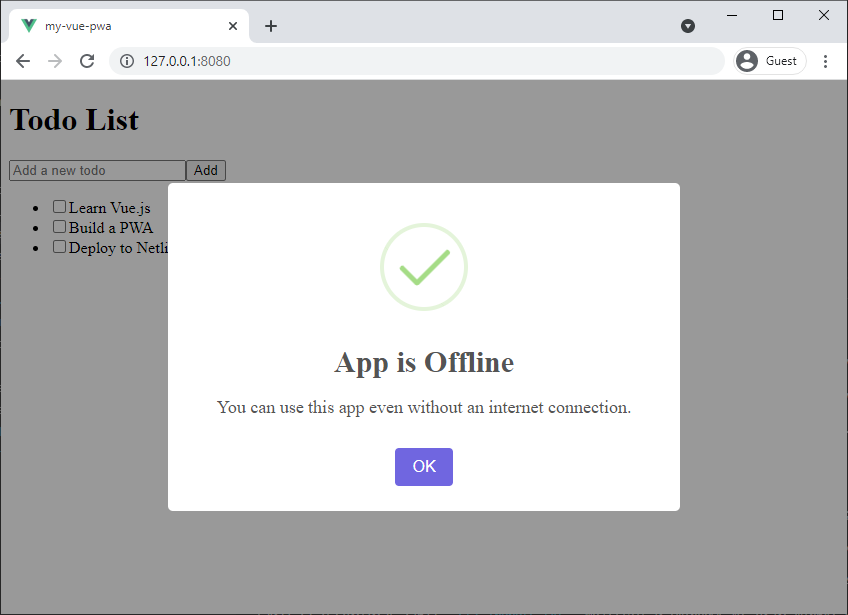
registerServiceWorker.jsfile:import { register } from 'register-service-worker'; import Swal from 'sweetalert2'; if (course of.env.NODE_ENV === 'manufacturing') { register(`${course of.env.BASE_URL}service-worker.js`, { prepared() { Swal.hearth({ title: 'App is Offline', textual content: 'You should utilize this app even with out an web connection.', icon: 'success', }); }, registered() { Swal.hearth('Service employee has been registered.'); }, cached() { Swal.hearth('Content material has been cached for offline use.'); }, updatefound() { Swal.hearth('New content material is downloading.'); }, up to date() { Swal.hearth({ title: 'New Content material Accessible', textual content: 'Please refresh to load the most recent model.', icon: 'data', }); }, offline() { Swal.hearth({ title: 'No Web Connection', textual content: 'App is working in offline mode.', icon: 'warning', }); }, error(error) { console.error('Error throughout service employee registration:', error); }, }); }
On this instance, we’ve changed the console.log statements with SweetAlert notifications. You possibly can customise the looks and conduct of those notifications in keeping with your design preferences.
Make Your App Installable
Progressive internet apps provide a seamless set up expertise, permitting customers so as to add your app to their system’s dwelling display for fast entry. On this part, we’ll information you thru prompting customers to put in your PWA.
Immediate customers to put in your PWA
Encouraging customers to put in your PWA enhances person engagement and gives a local app-like expertise. You possibly can set off an set up immediate based mostly on sure situations, resembling person interactions or time spent in your web site.
To implement this function, you need to use the @owliehq/vue-addtohomescreen plugin. This plugin is designed solely for Vue 3, providing a hassle-free answer for integrating an Add to Residence Display button in your software.
Set up the plugin
To get began, set up the plugin utilizing npm or yarn:
npm set up @owliehq/vue-addtohomescreen
Add the plugin
In your src/foremost.js file, initialize the plugin by importing it and passing any desired customization parameters. This instance units the button shade to blue:
import { createApp } from 'vue';
import App from './App.vue';
import AddToHomescreen from '@owliehq/vue-addtohomescreen';
import './registerServiceWorker'

const app = createApp(App);
app.use(AddToHomescreen, {
  buttonColor: 'blue',
});

app.mount('#app');
This code ensures that the plugin is built-in into your Vue 3 software with the required customization.
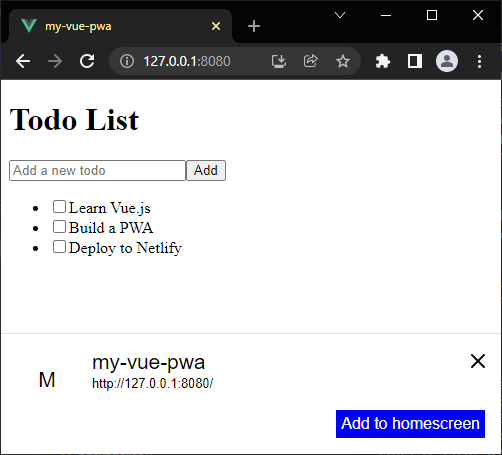
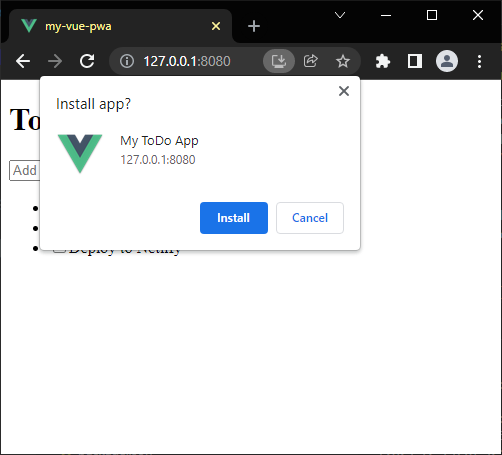
These implementations present customers with clear choices to put in your PWA, making a extra user-centric expertise and rising the chance of app adoption. Customers can select to put in the app programmatically or comply with a visible cue so as to add it to their system’s dwelling display.
Testing Your Offline-ready PWA
To domestically check your offline-ready progressive internet app, start by putting in the http-server utilizing the command:
npm set up -g http-server
Subsequent, navigate to the dist listing in your terminal and serve the recordsdata utilizing the next command:
http-server -o
This command will open the PWA in your default browser.
In case your PWA is already deployed, entry it by opening the hyperlink offered by your internet hosting supplier after the deployment course of is accomplished.
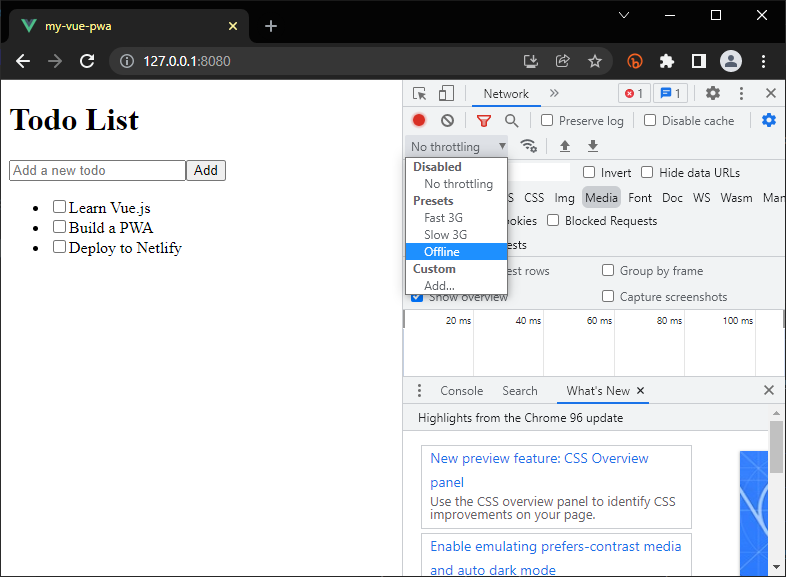
Offline testing with browser developer instruments
Simulating offline situations for testing may be achieved by means of browser developer instruments. In Google Chrome, open DevTools (F12 or right-click and choose Examine), go to the Community tab, and test the Offline choice to simulate an offline surroundings. Equally, in Microsoft Edge, open DevTools, navigate to the Community situations tab, and test the Offline choice to simulate an offline situation.
Conclusion
In conclusion, reworking your Vue.js app right into a progressive internet app brings a mess of advantages, together with enhanced person expertise, offline performance, and improved efficiency. By implementing service staff, manifest recordsdata, and caching methods, your app turns into resilient to various community situations and gives customers with a seamless expertise.