
Thoughts-blowing results that require 1000’s, probably tens of millions of objects like lots of of paper planes, brains made out of triangles, or a galaxy of stars, push the boundaries of the GPU.
Nonetheless, generally it’s not as a result of the GPU can’t draw sufficient, at instances it’s bottlenecked by how a lot data it’s receiving.
On this tutorial, we’ll learn to leverage Instancing to permit the GPU to concentrate on what it does finest: drawing tens of millions of objects.
Try Mastering ThreeJS Instancing for artistic builders.
On this course, you’ll learn to draw tens of millions of objects with good efficiency by creating 3 mind-blowing Instancing tasks in 14 totally different classes.
If you need extra in-depth video explanations, test it out!
Use code AdeventOfCodrops for a 20% low cost
Overview
On this tutorial we are going to be taught:
- How you can create an Instanced Mesh with instanced place and coloration to render 1000’s of objects
- Displace the mesh in Y axis with the gap to the mouse
- Animate the scaling and rotation on a per-instance foundation
- Rework this demo right into a visually compelling undertaking
Set up
Use this if you’ll observe together with the tutorial (you should utilize npm/yarn/pnpm):
- Obtain the demo recordsdata
- Run yarn set up in a command line
- Run yarn dev
Instancing
The GPU is unimaginable at drawing objects, however not nearly as good at receiving the info it wants. So, how we talk with the GPU is essential.
Every mesh creates one draw name. For every draw name, the GPU must obtain new information. This implies if we have now a million meshes, the GPU has to obtain information 1,000,000 tones after which draw 1,000,000 instances.
With instancing, we ship a single mesh, create a single draw name, however say “Draw this mesh a million instances” to the GPU. With easy this modification, we solely ship the info as soon as, and the GPU can concentrate on what it does finest. Drawing tens of millions of objects.
Instancing fundamentals
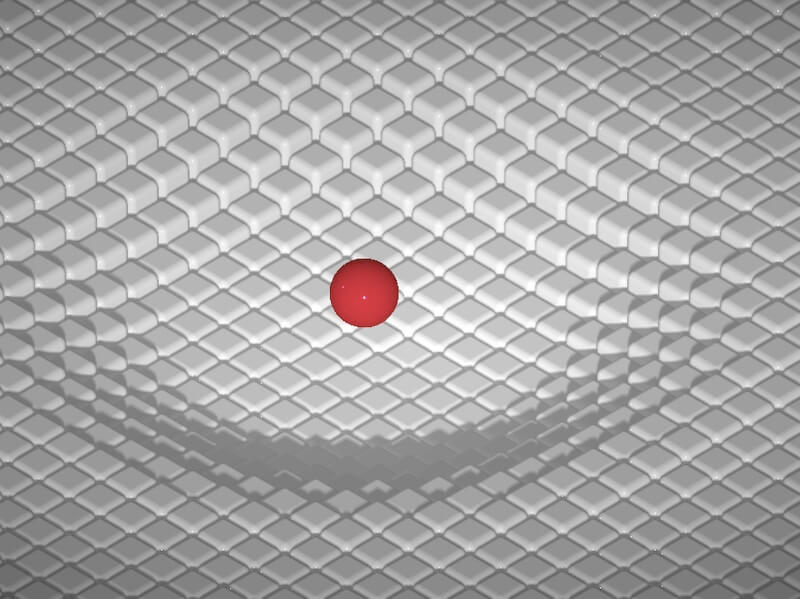
In ThreeJS, the only strategy to create situations is with THREE.InstancedMesh, receives the geometry, the fabric, and the quantity of situations we would like. We’ll create a grid of containers so grid * grid is the variety of situations.
let grid = 55;
let measurement = .5
let gridSize = grid * measurement
let geometry = new THREE.BoxGeometry(measurement, 4, measurement);
let materials = new THREE.MeshPhysicalMaterial({ coloration: 0x1084ff, metalness: 0., roughness: 0.0 })
let mesh = new THREE.InstancedMesh(geometry, materials, grid * grid);
rendering.scene.add(mesh)
mesh.castShadow = true;
mesh.receiveShadow = true;
You’ll discover that we solely have one object on the display screen. We have to give each a place.
Every occasion has a ModelMatrix that the vertex shader then makes use of to place it. To switch the place of every occasion we’ll set the place to a dummy, after which copy the matrix over to the InstancedMesh by setMatrixAt
let dummy = new THREE.Object3D()

let i =0;
let coloration = new THREE.Coloration()
for(let x = 0; x < grid; x++)
for(let y = 0; y < grid; y++){
  // console.log(x,y)


  dummy.place.set(
    x * measurement - gridSize /2 + measurement / 2.,
    0,
    y * measurement - gridSize/2 + measurement / 2.,
  );

  dummy.updateMatrix()
  mesh.setMatrixAt(i, dummy.matrix)
  i++;
}
Setting the place shouldn’t be sufficient. As a result of these are attributes we’re modifying, they should be marked as up to date and the boundingSphere recalculated.
mesh.instanceMatrix.needsUpdate = true;
mesh.computeBoundingSphere();
Including waves within the vertex shader
To have higher management over the end result and higher efficiency, we’re going to transfer every occasion contained in the vertex shader. Nonetheless, we’re utilizing a MeshPhysicalMaterial, which has its personal shaders. To switch it we have to use OnBeforeCompile
For this, we have to create our vertex shader in two elements.
let vertexHead = glsl`

  uniform float uTime;
  void principal(){
`
let projectVertex = glsl`


        // Code goes above this
        vec4 mvPosition = vec4( reworked, 1.0 );

        #ifdef USE_INSTANCING

          mvPosition = instanceMatrix * mvPosition;

        #endif

        mvPosition = modelViewMatrix * mvPosition;

        gl_Position = projectionMatrix * mvPosition;
`
Then, utilizing onBeforeCompile, we will hook our shader earlier than the MeshPhysicalMaterial is compiled. Lastly permitting us to start out making our customized vertex modifications.
let uniforms = {
  uTime: uTime
}
mesh.materials.onBeforeCompile = (shader)=>{
      shader.vertexShader = shader.vertexShader.exchange("void principal() {", vertexHead)
      shader.vertexShader = shader.vertexShader.exchange("#embody <project_vertex>", projectVertex)
      shader.uniforms = {
        ...shader.uniforms,
        ...uniforms,
      }
    }
For all the results of this undertaking, we’ll use the place of every occasion. The place is the third worth in a Matrix. So we will seize it like instanceMatrix[3].
With this place, we’ll calculate the gap to the middle and transfer the situations up and down within the Y-axis with a sin perform.
// projectVertex

vec4 place = instanceMatrix[3];
float toCenter = size(place.xz);
reworked.y += sin(uTime * 2. + toCenter) * 0.3;
Then, rotate the mesh over time. We’ll use rotate perform present in a Gist by yiwenl. Add the rotation capabilities to the top, and rotate the reworked BEFORE the interpretation.
// Vertex Head
mat4 rotationMatrix(vec3 axis, float angle) {
    axis = normalize(axis);
    float s = sin(angle);
    float c = cos(angle);
    float oc = 1.0 - c;

    return mat4(oc * axis.x * axis.x + c,           oc * axis.x * axis.y - axis.z * s,  oc * axis.z * axis.x + axis.y * s,  0.0,
                oc * axis.x * axis.y + axis.z * s,  oc * axis.y * axis.y + c,           oc * axis.y * axis.z - axis.x * s,  0.0,
                oc * axis.z * axis.x - axis.y * s,  oc * axis.y * axis.z + axis.x * s,  oc * axis.z * axis.z + c,           0.0,
                0.0,                                0.0,                                0.0,                                1.0);
}

vec3 rotate(vec3 v, vec3 axis, float angle) {
	mat4 m = rotationMatrix(axis, angle);
	return (m * vec4(v, 1.0)).xyz;
}

// ProjectVertex

reworked = rotate(reworked, vec3(0., 1., 1. ),  uTime + toCenter * 0.4 );
reworked.y += sin(uTime * 2. + toCenter) * 0.3;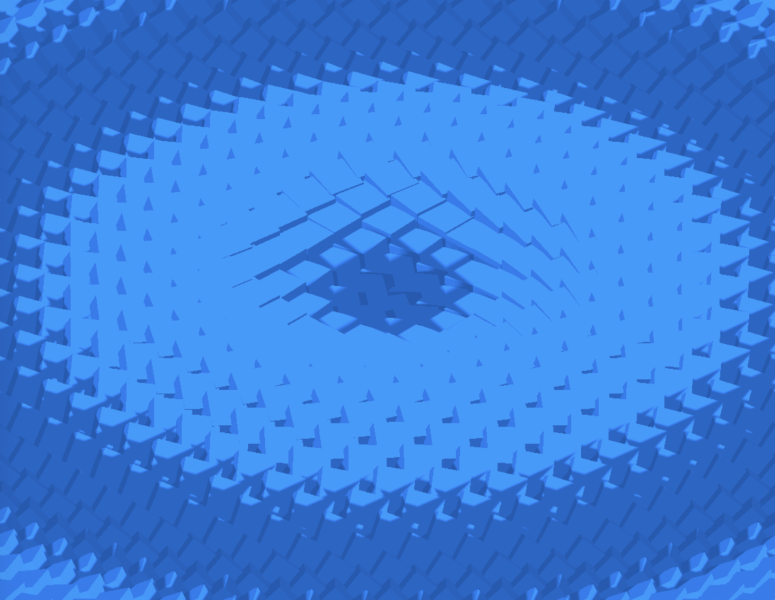
Fixing the shadows
For example supplies with customized vertex shaders the shadows are incorrect as a result of the digital camera makes use of a daily DepthMaterial for all meshes. This materials lacks our vertex shader modification. We have to present our customDepthMaterial to the mesh, a brand new MeshDepthMaterial with our similar onBeforeCompile
mesh.customDepthMaterial = new THREE.MeshDepthMaterial()
    mesh.customDepthMaterial.onBeforeCompile = (shader)=>{
      shader.vertexShader = shader.vertexShader.exchange("void principal() {", vertexHead)
      shader.vertexShader = shader.vertexShader.exchange("#embody <project_vertex>", projectVertex)
      shader.uniforms = {
        ...shader.uniforms,
        ...uniforms,
      }
    }
mesh.customDepthMaterial.depthPacking = THREE.RGBADepthPacking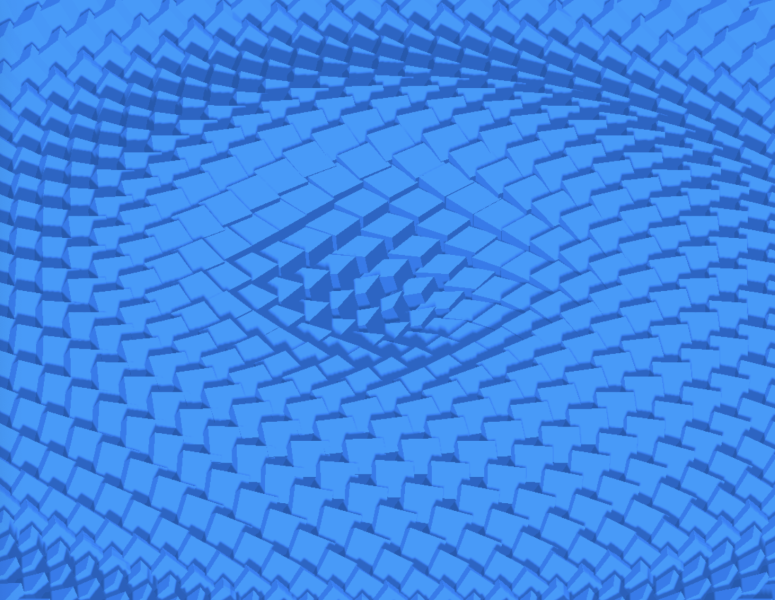
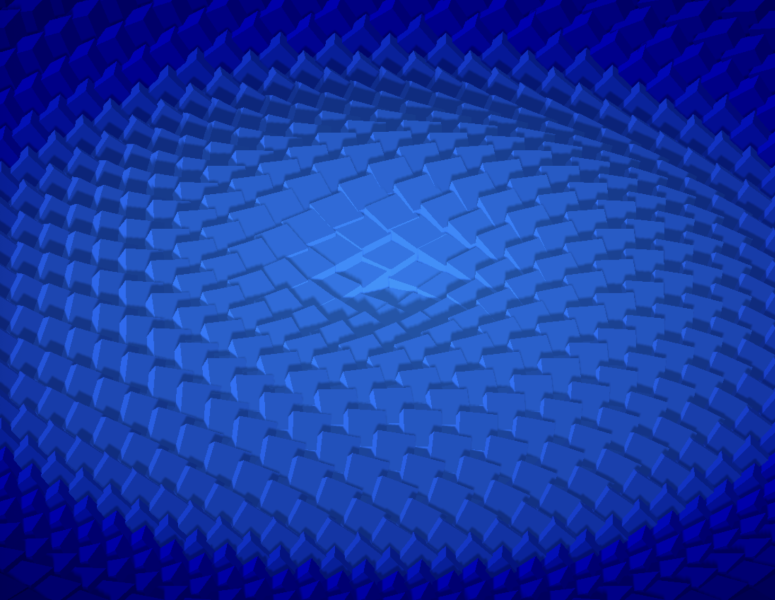
Distance Colours
The occasion colours are made in a few steps:
- Sum all coloration elements r + g + b
- Calculate how a lot proportion % every part contributes to the entire sum.
- Then, cut back the smaller percentages because the situations get away from the middle
First, sum all of the elements and divide every by the entire sum to get the share.
const totalColor = materials.coloration.r + materials.coloration.g + materials.coloration.b;
const coloration = new THREE.Vector3()
const weights = new THREE.Vector3()
weights.x = materials.coloration.r
weights.y = materials.coloration.g
weights.z = materials.coloration.b
weights.divideScalar(totalColor)
weights.multiplyScalar(-0.5)
weights.addScalar(1.)
With the share, calculate the gap to the middle and cut back the colour part based mostly on how a lot it contributed to the entire sum.
Which means that dominant colours keep for longer than much less dominant colours. Ensuing within the situations rising darker, however extra saturated on the dominant part because it strikes away from the middle.
for(let x = 0; x < grid; x++)
for(let y = 0; y < grid; y++){
  // console.log(x,y)


  dummy.place.set(
    x * measurement - gridSize /2 + measurement / 2.,
    0,
    y * measurement - gridSize/2 + measurement / 2.,
  );

  dummy.updateMatrix()
  mesh.setMatrixAt(i, dummy.matrix)

  let heart = 1.- dummy.place.size() * 0.18
  coloration.set( heart * weights.x + (1.-weights.x) , heart * weights.y + (1.-weights.y) , heart * weights.z + (1.-weights.z))
  mesh.setColorAt(i,coloration)

  i++;
}
Mouse Animation
Right here we use an affordable chain of followers. One follows the mouse, and the second follows the primary. Then we draw a line between them. Just like Nathan’s Stylised Mouse Trails
It is a quick and straightforward approach of making a line behind the mouse. Nonetheless, it’s noticeable if you transfer the mouse too shortly.
let uniforms = {
  uTime: uTime,
  uPos0: {worth: new THREE.Vector2()},
  uPos1: {worth: new THREE.Vector3(0,0,0)},
}
To calculate the mouse line in relation to the occasion place, we’d like the mouse in world place. With a raycaster, we will test intersections with an invisible aircraft and get the world place on the level of intersection.
This hit mesh shouldn’t be added to the scene, so we have to replace the matrix manually.
const hitplane = new THREE.Mesh(
  new THREE.PlaneGeometry(),
  new THREE.MeshBasicMaterial()
)
hitplane.scale.setScalar(20)
hitplane.rotation.x = -Math.PI/2
hitplane.updateMatrix()
hitplane.updateMatrixWorld()
let raycaster = new THREE.Raycaster()
Then, on mousemove, normalize the mouse place and raycast it with the invisible hit aircraft to get the purpose the place the mouse is touching the invisible aircraft.
let mouse = new THREE.Vector2()
let v2 = new THREE.Vector2()
window.addEventListener('mousemove', (ev)=>{
  let x = ev.clientX / window.innerWidth - 0.5
  let y = ev.clientY / window.innerHeight - 0.5

  v2.x = x *2;
  v2.y = -y *2;
  raycaster.setFromCamera(v2,rendering.digital camera)

  let intersects = raycaster.intersectObject(hitplane)

  if(intersects.size > 0){
    let first = intersects[0]
    mouse.x = first.level.x
    mouse.y = first.level.z
  }

})
To create our chain of followers, use the tick perform to lerp the primary uniform uPos0 to the mouse. Then, lerp the second uPos1 to the uPos0.
Nonetheless, for the second lerp, we’re going to calculate the velocity first, and lerp between the earlier velocity earlier than including it to uPos1. This creates a enjoyable spring-like movement as a result of it makes the change in course occur over time and never immediately.
let vel = new THREE.Vector2()
const tick = (t)=>{
  uTime.worth = t

  // Lerp uPos0 to mouse
  let v3 = new THREE.Vector2()
  v3.copy(mouse)
  v3.sub(uniforms.uPos0.worth)
  v3.multiplyScalar(0.08)
  uniforms.uPos0.worth.add(v3)

  // Get uPos1 Lerp velocity
  v3.copy(uniforms.uPos0.worth)
  v3.sub(uniforms.uPos1.worth)
  v3.multiplyScalar(0.05)

  // Lerp the velocity
  v3.sub(vel)
  v3.multiplyScalar(0.05)
  vel.add(v3)

  // Add the lerped velocity
  uniforms.uPos1.worth.add(vel)


  rendering.render()
}
Utilizing the mouse within the shader
With uPos0 and uPos1 following the mouse at totally different speeds, we will “draw” a line between them to create a path. So first, outline the uPos0 and uPos1 uniforms and the road perform within the head.
sdSegments returns the signed distance subject, representing how far you might be to the road.
// Vertex Head
uniform vec2 uPos0;
uniform vec2 uPos1;

float sdSegment( in vec2 p, in vec2 a, in vec2 b )
{
    vec2 pa = p-a, ba = b-a;
    float h = clamp( dot(pa,ba)/dot(ba,ba), 0.0, 1.0 );
    return size( pa - ba*h );
}
On the vertex Shader physique, we’ll use sdSegment to calculate how far the present occasion XZ place is to the road. And normalize with smoothstep from 1 to three. You’ll be able to improve the mouse impact by rising these values.
With the gap, we will modify the shader to create a change when the occasion is close to the mouse:
- Scale up the mesh,
- Add to the rotation angle.
- Transfer the occasion down.
The order of those operations is crucial as a result of they construct on one another. When you had been to translate earlier than rotation, then the rotation would begin from a distinct level.
float mouseTrail = sdSegment(place.xz, uPos0, uPos1);
mouseTrail = smoothstep(1., 3. , mouseTrail) ;

reworked *= 1. + (1.0-mouseTrail) * 2.;

reworked = rotate(reworked, vec3(0., 1., 1. ), mouseTrail * 3.14 +  uTime + toCenter * 0.4 );

reworked.y += -2.9 * (1.-mouseTrail);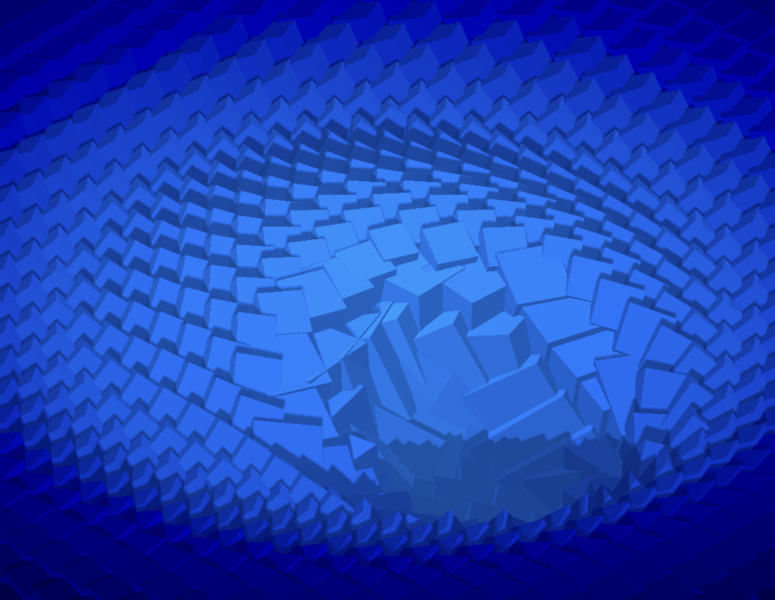
Animating the situations
We’ll use the identical distance to the middle to animate every occasion. Nonetheless, we’d like a brand new uniform to manage it from our javascript: uAnimate
let uniforms = {
  uTime: uTime,
  uPos0: {worth: new THREE.Vector2()},
  uPos1: {worth: new THREE.Vector2()},
  uAnimate: {worth: 0}
}
let t1= gsap.timeline()
t1.to(uniforms.uAnimate, {
  worth: 1,
  period: 3.0,
  ease: "none"
}, 0.0)
This animation must have linear easing as a result of we’ll calculate the precise occasion period/begin on the vertex shader, and add the easing proper there as a substitute.
This permits every occasion to have its personal easing fairly than beginning/ending and shifting at odd speeds.
// vertex head
#pragma glslify: ease = require(glsl-easings/cubic-in-out)
#pragma glslify: ease = require(glsl-easings/cubic-out)
Then to calculate a per occasion animation worth utilizing that uAnimate, we calculate the place every occasion goes to start out and finish utilizing the toCenter variable. And clamp/map our uAnimate making it so when uAnimate is between the beginning/finish of an occasion, it maps to ( 0 to 1) for that particular occasion.
// Head

uniform float uTime;
float map(float worth, float min1, float max1, float min2, float max2) {
    return min2 + (worth - min1) * (max2 - min2) / (max1 - min1);
}

// vertex physique

float begin = 0. + toCenter * 0.02;
float finish = begin+  cubicOut(toCenter + 1.5) * 0.06;
float anim = (map(clamp(uAnimate, begin,finish) , begin, finish, 0., 1.));

reworked = rotate(reworked, vec3(0., 1., 1. ),anim * 3.14+ mouseTrail * 3.14 +  uTime  + toCenter * 0.4 );

reworked.y += -2.9 * cubicInOut(1.-mouseTrail);
reworked.xyz *= anim;
reworked.y += cubicInOut(1.-anim) * 1.;
Enhancing the undertaking’s appears
We’ve some good lighting, however the cubes don’t showcase it too effectively. A rounded dice is a pleasant strategy to get some mild reflections whereas nonetheless protecting our beloved dice.
It’s Pailhead’s Rounded Dice, however added to the undertaking recordsdata as an ES6 class.
geometry = new RoundedBox(measurement, measurement, measurement, 0.1, 4);Configuring the shaders
To make the variations we made for the demo, we added a few new uniforms that modify the shader values.
These choices are all in vec4 to scale back the quantity of uniforms we’re sending to the GPU. This uniform config packing is an efficient apply as a result of every uniform means a brand new WebGL name, so packing all 4 values in a single vec4 ends in a single WebGL name.
let opts = {
   velocity: 1, frequency: 1, mouseSize:1, rotationSpeed: 1,
   rotationAmount: 0, mouseScaling: 0, mouseIndent: 1,
}

let uniforms = {
      uTime: uTime,
      uPos0: {worth: new THREE.Vector2()},
      uPos1: {worth: new THREE.Vector2()},
      uAnimate: {worth: 0},
      uConfig: { worth: new THREE.Vector4(opts.velocity, opts.frequency, opts.mouseSize, opts.rotationSpeed)},
      uConfig2: { worth: new THREE.Vector4(opts.rotationAmmount, opts.mouseScaling, opts.mouseIndent)}
    }
Now, we will use these uniforms within the shaders to configure our demo and create all of the variations we made for the demos. You’ll be able to try different configurations within the undertaking’s recordsdata!
float mouseTrail = sdSegment(place.xz, uPos0, uPos1 );
mouseTrail = smoothstep(2.0, 5. * uConfig.z , mouseTrail)  ;

// Mouse Scale
reworked *= 1. + cubicOut(1.0-mouseTrail) * uConfig2.y;

// Occasion Animation
float begin = 0. + toCenter * 0.02;
float finish = begin+  (toCenter + 1.5) * 0.06;
float anim = (map(clamp(uAnimate, begin,finish) , begin, finish, 0., 1.));

reworked = rotate(reworked, vec3(0., 1., 1. ),uConfig2.x * (anim * 3.14+  uTime * uConfig.x + toCenter * 0.4 * uConfig.w) );

// Mouse Offset
reworked.y += (-1.0 * (1.-mouseTrail)) * uConfig2.z;

reworked.xyz *= cubicInOut(anim);
reworked.y += cubicInOut(1.-anim) * 1.;

reworked.y += sin(uTime * 2. * uConfig.x + toCenter * uConfig.y) * 0.1;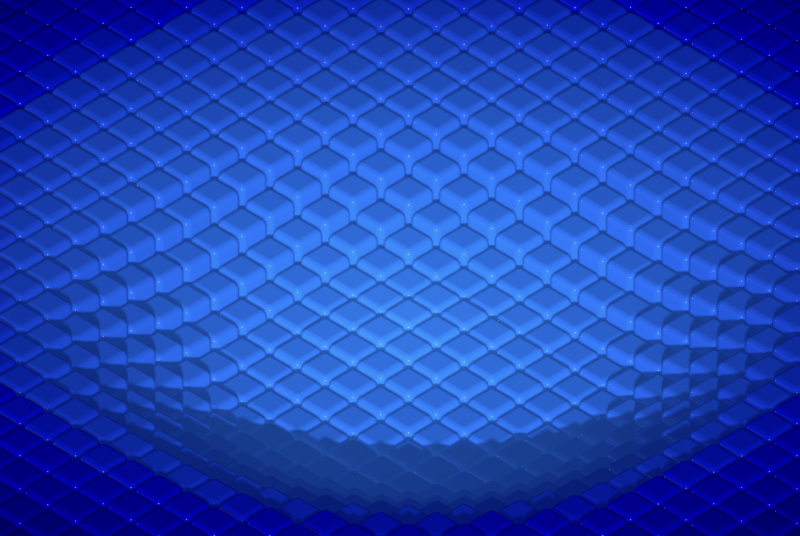
That’s it! You may get the ultimate end result within the github!
Going additional
As a substitute of utilizing the mouse, this demo began with a mesh’s place affecting the cubes as a substitute. So there’s rather a lot you are able to do with this concept.
- Change the form of the situations
- Create a mesh that follows the mouse
- Add a GPGPU to the mouse for precise following
Be taught extra about instancing
When you favored this tutorial or wish to be taught extra, be a part of Mastering ThreeJS Instancing the place you’ll be taught comparable instancing results like these. Right here’s a reduction of 20% for you 😄