
On this article, I’ll present you the right way to add KwesForms to your Astro web site after which carry the shape to life utilizing customized occasions and Rive.
Customized occasions can be utilized to manage the totally different states of a Rive animation every time an “occasion” within the type happens. This might be when a area turns into invalid, or when the shape has been efficiently submitted.
For those who’re eager to leap forward, I’ve created an instance repo containing all of the code, and a stay preview:
Getting Began with Astro
To get began with Astro, you’ve a few choices. You possibly can both comply with the pointers for putting in Astro with the Automated CLI, or (my most popular strategy) set up Astro manually.
Create a web page
For those who’ve put in Astro manually, create a brand new file known as index.astro within the following listing: src/pages.
Create a part
Create a brand new file known as rive-form.astro within the src/parts listing.
Add the part to the web page
Add the next to render the RiveForm part within the index web page:
---
import RiveForm from '../parts/rive-form.astro';
---

<RiveForm />
For the remainder of this text, I’ll be including code to the rive-form.astro file.
The src may be seen within the repo right here: rive-kwes-forms/src/pages/index.astro.
Getting Began with KwesForms
I used KwesForms for a shopper undertaking lately, and beloved the expertise. There are, after all, some ways to deal with type knowledge, however I discovered utilizing KwesForms actually helped simplify the requirement to have each client- and server-side validation!
To get began, go forward and join (it’s free). There are two methods to incorporate the KwesFroms code in your web site: you possibly can both set up by way of npm, or use a script aspect. On this instance, I’ll be utilizing the script aspect.
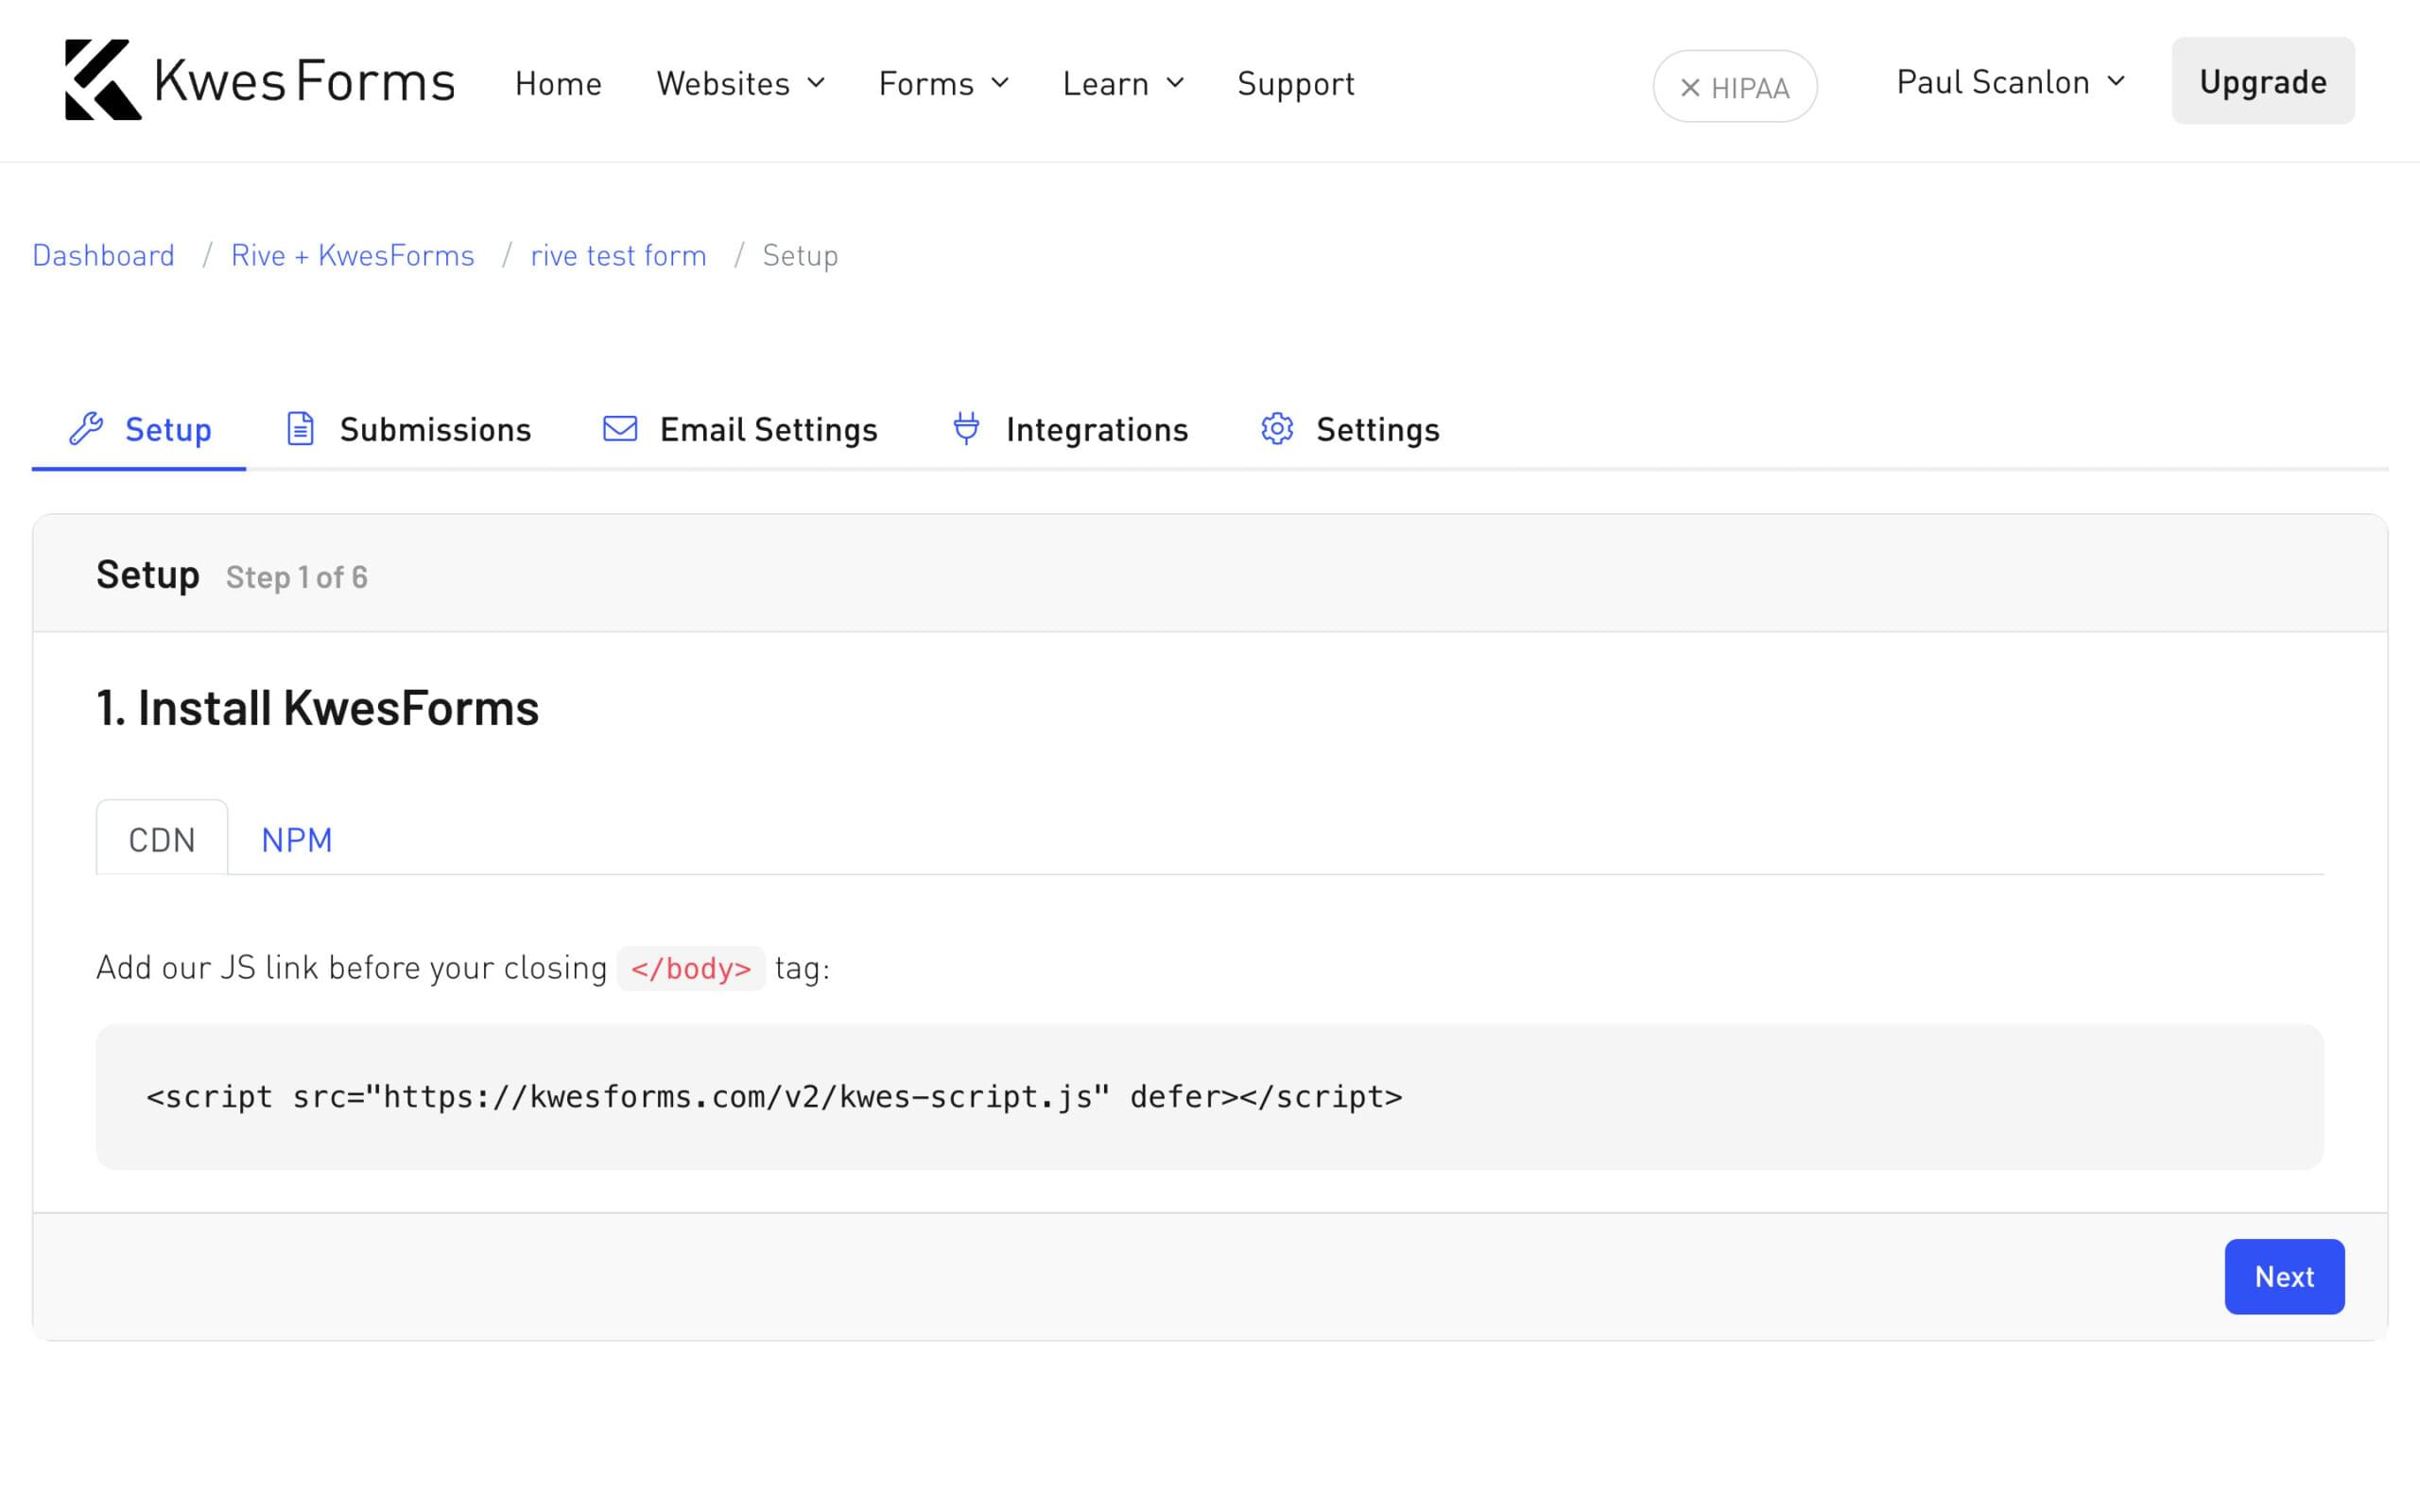
The remaining 5 steps within the setup part will information you thru the right way to add an HTML type aspect to your web site.
Including KwesFroms script to Astro
When utilizing client-sides scripts with Astro, you may wish to choose out of processing utilizing the is:inline directive. This tells Astro to go away the script alone and to render it within the HTML as a script aspect.
In your rive-form.astro file, add the next:
// src/parts/rive-form.astro

- <script src="https://kwesforms.com/v2/kwes-script.js" defer></script>
+ <script is:inline src="https://kwesforms.com/v2/kwes-script.js" defer></script>
Including KwesForms HTML
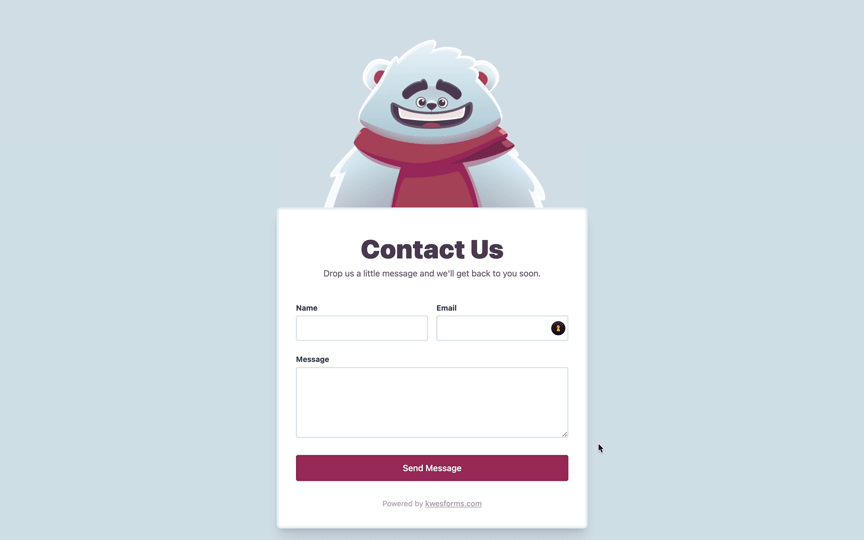
Right here’s the code I’ve used within the instance (utilizing Tailwind):
// src/parts/rive-form.astro

<script is:inline src="https://kwesforms.com/v2/kwes-script.js" defer></script>

<type
  id="riveForm"
  class="kwes-form flex flex-col gap-6"
  motion="https://kwesforms.com/api/overseas/types/abc123"
  data-kw-no-reload
>
  <div class="flex gap-4">
    <div class="develop">
      <label for="title">Title</label>
      <enter id="riveFormName" kind="textual content" title="title" data-kw-rules="required" />
    </div>
    <div class="develop">
      <label for="e mail">E-mail</label>
      <enter id="riveFormEmail" kind="e mail" title="e mail" data-kw-rules="required|e mail" required />
    </div>
  </div>
  <div>
    <label for="title">Message</label>
    <textarea id="riveFormMessage" title="message" rows="4" data-kw-rules="required"></textarea>
  </div>
  <button kind="submit">Ship Message</button>
</type>
The src may be seen within the repo right here: rive-kwes-forms/src/parts.rive-form.astro.
There are a few attributes that I’ve used to configure my type. You’ll discover on all the inputs I’ve added the next: data-kw-rules="required". This tells KwesFroms that these fields should comprise a worth earlier than the shape may be thought-about legitimate. I’ve used an extra attribute on the e-mail area to make sure solely legitimate e mail addresses are used — for instance, data-kw-rules="required|e mail".
You possibly can see all of the validation guidelines within the KwesForms type documentation.
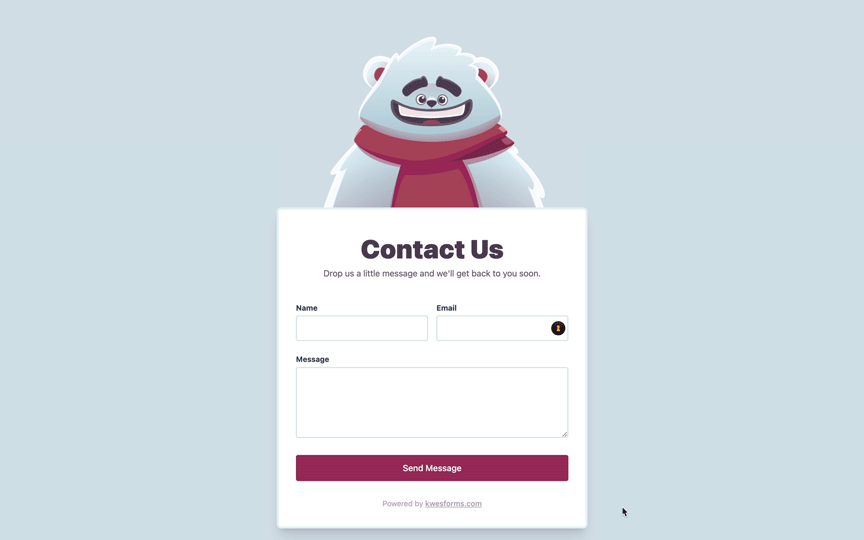
With the shape arrange, it’s now time so as to add a Rive animation.
What’s Rive?
Rive is tremendous cool, because it permits designers and animators to create an animation utilizing a browser-based interface, and as soon as it’s full, builders can merely obtain a file.
Modifying Astro’s Vite config
To make use of a .riv file with Astro, there’s a small quantity of config required so the Astro compiler is aware of what to do with recordsdata that finish in .riv.
To make use of Rive with Astro, add the next to your astro.config.mjs file:
import { defineConfig } from 'astro/config';

export default defineConfig({
  vite: {
    assetsInclude: ['**/*.riv'],
  },
});
Obtain Rive animation
The subsequent step is to discover a Rive animation to make use of, or, when you’re feeling inventive you possibly can create your individual. There are a great deal of neighborhood examples that may be downloaded and used free of charge.
The file I’m utilizing, Animated Login Character, was created by Juan Carlos Cruz from the Rive workforce. To get began, obtain the file and put it aside in your public listing.
I’ve saved mine in public/rive/2244-7248-animated-login-character.riv.
The src may be seen within the repo right here: rive-kwes-forms/public/rive.
Initializing Rive
To initialize the Rive canvas, add the next to your rive-form.astro file:
// src/parts/rive-form.astro

<script>
  const r = new rive.Rive({
    src: '/rive/2244-7248-animated-login-character.riv',
    canvas: doc.getElementById('canvas'),
    autoplay: true,
    stateMachines: 'Login Machine',
  });
</script>
<script is:inline src="https://unpkg.com/@rive-app/canvas@2.7.0"></script>
<canvas id="canvas" width="800" top="600"></canvas>
The subsequent half includes including occasion listeners to every of the shape parts to allow them to kick the Rive animation into its totally different animation states.
Rive state machines
You’ll see on the obtain web page that this animation has plenty of “states” outlined. These are the totally different states of the animation that may be triggered when sure type occasions happen.
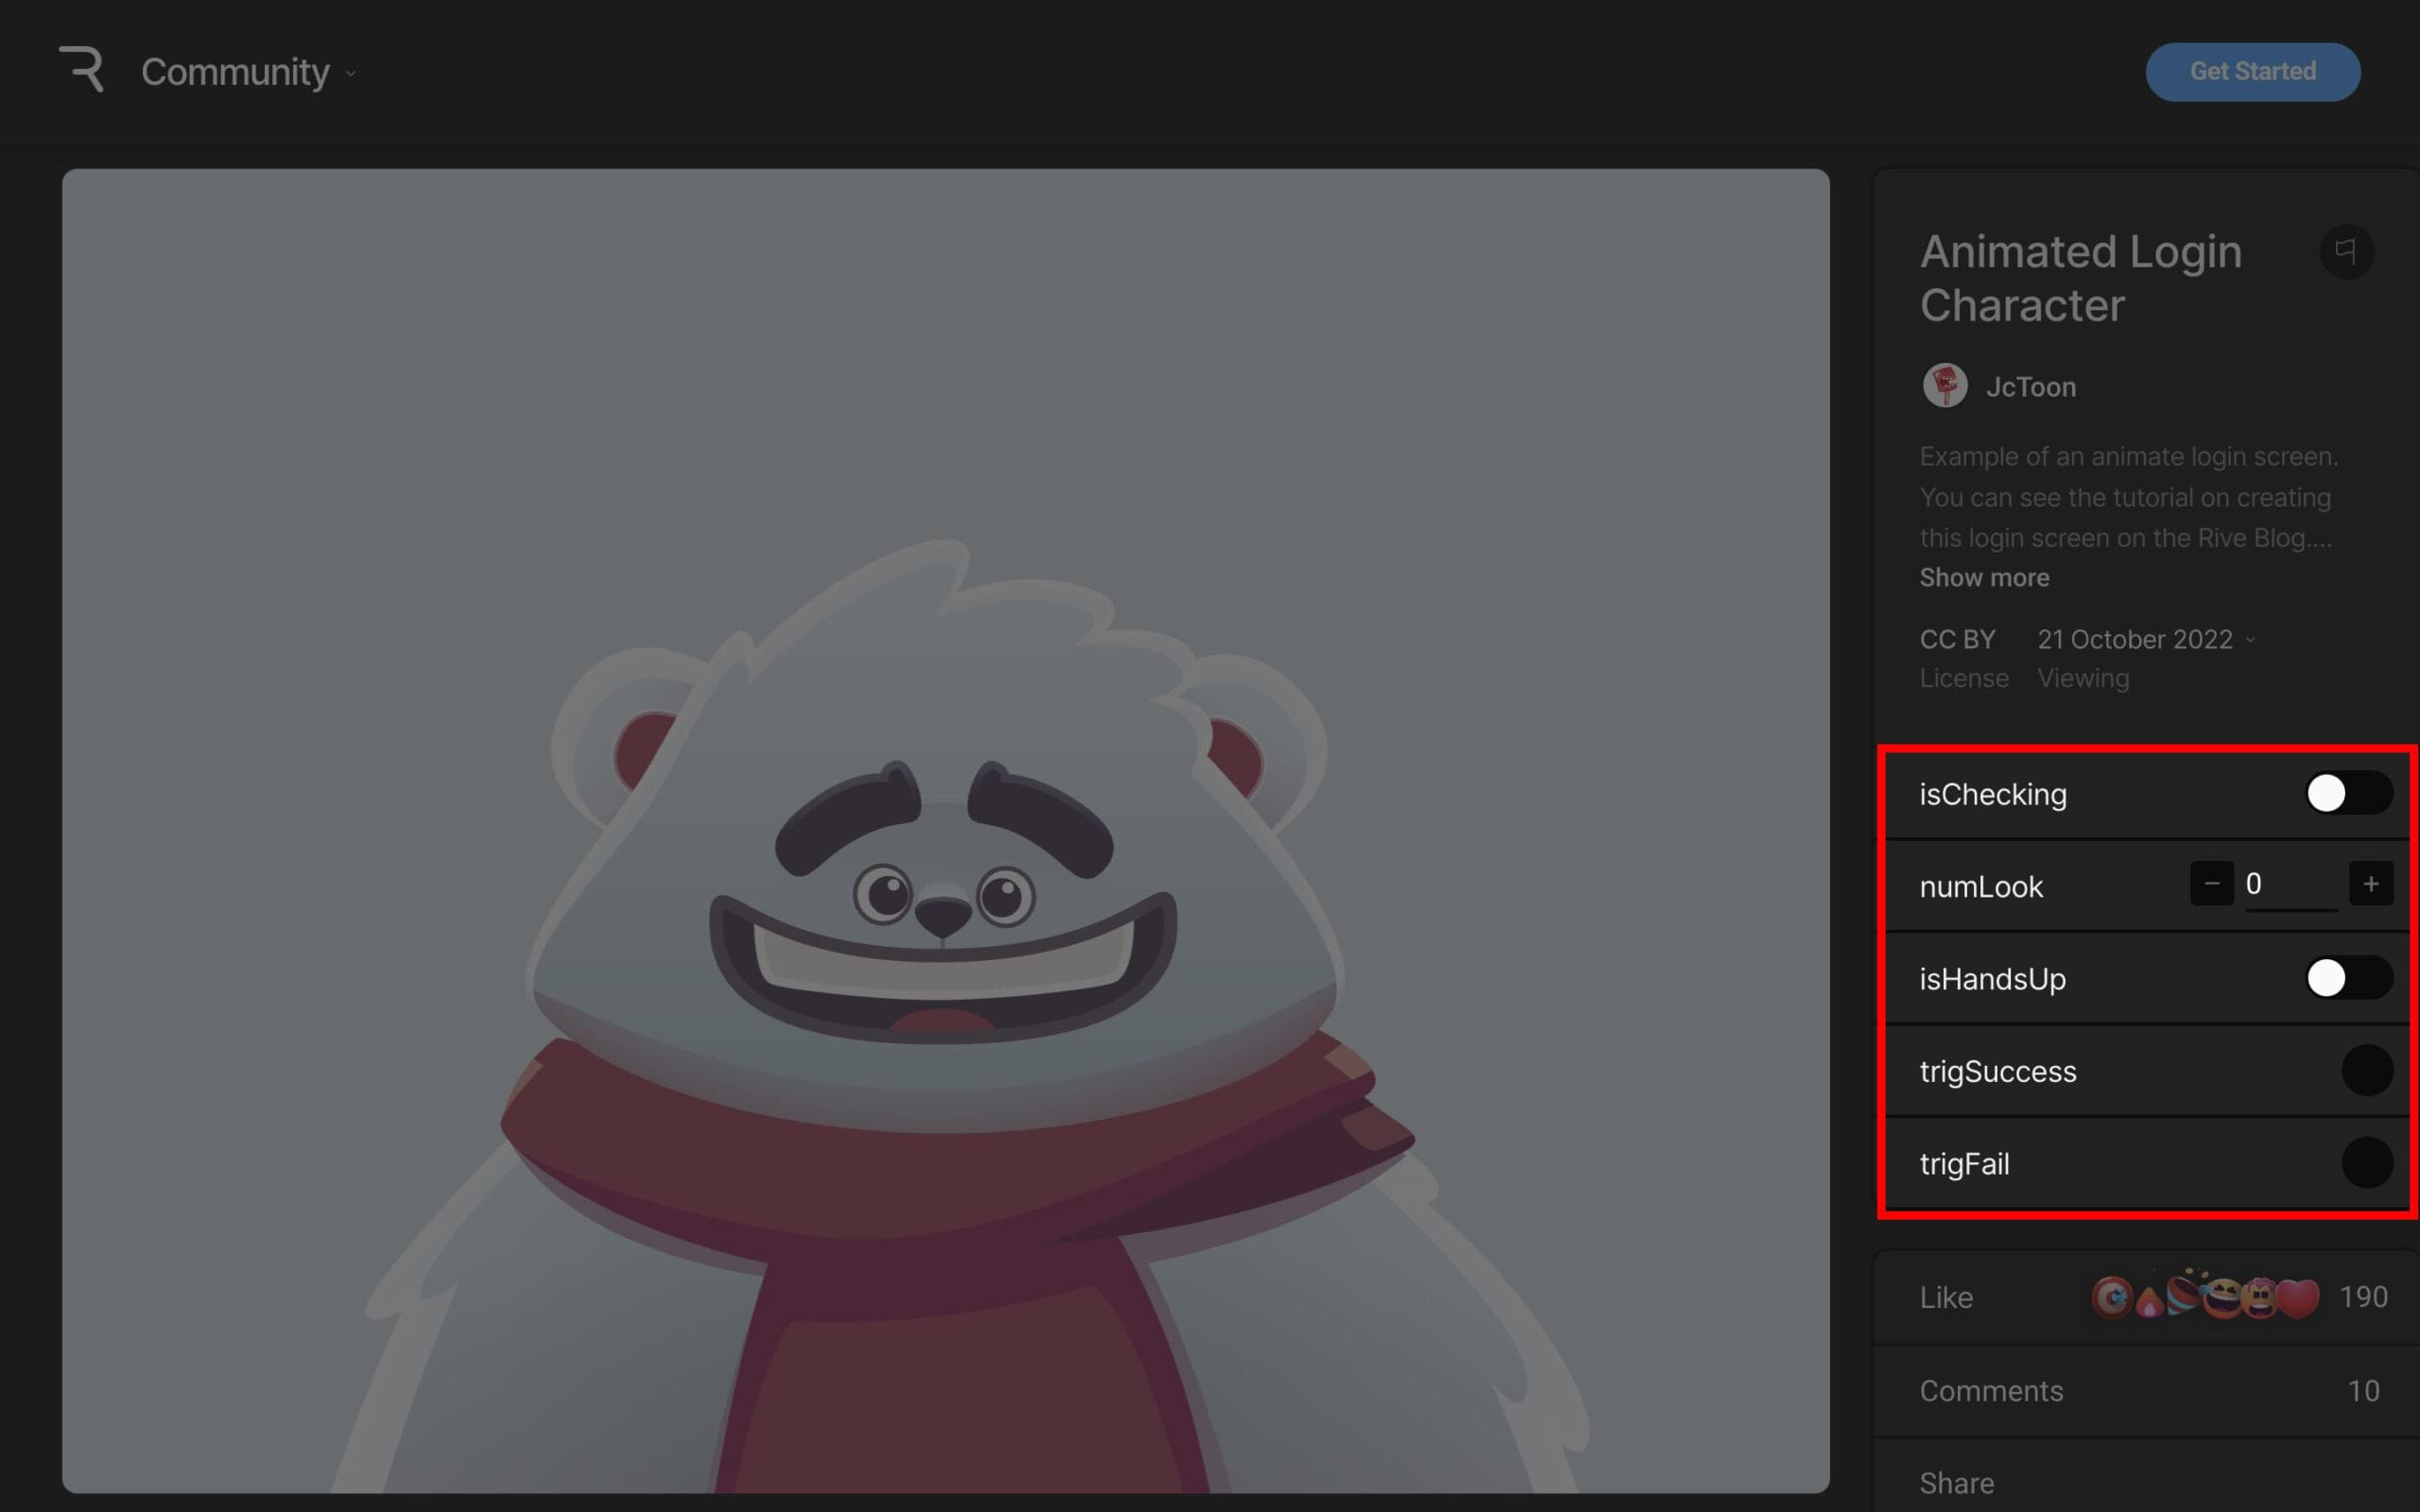
Rive state machines may be one of many following varieties:
- a set off that has a
fireplace()perform - a quantity that has a worth quantity property
- a Boolean that has a worth Boolean property
The kind of state machines outlined in an animation will decide the way you invoke them out of your type’s occasion listeners. (I’ll come again to this in only a second.)
Including Occasion Listeners
I’ve given every area within the type an id attribute, and from right here I can connect the required occasion listeners for every occasion I’d prefer to faucet into.
These occasions are particular to KwesForms. You possibly can see all of the customized occasions within the KwesForms documentation. Right here’s the code for the shape:
const type = doc.getElementById('riveForm');

type.addEventListener('kwSubmitted', perform () {
  console.log('type: kwSubmitted');
});

type.addEventListener('kwHasErrors', () => {
  console.log('type: kwHasErrors');
});
And right here’s the code for the e-mail area. These are the usual JavaScript occasions for focus and blur. I’ve added the identical for the title and message fields:
const title = doc.getElementById('riveFormName');

title.addEventListener('focus', () => {
  console.log('title: focus');
});

title.addEventListener('blur', () => {
  console.log('title: blur');
});
Triggering Rive State Machines from Type Occasions
That is the place the whole lot comes collectively. Every time a type occasion happens, I can invoke one of many states from the animation.
Making a getTrigger perform
Simply beneath the initialization code, add the next code snippet:
<script>
  const r = new rive.Rive({
  ...

+  const getTrigger = (title) => {
+    return r.stateMachineInputs('Login Machine').discover((enter) => enter.title === title);
+  };

</script>
This perform accepts a title parameter. That is the title of the state as seen earlier on the obtain web page. The perform returns an occasion of Rive’s stateMachineInputs, which permits values to be set, which in flip kicks the animation into its totally different states.
Calling a Set off from an Occasion Listener
Every time the shape has errors, I hook into the KwesForms kwHasErrors occasion and name the trigFail set off utilizing the fireplace perform:
type.addEventListener('kwHasErrors', () => {
  console.log('type: kwHasErrors');
+  const set off = getTrigger('trigFail');
+  set off.fireplace();
});
Every time the title area receives focus, I set isChecking to true, and wherever the title area is blurred, I set isChecking to false:
title.addEventListener('focus', () => {
  console.log('title: focus');
+  const set off = getTrigger('isChecking');
+  set off.worth = true;
});

title.addEventListener('blur', () => {
  console.log('title: blur');
+  const set off = getTrigger('isChecking');
+  set off.worth = false;
});
Every time the e-mail area receives focus, I set isHandsUp to true, and every time the e-mail area is blurred, I set isHandsUp to false:
e mail.addEventListener('focus', () => {
  console.log('e mail: focus');
+  const set off = getTrigger('isHandsUp');
+  set off.worth = true;
});

e mail.addEventListener('blur', () => {
  console.log('e mail: blur');
+  const set off = getTrigger('isHandsUp');
+  set off.worth = false;
})
Conclusion
Through the use of a mix of KwesForms occasions and commonplace JavaScript occasions with Rive animations, type errors may be surfaced in nearly any approach you possibly can think about.
If in case you have any questions regarding something I’ve coated on this put up, be happy to come back discover me on Twitter/X: PaulieScanlon.
Need extra data on Astro? Try out our model new ebook on SitePoint Premium: Unleashing the Energy of Astro, by Tamas Piros, which can present you the right way to get essentially the most out of essentially the most out of this contemporary all-in-one framework to construct quicker, content-focused web sites