
In a earlier submit, I walked by just a few steps on how you can host an Replace Retriever repository in an Azure blob storage. This concerned downloading the updates to an area machine, copying them to the blob, and configuring Skinny Installer on the consumer to drag these updates down.
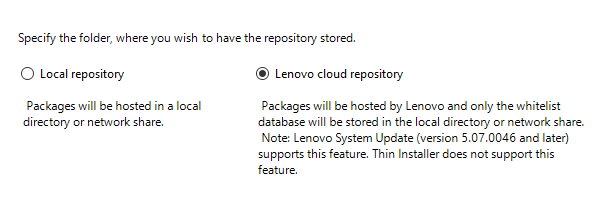
An alternative choice is the Lenovo cloud repository characteristic in Replace Retriever. By selecting this feature, solely the package deal XML’s will probably be downloaded to the repository whereas the complete content material will probably be hosted by Lenovo. Should you’re shifting your on-prem repository to the cloud, this feature will most positively lower down storage prices as these XML’s are solely a few Kilobytes in measurement.
A couple of issues to notice earlier than exploring this route:
- System Replace (model 5.07.0046 and later) is supported
- Business Vantage is supported
- Skinny Installer is NOT supported
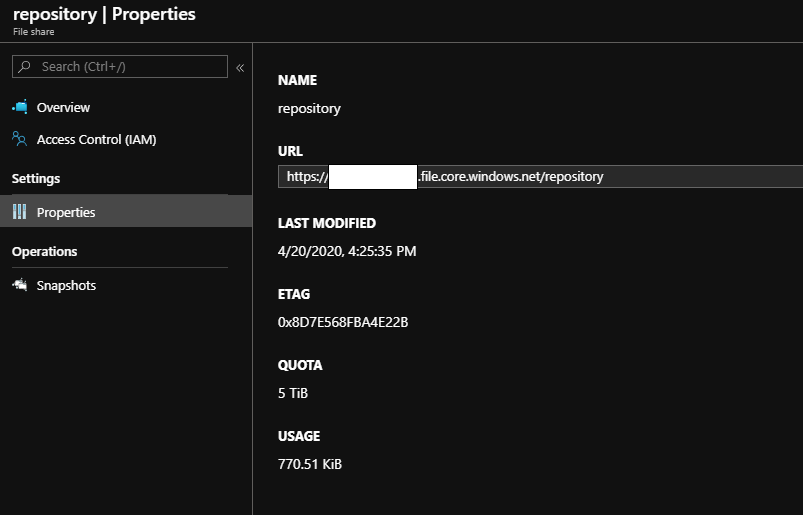
Azure Storage Account
The URL of the share may be present in Properties
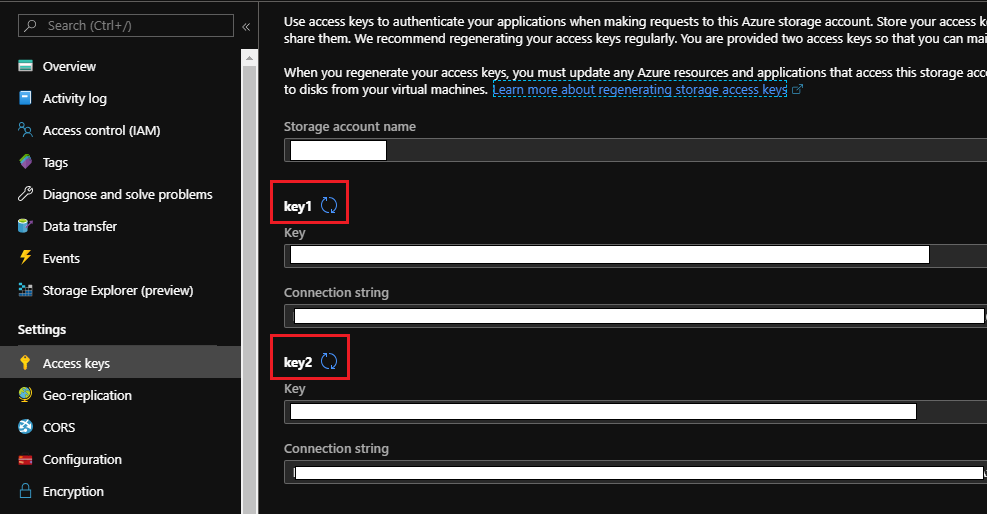
You will must pay attention to one of many Entry keys for the storage account, which will probably be used to in a while. These may be discovered below Settings > Entry keys.
Being that that is in a check tenant, I set the Storage account to be accessed from All networks. You possibly can lock the entry all the way down to particular vNets and/or IP ranges below Settings > Firewalls and digital networks.
Replace Retriever
Invoke-Expression -Command "cmdkey /add:<storageaccountname>.file.core.home windows.web /person:Azure<storageaccountname> /go:<accesskey>"
Now, launch Replace Retriever and choose Lenovo Cloud repository. As a substitute of getting into the URL of the file share, enter it as a UNC path:
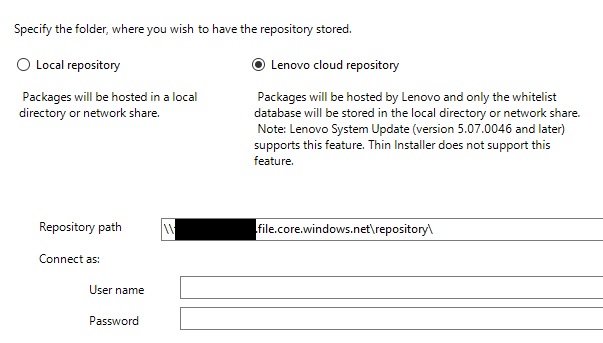
Set some other choices and click on Proceed. You might even see a spinning wheel for a bit however will finally proceed to the Get new updates display. Right here you may add your MTM’s and examine for updates. You must see Replace Retriever hook up with your Azure file share and obtain content material.
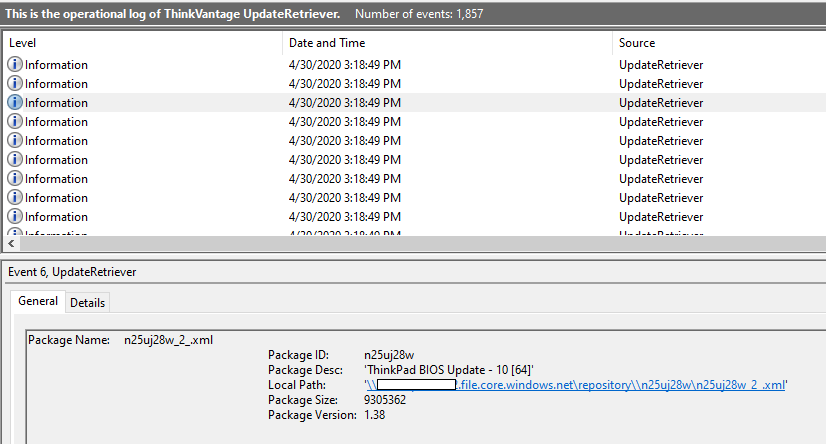
Should you look in Occasion Viewer below Purposes and Providers Logs > Lenovo > ThinkVantage > UpdateRetriever and look by the That is the operational log of ThinkVantage UpdateRetriever log, you will see Occasions like this:
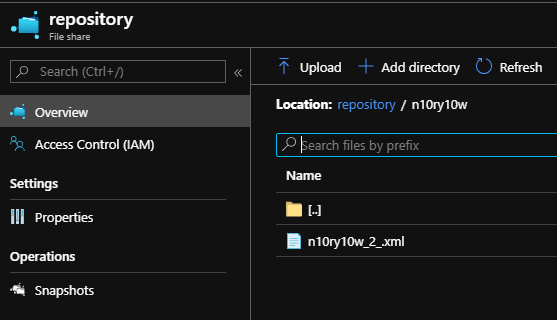
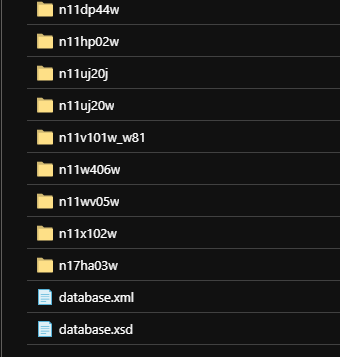
Again within the Azure portal, navigate to your file share and it is best to now see the entire package deal ID directories with corresponding .xml’s, in addition to the database.xml.
I’ll construct off the earlier submit, Managing System Replace with Intune, and add yet one more requirement right here. We have to add and deploy a PowerShell script so as to add the Azure storage account credentials on the consumer. Sadly, SAS tokens aren’t supported with SMB entry so you will have to make use of the Storage Account Entry Key.
Copy the identical command that was used earlier right into a .ps1 file and add it by navigating to Intune > Machine Configuration > Scripts within the Azure portal.
Set the Script settings to:
Run this script utilizing the logged on credentials – Sure
Run script in 64 bit PowerShell host – Sure
Assign to a gaggle.
I’ve already set my System Replace scheduled activity, as described within the System Replace Suite and MEM submit.
To verify every part works, I manually begin the scheduled activity and monitor the tvsu_<timestamp>.log which may be discovered below %ProgramDatapercentLenovoSystemUpdatelogs
I can see the consumer connects to the repository and finds the database.xml
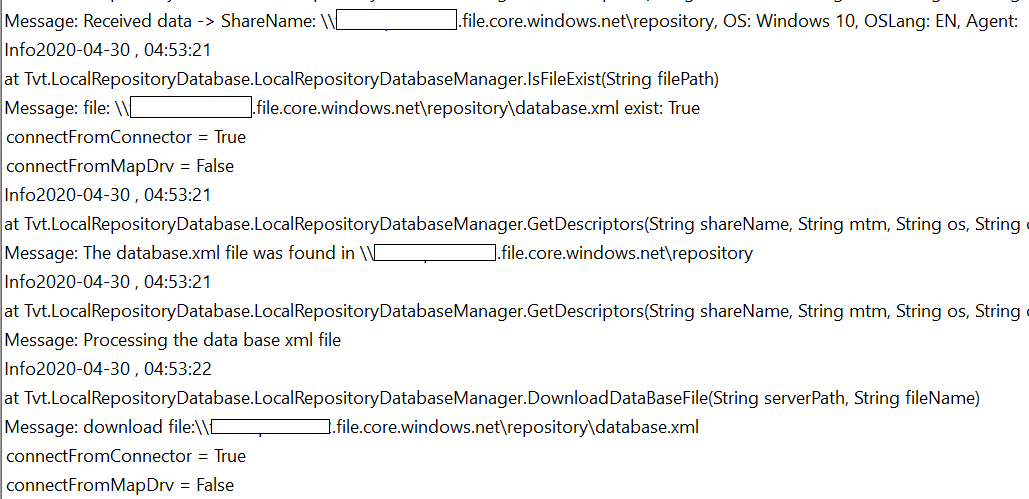
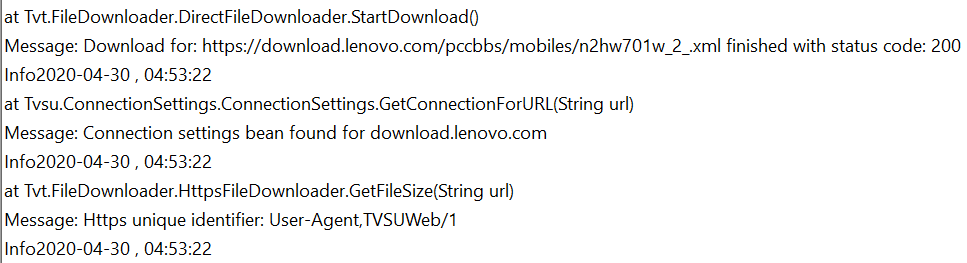
And additional down the log, as soon as the consumer parses by the database.xml for relevant updates, the packages are downloaded from Lenovo
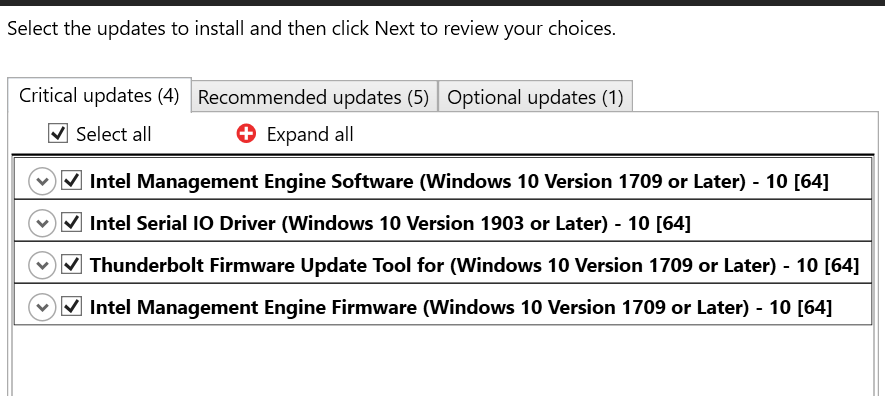
I’ve set my AdminCommandLine to checklist the updates so I can choose which of them to put in.
/CM -search A -action LIST -includerebootpackages 3,5 -noreboot -noicon -exporttowmi
And this is a screenshot of updates which can be relevant to obtain and set up
Should you’re utilizing Business Vantage, make sure you’ve configured the Native Repository GPO to level to the UNC of your Azure File Share.