
11
Chromebooks have retained their standing as monumentally handy gadgets through the years for not with the ability to carry out web-based duties on the fly together with putting in top-grade Linux packages, but additionally operating Android apps for multi-faceted usability. Whereas the performance at hand is definitely sought-after, it helps to know tips on how to handle it correctly.
That approach, you’ll be able to keep in management over the completely different processes happening in your gadget, and know tips on how to troubleshoot points once they come up. On this information, we’ll learn to entry the Android panel on ChromeOS and tweak its numerous parameters to focus on an optimum consumer expertise.
With no additional ado, let’s dive proper in right away.
Accessing Android preferences on a Chromebook
Sure apps, duties, and processes in your Chromebook, such because the Google Play Retailer, together with the next apps that you simply obtain from the storefront, all have a most important management panel on ChromeOS from the place you’ll be able to train management and regulation. To entry it, you simply need to undergo a few steps, and that’ll be it.
Heading over to the Settings app
You learn the subtitle. Get began by opening the Settings app in your Chromebook. Do that simply by way of the launcher or from the shelf space you probably have the utility pinned there.
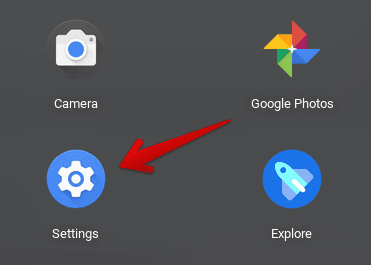
Opening “Settings”
Navigating the Settings app
As you boot into the Settings window, the subsequent step is to click on on the “Apps” part on the aspect column to the left, adopted by clicking the “Google Play Retailer” possibility as proven under.
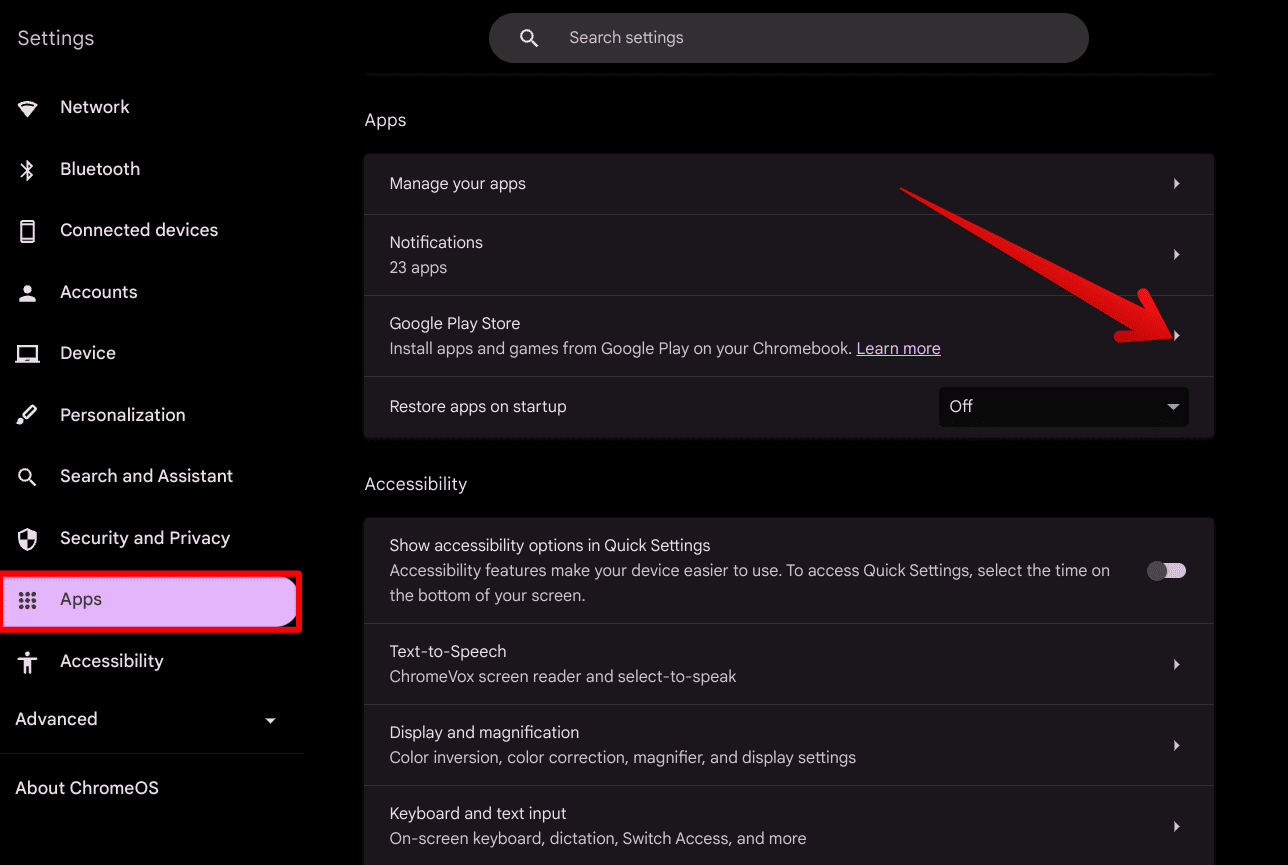
Getting into the Google Play Retailer part
Discovering the Android preferences part
Now, merely click on on the “Handle Android preferences” button inside the Google Play Retailer subsection and also you’ll be capable to get to the subsequent step. A window titled “Android Preferences” will launch promptly in your Chromebook, having adopted the directions appropriately.
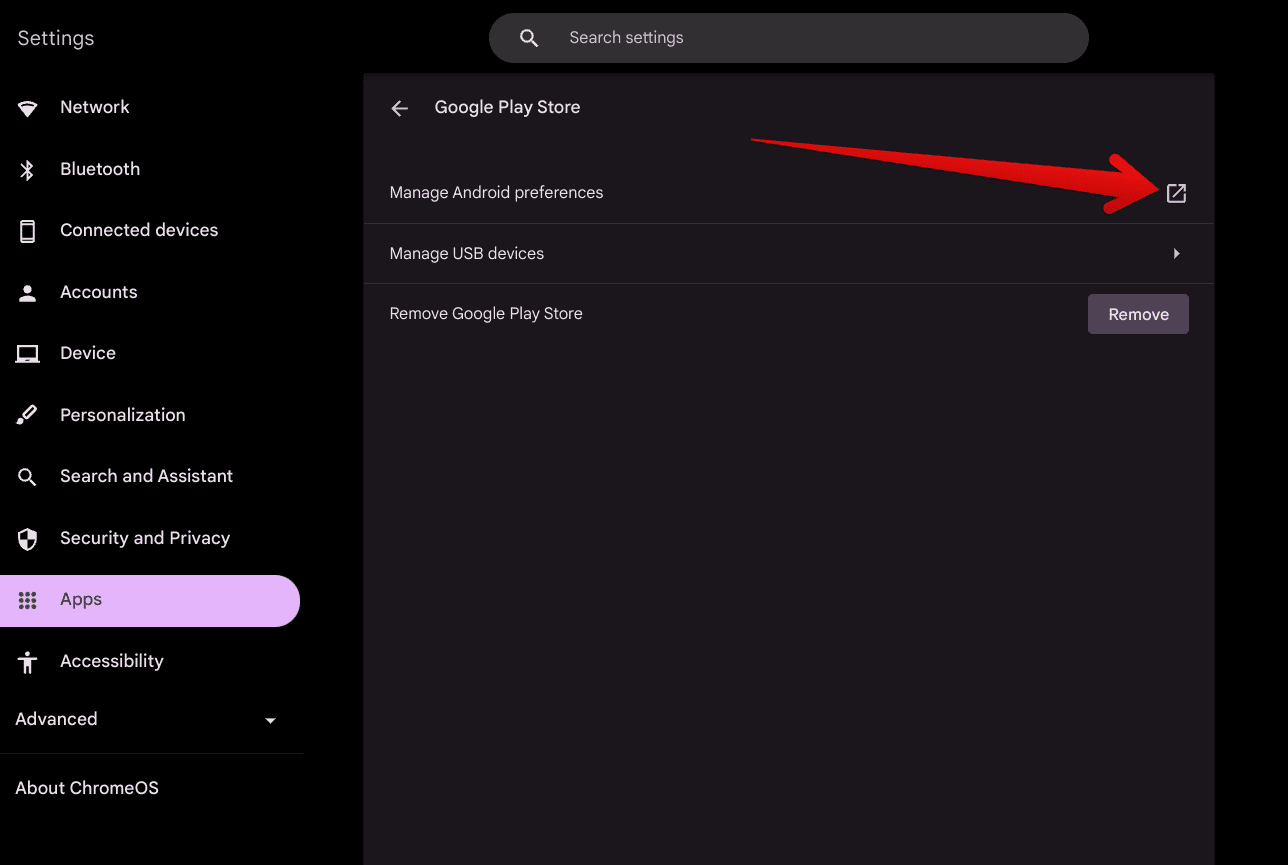
Managing Android preferences
- Tip: For simpler entry subsequent time, pin the Android Preferences window by tapping on its app icon with two fingers on the trackpad. As soon as carried out, quite a few choices will pop up on the display, permitting you to decide on the “Pin” possibility.
Taking management of Android settings on ChromeOS
Now that you simply’re inside the Android Preferences part in your Chromebook, you’ll be able to see how there’s a wealth of various choices so that you can discover and get into. Previous to the most recent system replace, which is ChromeOS 119, the consumer interface of this space was adopted by an outdated design, however we’re glad {that a} main aesthetic enchancment has been made on this entrance.
Beginning with the Community and web choice

The “Community and web” setting within the Android panel
The primary setting that you simply’ll see from the highest inside the Android Desire window is “Community and web.” Click on on it along with your cursor to enter this specific part. Inside, you’ll discover the “Information Saver” and “VPN” choices, each pertaining to your Chromebook’s Android performance.
Information Saver helps you in the reduction of on information utilization if you happen to’ve inserted a SIM card into your Chromebook whereas the VPN possibility permits you to arrange a handbook VPN in your gadget, although we advise automating issues in that regard and counting on one thing like NordVPN or ProtonVPN.

Subsequent settings to tweak
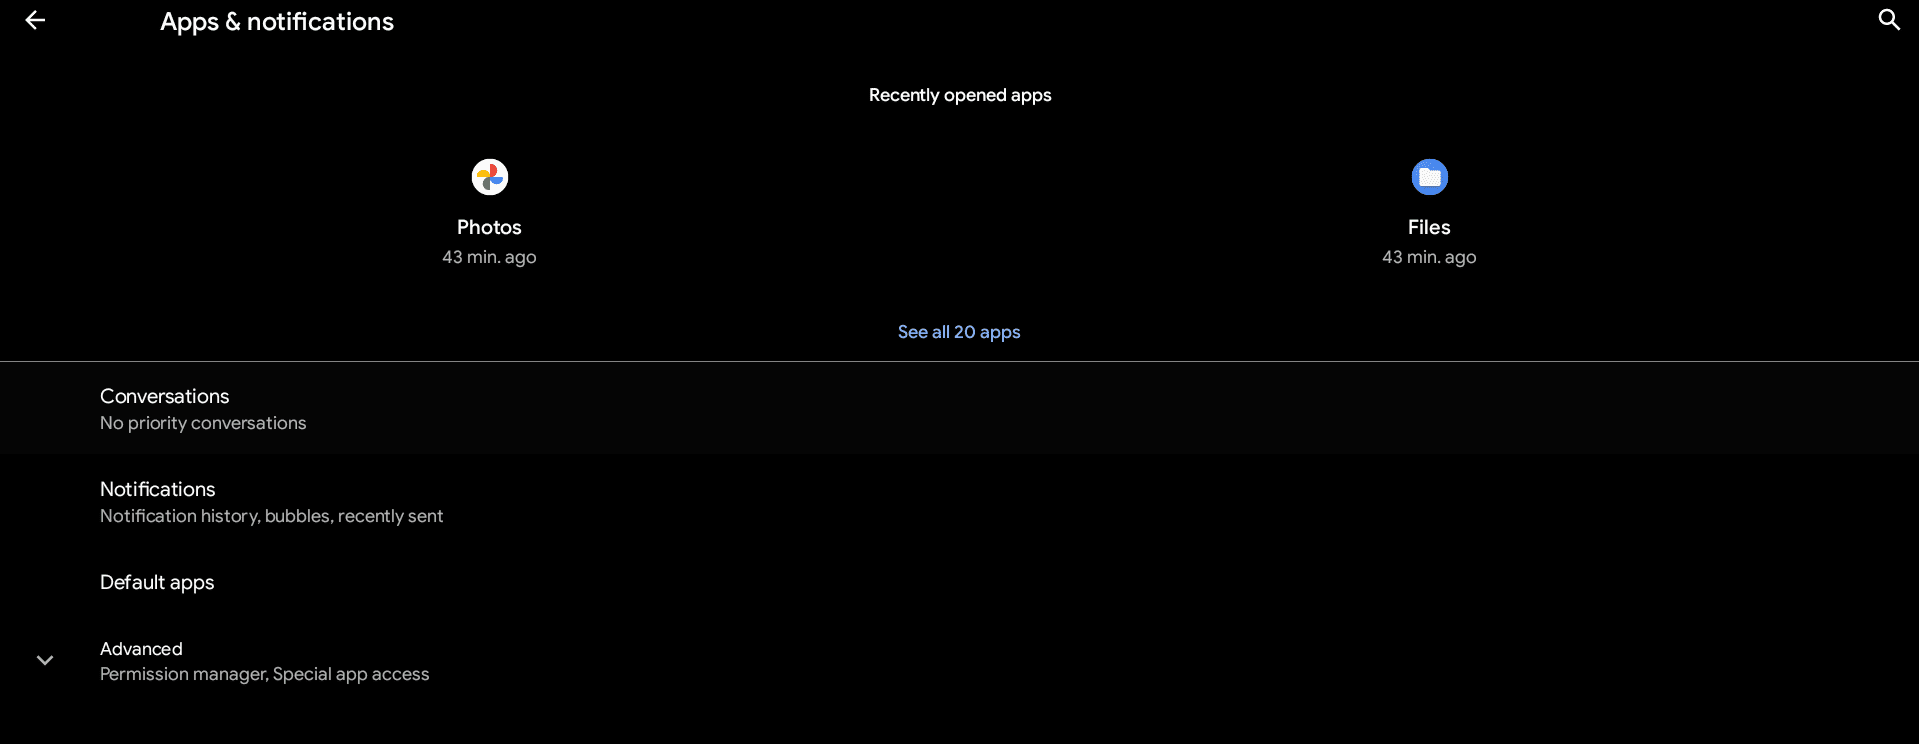
Managing apps and app-related settings
That is a very powerful part of your Chromebook’s Android settings compartment, contemplating the way it means that you can handle the functions that you simply’ve put in on the gadget from the Google Play Retailer or by way of sideloading measures. From the central web page of the Android Preferences window, choose “Apps and notifications” to maneuver forward.

The “Apps and notifications” part
Attending to know the part
As you enter the part, you’ll observe quite a few application-centric choices and selections to take a look at, together with “Conversations,” “Notifications,” which is totally essential, and “Default apps.” For now, click on on the “See all apps” button in blue situated within the middle of the web page. That ought to take you to the subsequent step.
Viewing all the app checklist of your Chromebook
Scrolling by way of the put in apps
Finishing the earlier step ought to allow you to achieve entry to all the functions that you simply’ve bought in your Chromebook for the time being, together with the system-installed ones. Flick thru the catalog to view your full library. Doing so ought to get you higher perception into the kind of apps you may have put in, together with those that you simply don’t want anymore.
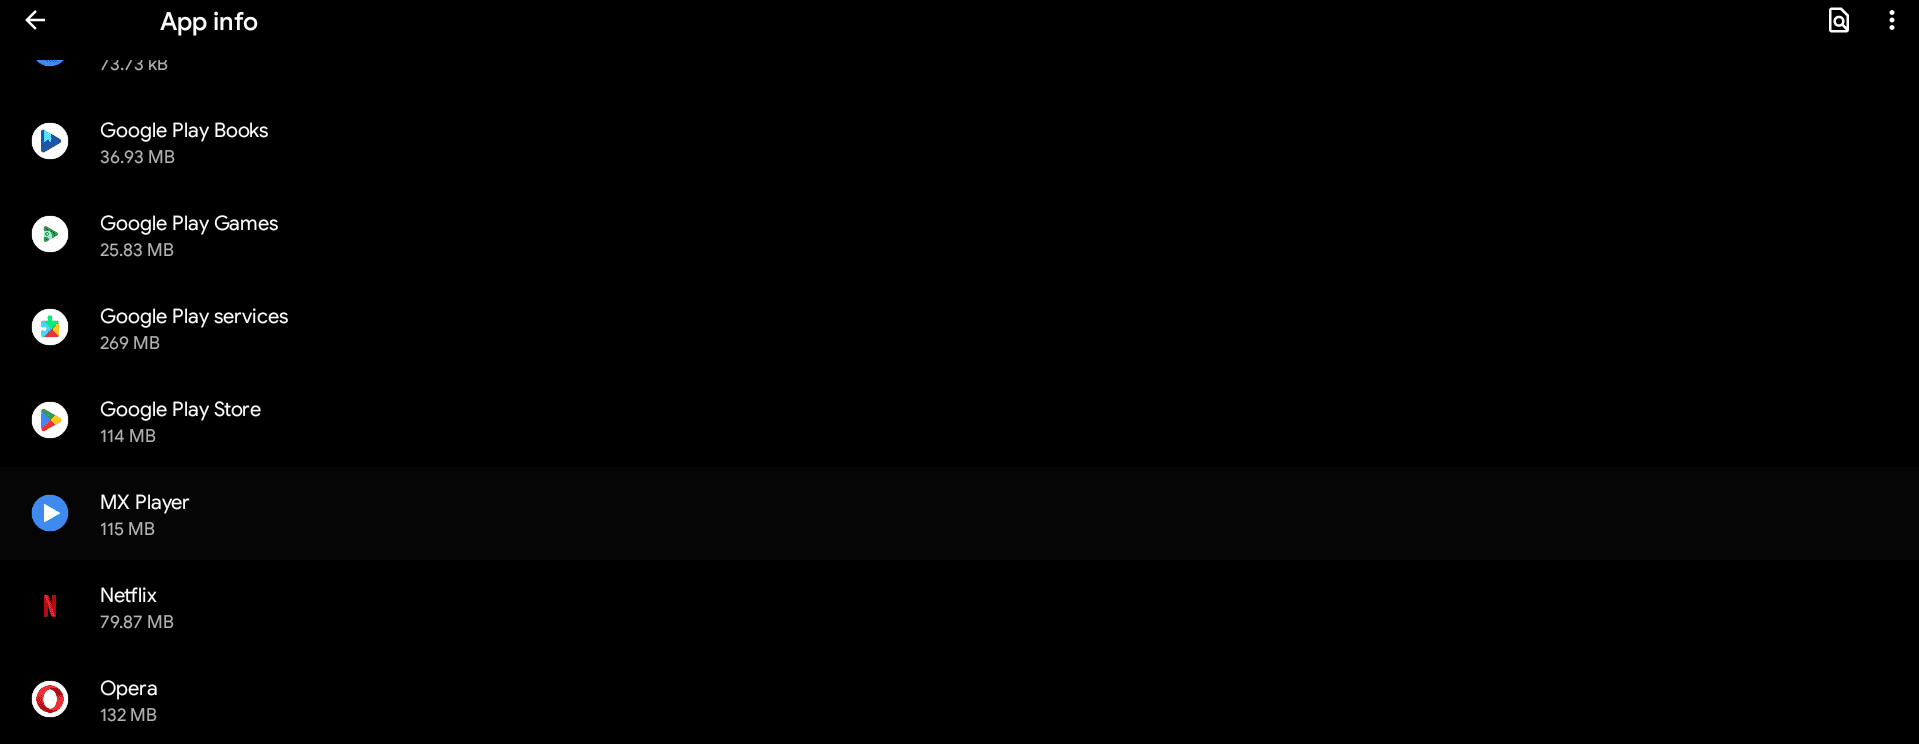
The apps of your Chromebook
Pulling up the main points of an app
In the event you occur to click on on an utility from the checklist, it’s going to have its particulars pop up for you. From right here, the controls you may have embody altering the permissions that the applying has, together with with the ability to tweak its notification settings. Furthermore, you’ll be able to gauge how a lot storage the app is occupying, clear information, and erase cache as properly.
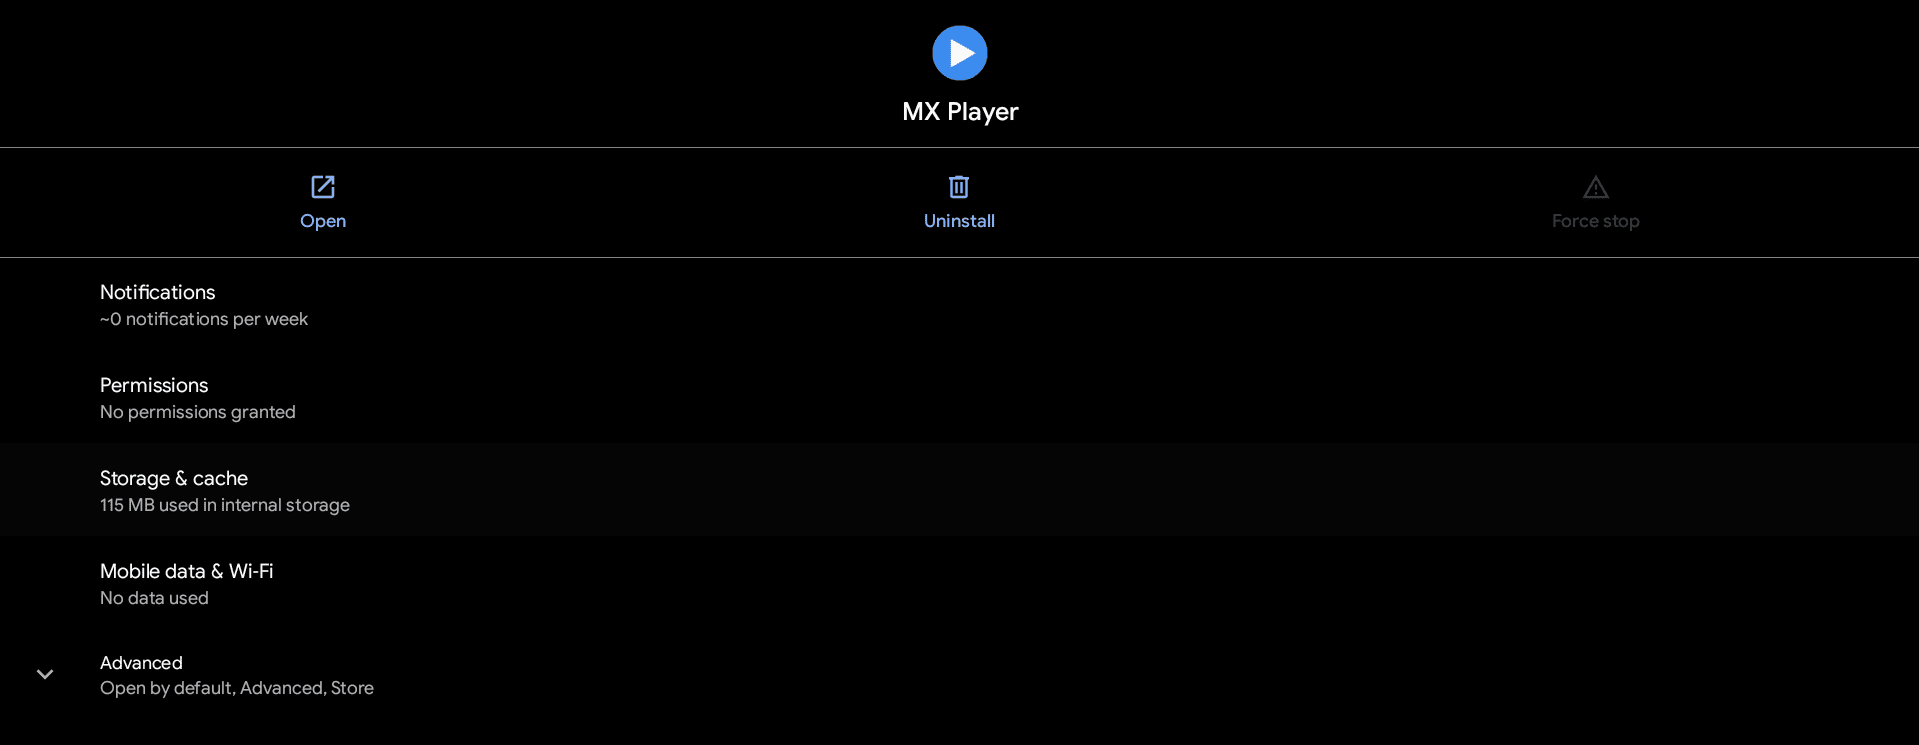
App particulars
Casting a lens in your Chromebook’s storage
Shifting ahead, we’ve now bought the storage space to shed some gentle on, which is a big a part of your Chromebook’s mainframe. Ensuring that the gadget you may have isn’t loaded to the brim with stuff is important for retaining constant efficiency ranges, and with the “Storage” space right here in Android Preferences, you’ll be able to aspire to do exactly that.

Getting into the “Storage” part
Accessing the storage space
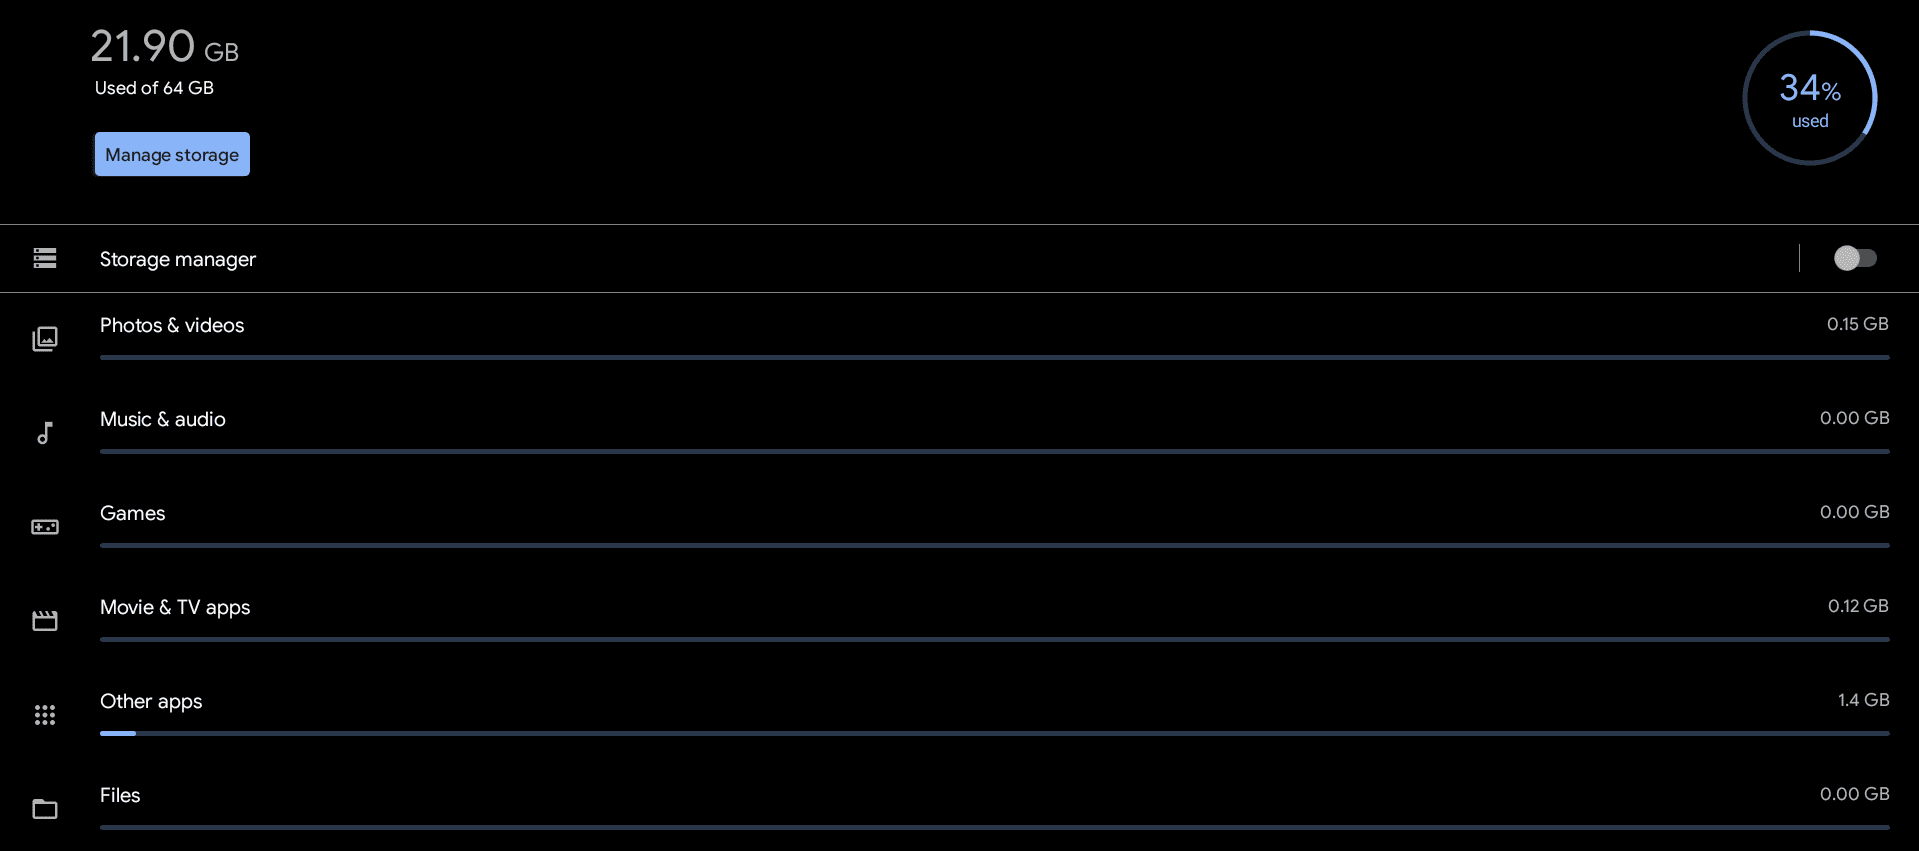
As quickly as you’ve entered the “Storage” space, you’ll discover a rundown of the whole area that your Chromebook has, adopted by a fast look at what’s taking over storage on the gadget. On our aspect, now we have utilized about 22 GB from our set inside storage capability of 64 GB. Clicking on the part will take you additional in on the storage particulars.

Storage particulars of the Chromebook
The Storage supervisor characteristic
This can be a comparatively hidden space inside your Chromebook’s Android settings that packs an attention-grabbing characteristic to work with—the “Storage supervisor.” That is an AI device that makes use of good optimization to maintain the area that will get taken up by information on the gadget. Aside from that, you’ll discover a full overview of every part current on the Chromebook that makes use of these treasured MBs and GBs.
The Storage supervisor characteristic
Handle your storage with a few faucets
Inside this space, there’s additionally the “Handle storage” characteristic discovered close to the highest of the web page. It’s one more device that may allow you to optimize your storage by eradicating duplicate information current on the gadget. Simply make sure that to undergo every chosen entry, and double-check whether or not the device doesn’t kill off something essential to you.

Liberating up area on ChromeOS
Privateness settings that must be factored in
Your proper to privateness is unique to you, and your Chromebook is a method to train that proper, however solely with due diligence. The “Privateness” part in your Chromebook’s Android Desire settings revolves round a myriad of choices that make it attainable to manage how functions behave on the gadget, together with autofill capabilities from the aspect of Google.

Getting into the “Privateness” part
Extra controls to tweak
You’ve bought the “Permission supervisor,” “Notifications on lock display,” and “Autofill service from Google,” all of which could be oriented in a approach that instantly and not directly influences your Chromebook’s privateness. Nonetheless, we imagine two of a very powerful settings that you need to look into are hidden below the “Superior” dropdown space.
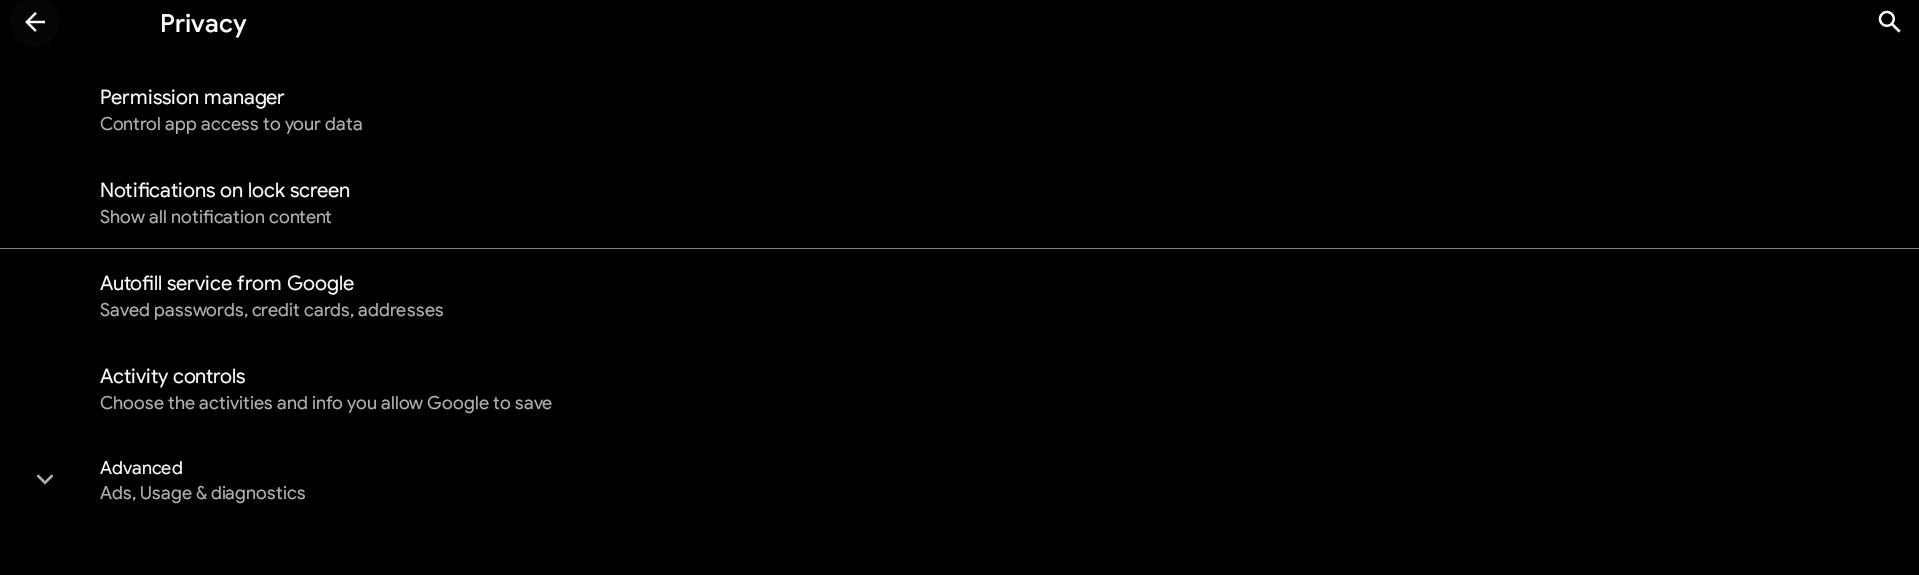
Privateness part in Android settings
Opting out of advertisements and information report sending
There are “Adverts” and “Utilization and diagnostics” choices current inside Android Preferences that you could additional discover. The advertisements button leads you to a different web page, with a subsequent possibility that may allow you to decide out of advertisements personalization. Equally, with the “Utilization and diagnostics” space, you’ll be able to seamlessly disable the sending of studies to Google which will include data referring to your Chromebook’s utilization, significantly the Android half.

Adverts and diagnostics
Taking good care of the Location choice
Sharing your location with Android functions isn’t at all times an incredible factor to do, particularly whenever you don’t belief the app on the opposite aspect, and also you subsequently want to keep in charge of your location preferences. Select “Location” from the principle Android Preferences window, and that ought to take you to the subsequent step.

Getting into the “Location” part
Ensuring the proper app will get entry to your Chromebook’s location solely
Now that you simply’re in, you’ll be able to first train your proper to allow or disable your Chromebook’s location companies. Subsequent, you’ll be able to test what apps tried to demand locational entry from the gadget in latest instances. Moreover, it’s additionally attainable to find out what apps can entry your location, and go on to place tabs on them if you need to.
Lastly, the “Superior” dropdown arrow on the backside of the part considerations Google Location Accuracy, which you’ll allow to boast higher accuracy when utilizing the gadget’s location options.
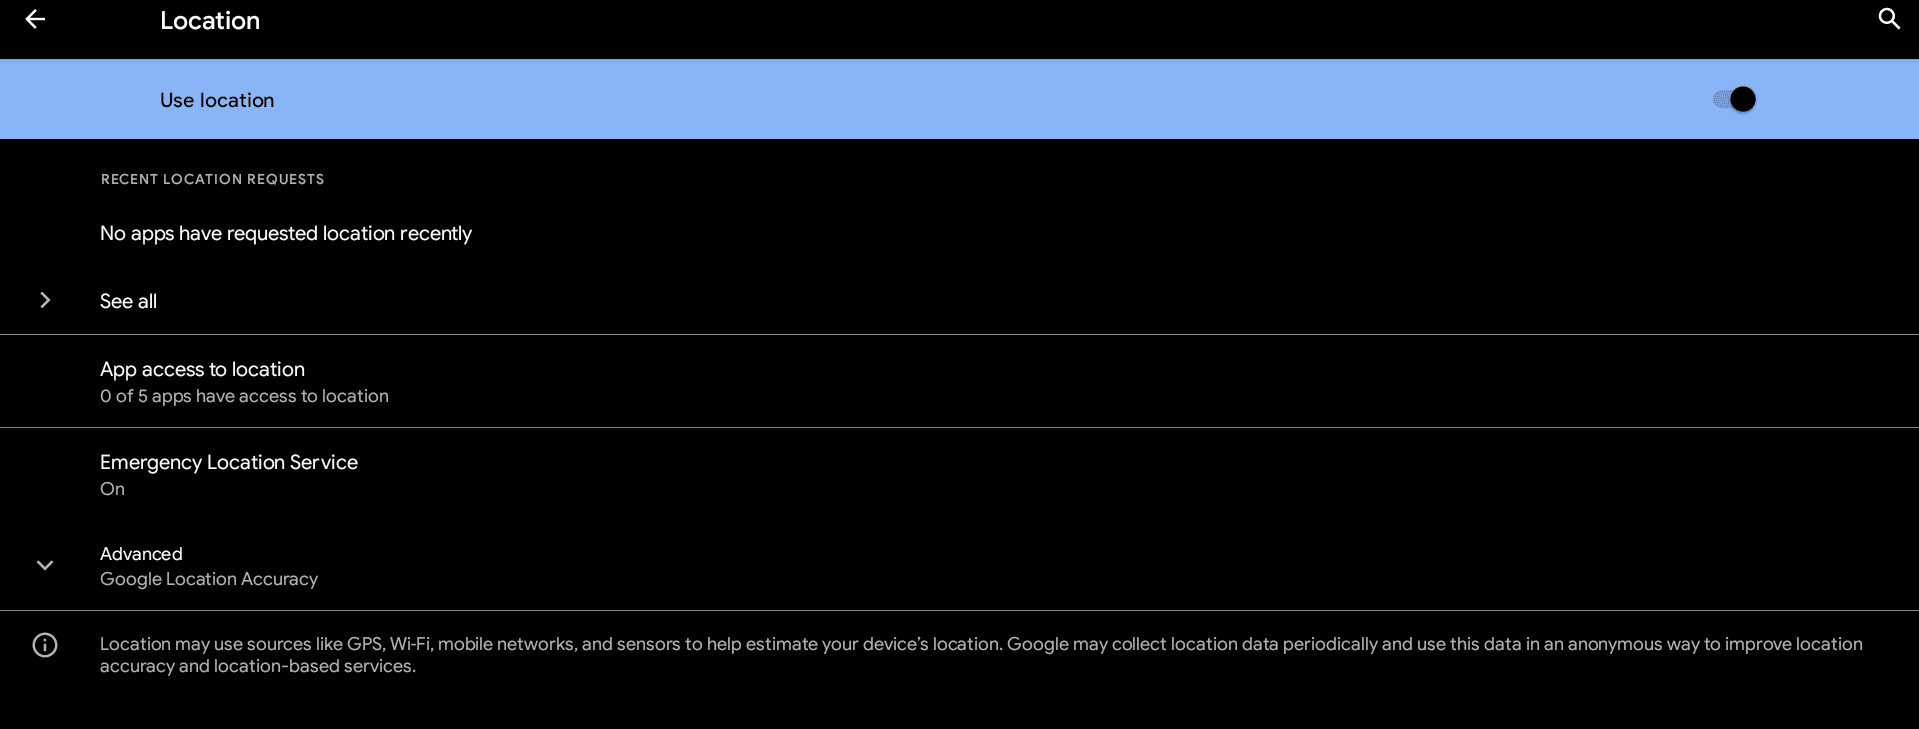
Location settings on ChromeOS
Exploring your Android’s accessibility
Going ahead, we’ve now bought one other Android choice to look into, and it’s none aside from the “Accessibility” part that may roughly change the way in which one makes use of their Chromebook, with particular emphasis on these with visible or different impairments. The thought with the part is to make this modern working system usable for as many individuals as attainable.

Getting into “Accessibility” in Android Preferences
The various vary of Android accessibility instruments
As you enter “Accessibility,” you’ll be able to seemingly check out completely different instruments accessible at your disposal, together with the text-to-speech output, font dimension alterations, and different interplay controls that decide how lengthy of a press registers the press. Lastly, one of many “Experimental” options denotes that you could swap your Chromebook’s Android part to high-contrast textual content as properly, significantly for these with imaginative and prescient issues.
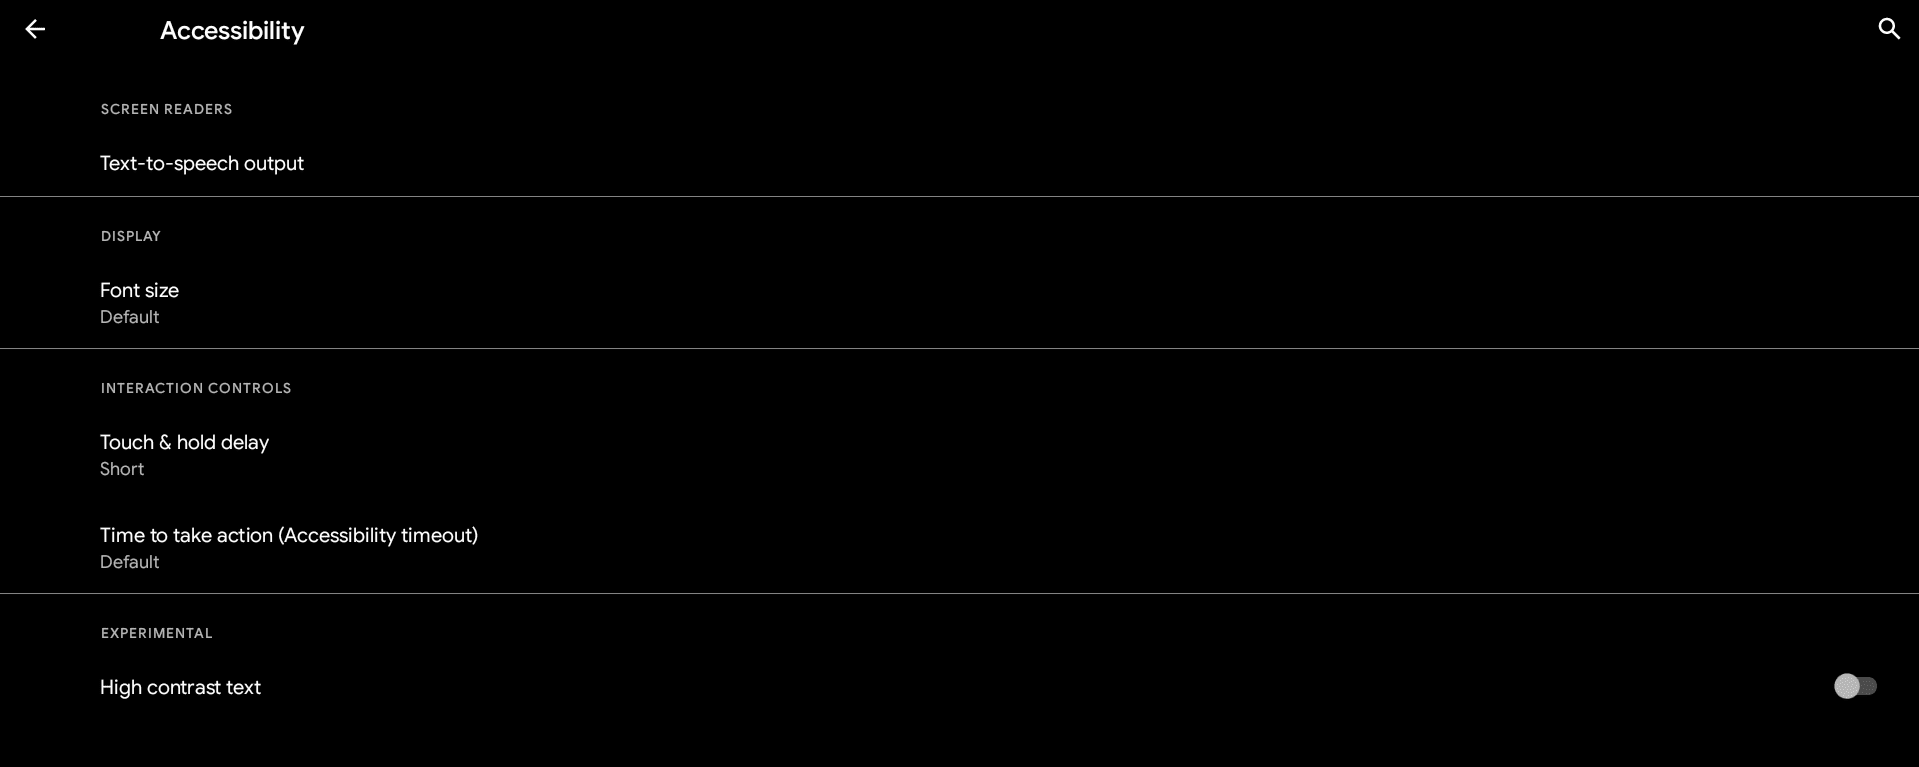
Varied accessibility choices
A take a look at some essential system settings
Final however not least, we’ve bought “System” settings to dig into to your Chromebook’s Android half. Right here, you’ll discover the choice to tweak your bodily keyboard when it pops up on the display for touchscreen gadgets and set the date and time as per your choice. Transfer forward by choosing the “System” possibility on the backside of the principle Android Preferences web page.

Selecting the “System” settings
The Main “System” settings options
As you enter the part, be at liberty to take a look at what the “Languages” subsection has to supply. It’s an concerned element that includes additional options, akin to “Autofill service,” “Private dictionary,” and “Textual content-to-speech output” as properly. Aside from that, you’ve bought the aforementioned date and time, the default setting of which selects the time zone related to you mechanically.

System settings in ChromeOS
Backing up prevents information loss
One other characteristic inside the “System” space that we felt like deserved a separate part is “Backup.” We extremely suggest having it enabled, so you’ll be able to keep away from potential information loss within the case your Chromebook all of a sudden and completely expires. Click on on “Backup” to deliver up a follow-up window in your finish, and undergo the on-screen directions to allow it efficiently.
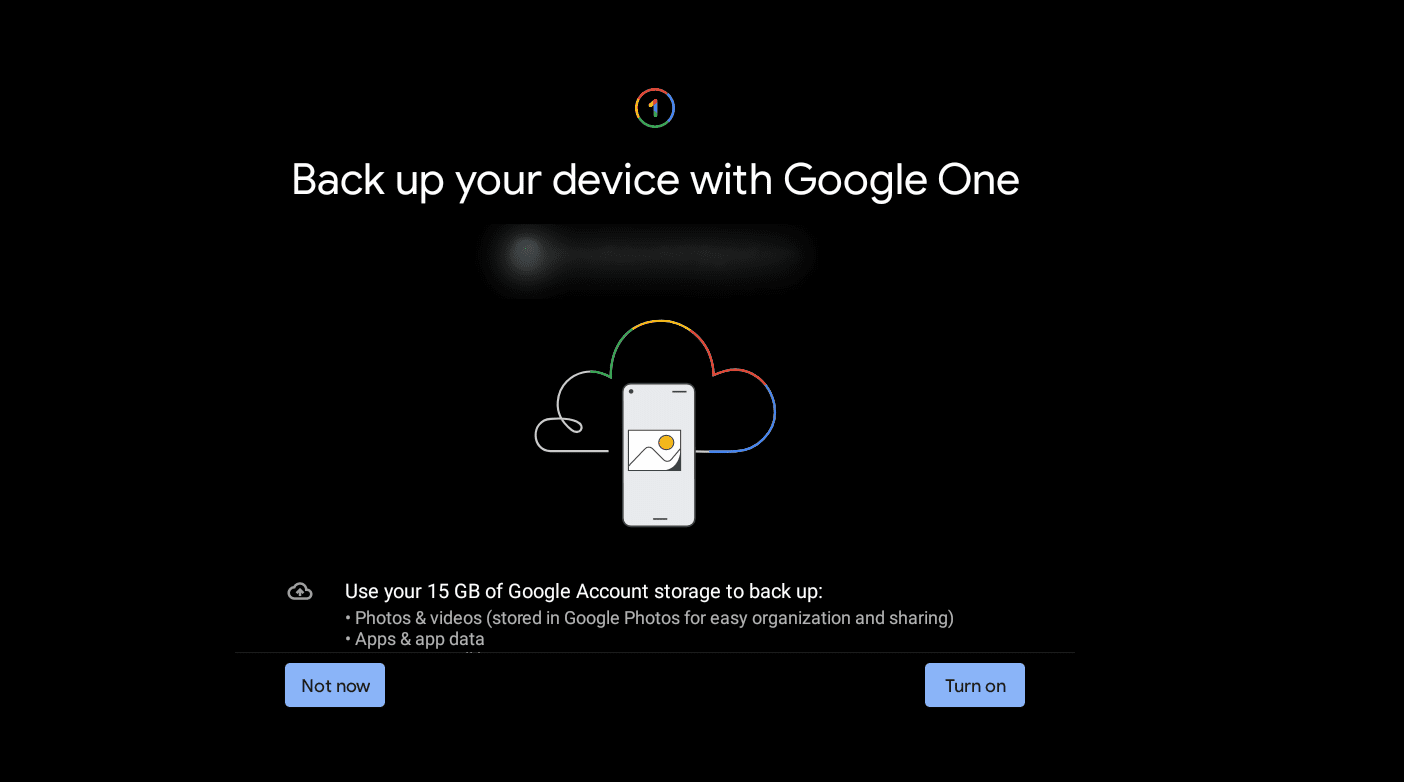
Backing up Chromebook information with Google One
A phrase to the clever: Google One is the platform to method if you happen to want to take advantage of cloud storage in your finish. It encompasses Google Drive, Google Pictures, and Gmail, thereby providing you additional storage to soundly and soundly safe the info you maintain treasured. This consists of app information to your Android apps and settings preferences as properly.
Conclusion – Staying in charge of your Chromebook’s Android aspect
Chromebooks have made immense headway in turning into the entire bundle within the day and age we reside in at this time, providing customers the liberty to make use of Android apps, PWAs, Linux software program, and web-based packages within the blink of an eye fixed. Nonetheless, you, as a consumer, must also know that almost all processes in your ChromeOS have sure implications hooked up to them.
Subsequently, you need to be within the know and learn to handle your gadget’s preferences, particularly on the Android entrance. And on this information, we’ve make clear simply that, going over the most important settings that pertain to your Chromebook. Tell us within the feedback part forward whether or not you discovered this information helpful in your finish.
Chrome Prepared needs you good luck!