
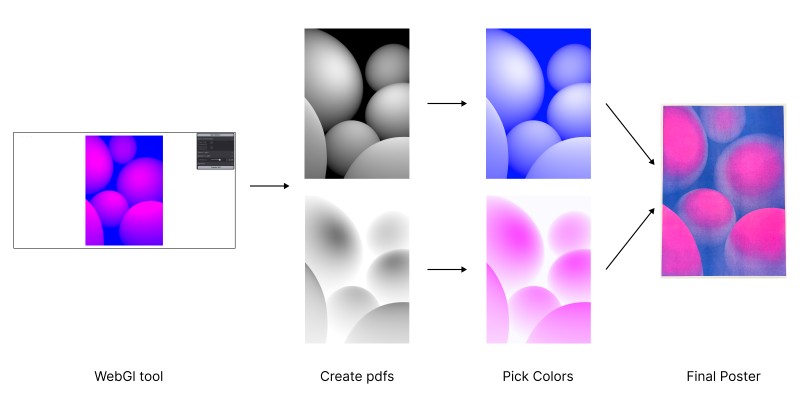
By bridging the hole between digital and bodily mediums, you could find plenty of surprising and enjoyable outcomes. On this tutorial we are going to learn to develop our personal instrument to create Riso posters utilizing Three.js. Under are steps to create a really primary editor, the place spheres will be added and moved round. We’ll then use submit processing to export printable PDFs. Lastly discover a Riso lab, decide your colours and print the poster. The objective for this setup is to supply a stable place to begin so that you can create your personal instrument.

Workflow
For our workflow, it’s essential to know that the colours of the rendered picture are impartial of the printed colours. Our objective with this instrument is to create two PDFs, every representing the depth of 1 shade. The ultimate colours can then be chosen from the out there Riso colours. So, simply because the picture seems blue and pink doesn’t imply the printed poster must be blue and pink, you can select yellow and inexperienced as properly. Throughout the course of of making this Article I simply acquired connected to blue and pink, which is why I selected these colours for printing.
Understanding Riso Printing
So, let’s begin from the start and perceive the basics of Riso printing. Riso printing is a digital display screen printing approach. It really works much like a traditional printer by depositing ink on paper, however provides far more fascinating and vivid colors. You may consider it in the identical means as how an analog digicam creates a extra fascinating image than a digital digicam.
Historically, Riso is utilized by graphic designers and illustrators, however as builders, we will use it to boost our work and create one thing tactile. Plus, the Riso course of provides a pure texture that provides even flat colors a singular look. Due to this fact in our instrument we aren’t going to deal with creating fancy shaders however will depend on the printing course of to form our remaining picture.
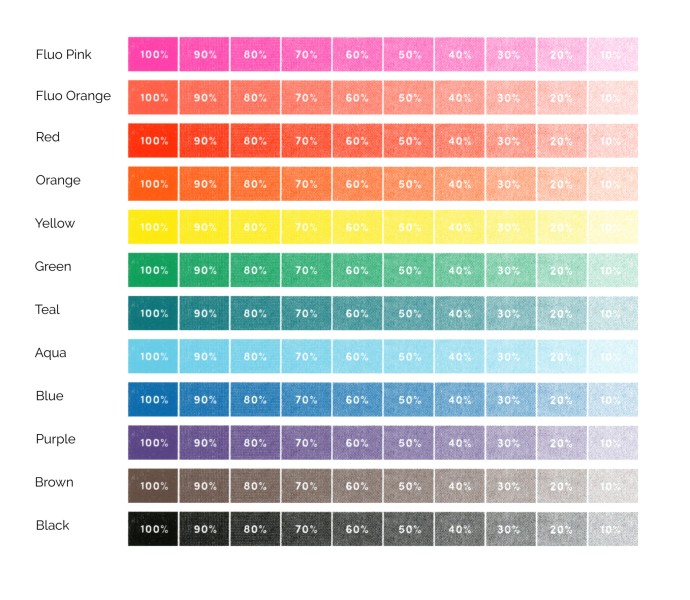
Versus digital platforms, when printing we can not select from an infinite color wheel, only a restricted ink choice. These out there colors can range throughout print retailers.
Supply: https://outoftheblueprint.org/information/
Making a instrument
Since we already know that the printing course of will care for including visible curiosity by means of texture, we will deal with creating an interactive editor. We wish one thing the place we will add spheres, transfer them round and scale them. Then we are going to use the three.js submit processing pipeline and pdf.js to create our print prepared PDFs.
WebGL setup
When creating our WebGL scene we want to concentrate on a number of issues. Because the objective is to create a print prepared PDF we wish the scene to be increased decision than what would make sense for any realtime utility. With the intention to save the canvas as a picture we have to set preserveDrawingBuffer: true within the renderer.
const renderer = new THREE.WebGLRenderer({
  canvas,
  digicam,
  preserveDrawingBuffer: true,
  antialias: true,
})
When setting the dimensions of the scene we don’t need the scene to be fullscreen, however maintain the identical facet ratio because the A3 paper we will probably be printing on.
const sizeCanvasToA3 = (wrapper) => {
  const bounds = wrapper.getBoundingClientRect()

  const width = bounds.width
  const peak = width * (OPTIONS.peak / OPTIONS.width)

  if (peak > window.innerHeight) {
    const peak = bounds.peak
    const width = peak * (OPTIONS.width / OPTIONS.peak)

    return { width, peak }
  }

  return { width, peak }
}

const resize = () => {
  const { width, peak } = sizeCanvasToA3(canvasWrapper)

  digicam.facet = width / peak
  digicam.updateProjectionMatrix()

  renderer.setSize(width, peak)
  composer.setSize(width * 2, peak * 2)
}
Shapes
We wish to maintain this easy and simply create some spheres that may transfer round and scale utilizing the three.js rework controls. The fabric of the sphere will probably be a MeshPhysicalMaterial in order that we will use lights to regulate the colour of the spheres.
const geometry = new THREE.SphereGeometry(1, 48, 48)
const materials = new THREE.MeshPhysicalMaterial({ shade: 0xffffff })

const mesh = new THREE.Mesh(geometry, materials)

const management = new TransformControls(digicam, renderer.domElement)
Lighting
Lighting would be the means we form the looks of our spheres. Bear in mind, the precise shade doesn’t matter, simply the depth of 1 channel. On this instance, we could have one ambient gentle that’s fully blue and one level gentle that’s fully crimson). Purple and blue are two totally different shade channels and that makes it simple to separate the colors and create two masks in our submit processing go.
const ambientLight = new THREE.AmbientLight(new THREE.Shade('#0000ff'), 3.2)

const pointLight = new THREE.PointLight(new THREE.Shade('#ff0000'), 8, 10)
pointLight.place.set(1.2, 1.8, 1.5)
Controls
After making a primary setup, we wish to develop this right into a primary editor. For this, we will probably be utilizing Tweakpane. Tweakpane is sweet as a result of it permits for simple modification of properties and permits grouping values into folders. For instance, that is how the values for the Level gentle are arrange.
const pointLightFolder = gui.addFolder({
  title: 'Shade 1 (Level Mild)',
  expanded: false,
})
pointLightFolder.addBinding(pointLight, 'place')
pointLightFolder.addBinding(pointLight, 'rotation')
pointLightFolder.addBinding(pointLight, 'depth', {
  min: 0,
  max: 15,
})
pointLightFolder.addBinding(helper, 'seen', {
  label: 'Present place',
})
Publish Processing
Now that we have now just a little editor, some spheres and lights in our scene, we have to care for creating our PDFs. With the intention to do that correctly, we want two submit processing passes. One which solely renders the crimson channel and one which solely renders the blue channel. Then we will toggle these passes and create a PDF with every one.
First, we are going to setup an Impact composer which permits us so as to add submit processing passes. Then, we want one render go (so we will seize the scene), our two color passes, and a remaining output go. Initially we are going to disable each color passes, as a result of having each enabled on the similar time will lead to a totally black picture.
// Will simply seize the crimson worth of the rendered picture
const RedShader = {
  ...
  fragmentShader: `
uniform sampler2D tDiffuse;
various vec2 vUv;

void most important() {
	vec3 shade = texture2D(tDiffuse, vUv).rgb;

	float crimson = shade.r;

	gl_FragColor = vec4(crimson, crimson, crimson, 1.0);
}`,
}

// Create EffectComposer to chain render passes
const composer = new EffectComposer(renderer)

// Create all vital render passes
const renderPass = new RenderPass(scene, digicam)
const redPass = new ShaderPass(RedShader)
const bluePass = new ShaderPass(BlueShader)
const outputPass = new OutputPass()

// Add passes to composer
composer.addPass(renderPass)
composer.addPass(redPass)
composer.addPass(bluePass)
composer.addPass(outputPass)

// Disable passes since they're simply vital for debug functions
// and when creating the pdfs
redPass.enabled = false
bluePass.enabled = false
Producing the PDFs
Now that we lastly have all the things arrange, we will care for creating the PDFs. Most Riso printers would require a ten Millimeter border across the fringe of the PDF in order that the paper doesn’t get caught to the printer.
Since our submit processing is in place we will allow one go, render our scene, seize the canvas as a picture, add that to the PDF within the appropriate dimension after which do the identical with the opposite go.
const createPage = (title, canvas) =>
new Promise(async (settle for) => {
const {
borderMM = 10,
format = 'a3',
width = 297,
peak = 420,
} = OPTIONS
const pdf = new jsPDF({ format })
// Add a background shade to the pdf
pdf.setFillColor('#fff')
pdf.rect(0, 0, 9999, 9999, 'F')
await wait(100)
// Save the canvas as a picture
const picture = canvas.toDataURL('picture/jpeg', 1.0)
await wait(100)
// Add picture to the pdf
const imageWidth = width - borderMM * 2
const imageHeight = (imageWidth / width) * peak
const x = borderMM
const y = (peak - imageHeight) * 0.5
pdf.addImage(
picture,
'JPEG',
x,
y,
imageWidth,
imageHeight,
'',
'NONE',
0
)
pdf.save(title)
settle for()
})
const createPdf = async (canvas, composer = {}) => {
const redPass = composer.passes[1]
const bluePass = composer.passes[2]
// Present simply crimson shade
redPass.enabled = true
bluePass.enabled = false
await createPage('color-1', canvas)
// Present simply blue shade
redPass.enabled = false
bluePass.enabled = true
await createPage('color-2', canvas)
bluePass.enabled = false
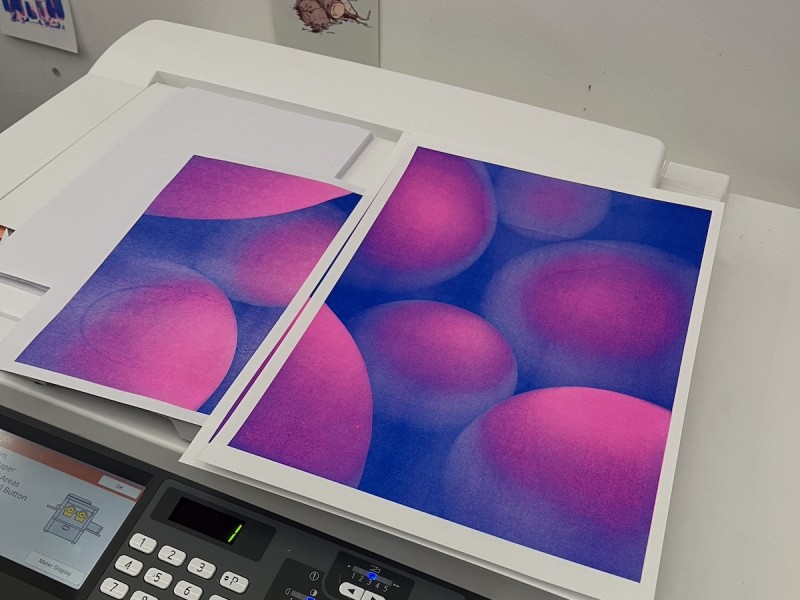
}Lastly we have now our PDFs and may go to our native Riso store to make the prints!
Conclusion
I discover holding one thing in my fingers that I created with code to be a really satisfying feeling. For me, Riso is a pleasant approach to get away of the digital world as a developer. I hope this tutorial was inspiring for you and can present you a place to begin to create your personal instrument. On the very least, I hope you may view Riso as a medium not just for illustrators and designers, but additionally for enhancing digital creation processes.