
On this article, you’ll study in regards to the significance of constructing a focused viewers in advertising and marketing, and how one can mix Mailchimp and Drupal to create efficient e-mail advertising and marketing campaigns.
Have you ever ever launched an e-mail marketing campaign solely to seek out that your message went off within the incorrect path? When you’ve skilled the frustration of a well-crafted e-mail going unnoticed, you’re not alone.
Electronic mail advertising and marketing mishaps grow to be much more difficult while you don’t have the fitting instruments. Combining the ability of a very good content material administration system (corresponding to Drupal) and a useful e-mail advertising and marketing platform (corresponding to Mailchimp), you may not often go incorrect together with your viewers or messaging. How? Let’s dive proper in!
Good Focusing on: the Core of Efficient Advertising
Why is it vital to market to a focused viewers?
Think about this: a health attire firm promoting high-performance athletic put on launches a brand new line of cutting-edge footwear. Now as a substitute of focusing on severe runners and health fanatics (seemingly to purchase the footwear), their e-mail advertising and marketing marketing campaign sends out a blast e-mail to all of their prospects and mailing listing subscribers. Moreover, the message is generic and doesn’t spotlight the core options of the product. What does this lead to?
- It results in ignored or un-opened emails (and probably even unsubscribes), inflicting low engagement.
- As a result of it’s not the fitting messaging, it gained’t resonate with severe runners attributable to low relevance.
- It’s a missed alternative that causes low conversions.
- It might generate adverse model notion.
Now, would you need that to your model? In all probability not. Setting goal audiences is essential for guaranteeing that your advertising and marketing efforts resonate with the fitting individuals, growing engagement, conversions, and total marketing campaign effectiveness. It begins with viewers segmentation, proper out of your Drupal-powered web site. A Drupal–Mailchimp duo can empower you to synchronize your viewers information and conduct, thus implementing exact focusing on.
Synchronizing Drupal and Mailchimp
Now, I’m taking the freedom of assuming that you understand the fundamental working of each Drupal and Mailchimp. Let’s go step-by-step collectively to arrange the Mailchimp module in your Drupal web site.
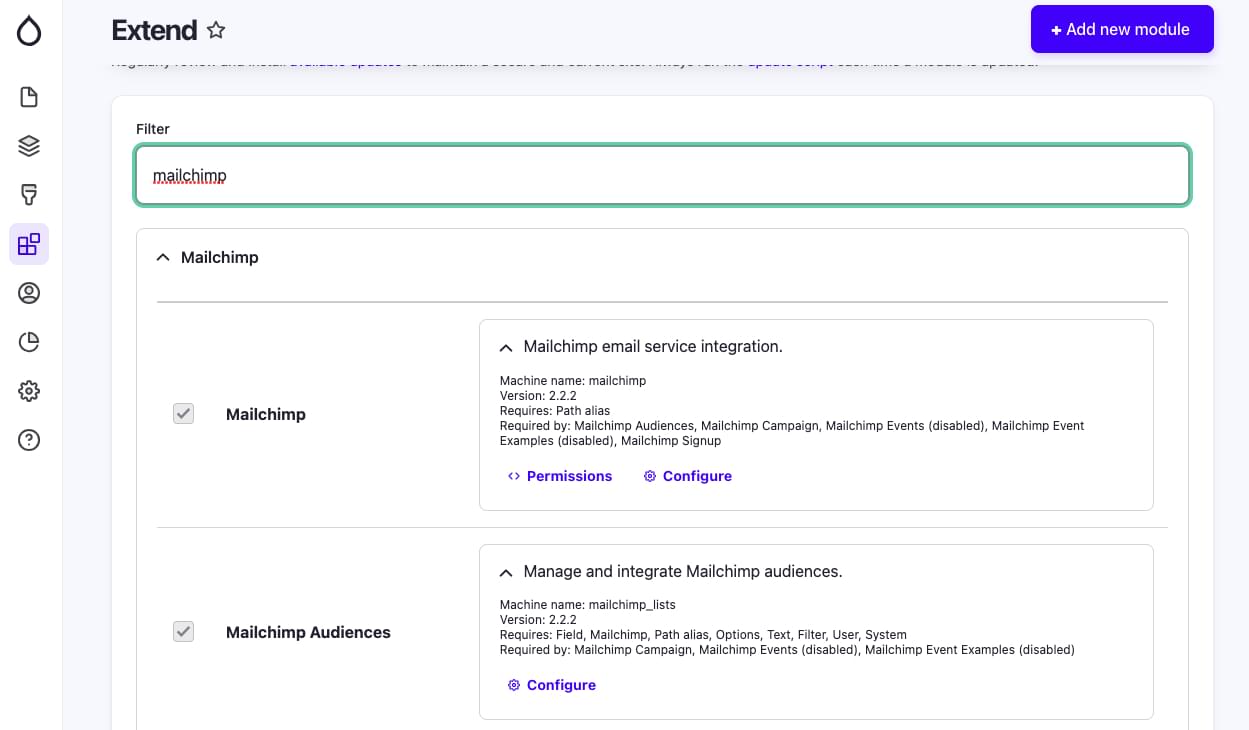
Step 1: Putting in and enabling the Mailchimp module in Drupal
Let’s start by putting in the module. In your admin panel, discover Lengthen within the menu. Seek for the Mailchimp module. When you don’t discover it, obtain it from right here, click on on the Add new module button (prime proper nook), after which add the downloaded file.
Now that you just’ve put in the module, allow each the Mailchimp and the Mailchimp Audiences modules.
Step 2: Configuring the module
Now let’s join the module to your Mailchimp account.
Scroll to the Configuration menu within the admin panel. Navigate to Configuration > Net providers > Mailchimp. Beneath the International Settings tab, you’ll want so as to add your Mailchimp API key. To seek out the important thing, click on Account & billing > Extras > API Keys in your Mailchimp account. Copy the important thing and paste it into the module configuration web page on the Drupal admin panel.

Save the configuration after including the API key, and voilà! Your Mailchimp integration is now arrange and able to go!
Signal Up the Viewers
For example, I’ll present you the way to create a focused e-mail e-newsletter marketing campaign that sends personalised content material primarily based on the viewers’s curiosity. This may contain creating the viewers, organising the shape in your Drupal web site, merging fields with Mailchimp, and sending focused emails out.
To start with, let’s create an viewers for individuals who join your newsletters in your web site.
Creating the viewers in Mailchimp
Go to the Viewers dashboard in your Mailchimp account and click on Create New Viewers.
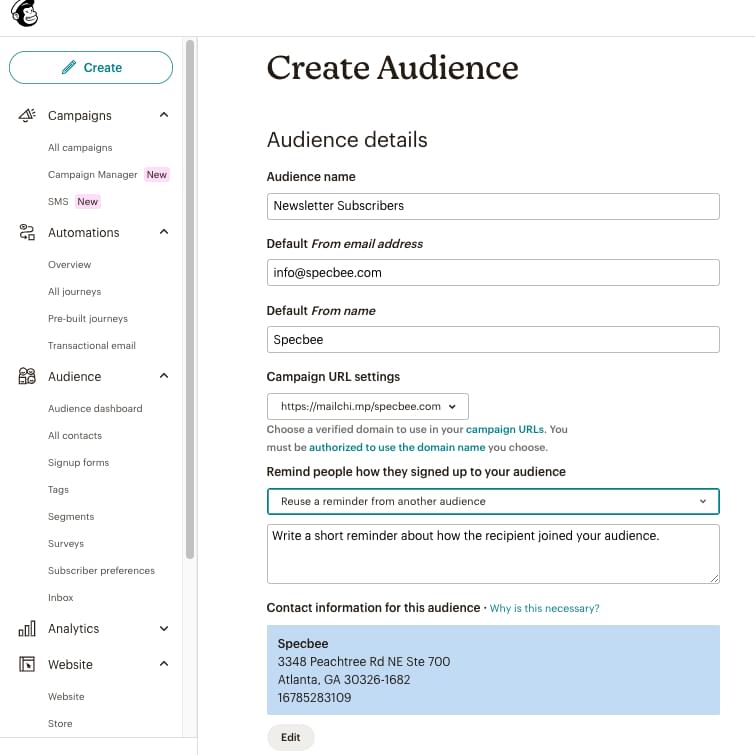
Ensure you enter all of the required particulars accordingly, just like the identify (maintain it related to what sort of viewers that is). The From handle helps while you need to ship an automatic reply or when utilizing it inside mail campaigns. The identical goes with the From identify. Save your viewers, and also you’re now prepared so as to add your contacts!
Further viewers fields
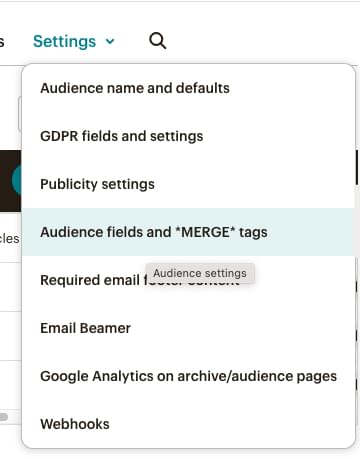
By default, Mailchimp provides you three fields to make use of: First identify, Final identify, and Electronic mail handle. However what if you wish to add extra fields to know your viewers higher (and so you may goal them higher!)? For that, inside the viewers you simply created, click on on Settings > Viewers fields and *MERGE* tags.
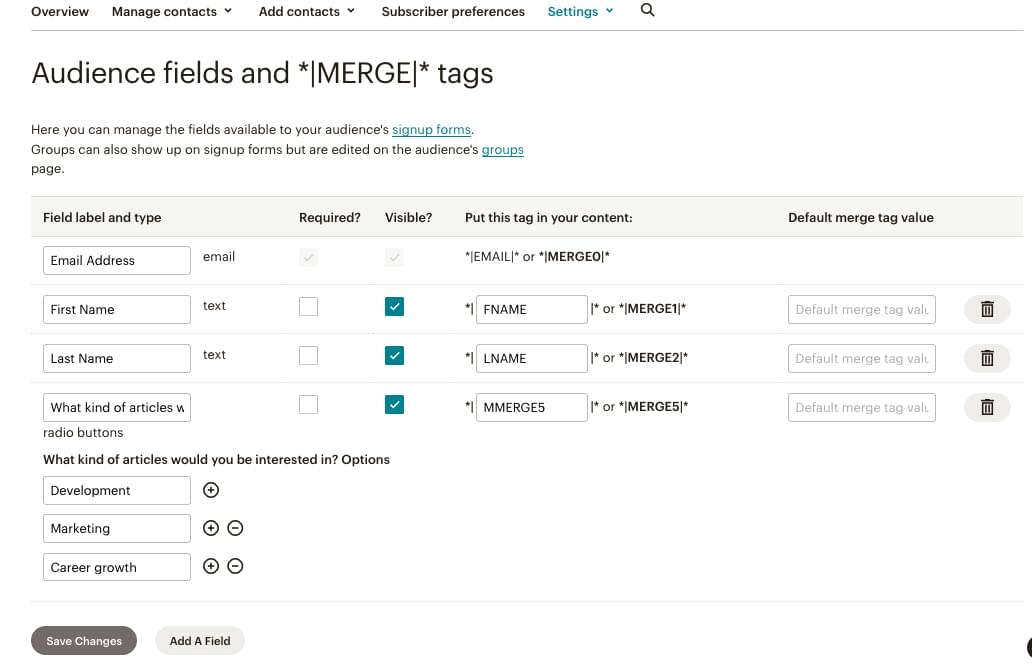
Right here, you may add the customized fields you need to see in your e-newsletter signup type. You too can customise your Merge tags, that are mainly dynamic contents of an e-mail marketing campaign that can be utilized to personalize your e-mail.
For this instance, I’m including a radio button subject that has three choices: Improvement, Advertising, and Profession development. Based mostly on these pursuits, I can then ship focused e-mail campaigns. When you add all of the fields you want, hit Save Adjustments.
Constructing a e-newsletter sign-up type on Drupal
In your Drupal admin dashboard, navigate to Configuration > Net providers > Mailchimp > Signup Kinds. Within the prime proper nook, click on on the + Add Signup Type button. Enter all the main points as required as proven within the screenshot under.
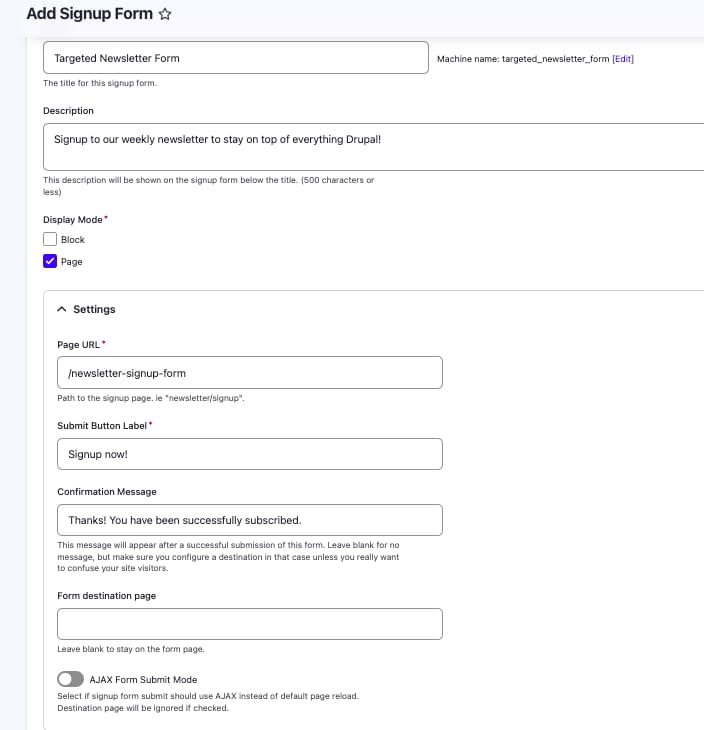
I’m choosing a Web page as a substitute of a Block right here, however you may even choose a block after which add that block to any web page you want. Now that I’ve chosen Web page, I must enter a URL.
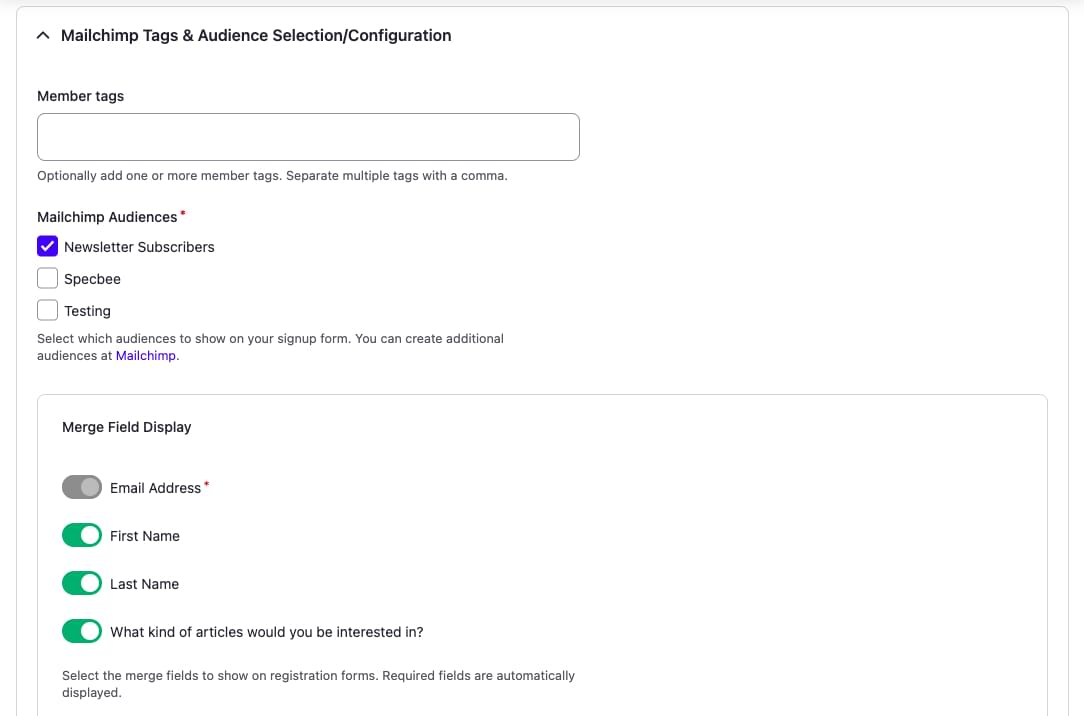
Transferring on to the following part, right here’s the place you may choose the Mailchimp viewers, tags, and fields. When you check out the screenshot under, you’ll discover that the viewers I’ve created — “E-newsletter Subscribers” — seems right here together with my different viewers lists. When you choose the viewers, you’ll see that every one these merge fields you added will present up below the Merge Discipline Show part. Choose every thing you want and hit Save!
Now you can view your e-newsletter type by navigating to the URL you simply created (corresponding to /newsletter-signup-form).

Segmenting your viewers
Now that you just’ve created your viewers and signup type, let’s begin segmenting them. For my focused e-newsletter marketing campaign, I need to section my viewers primarily based on their pursuits. So I’m going to create three segments on Mailchimp, since I’ve three pursuits. I’m doing this in order that I can ship out personalised emails and content material that they need to truly see.
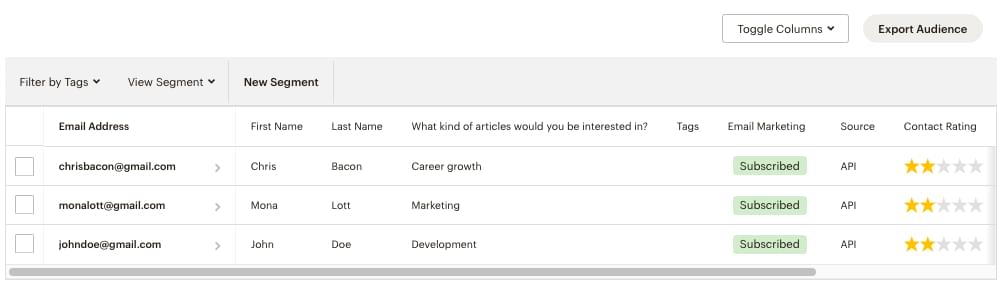
However earlier than I do that, I want some viewers! Let’s add some dummy signups so I can present you the way it works. The picture under reveals my viewers listing on Mailchimp.
To create a section, click on on the New Phase button on the desk. You may have all kinds of fields and selections for creating this section. I’m going to pick the “Pursuits” subject and choose the match as “Improvement”.
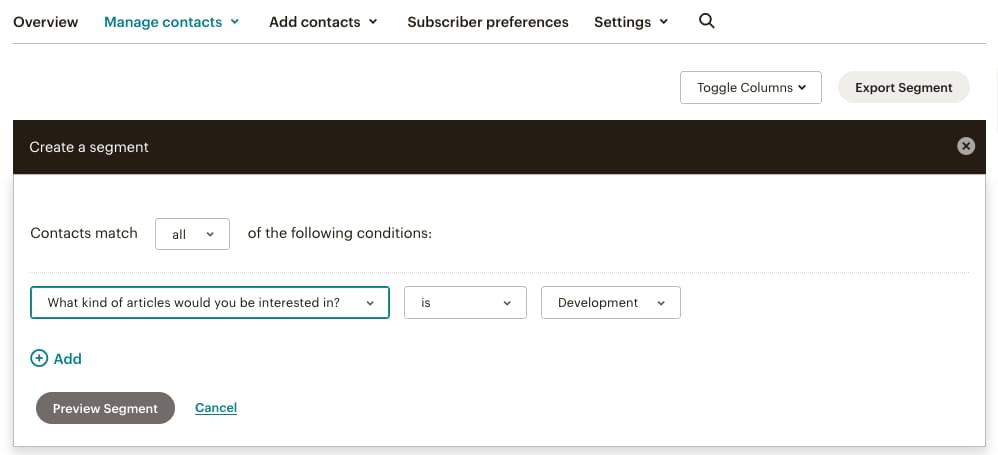
As soon as executed, click on on Preview Phase > Save Phase. Give a reputation to your section. I’m calling it “Improvement”, as a result of that’s most apt for my focused viewers. Click on Save.
In the identical approach, I’m going to create two extra segments for the “Advertising” and “Profession Development” pursuits. When you’ve created all of your segments, as quickly as somebody indicators up to your e-newsletter, they’ll be routinely segmented accordingly.
Creating the Focused Electronic mail Marketing campaign
Now that we’ve bought every thing else out of the best way, let’s get all the way down to enterprise! Whereas you can too create e-mail campaigns straight out of your Drupal web site as effectively, on this instance, I’m going to create one on Mailchimp.
Head to Marketing campaign > All Campaigns > Create New. I’ve chosen the non-fancy, Common Electronic mail possibility. Within the To part, I’m going to pick my viewers (E-newsletter Subscribers). Beneath Ship To, let’s choose the section. Optionally, you can too choose the Don’t ship to subject and choose the section you want to exclude.
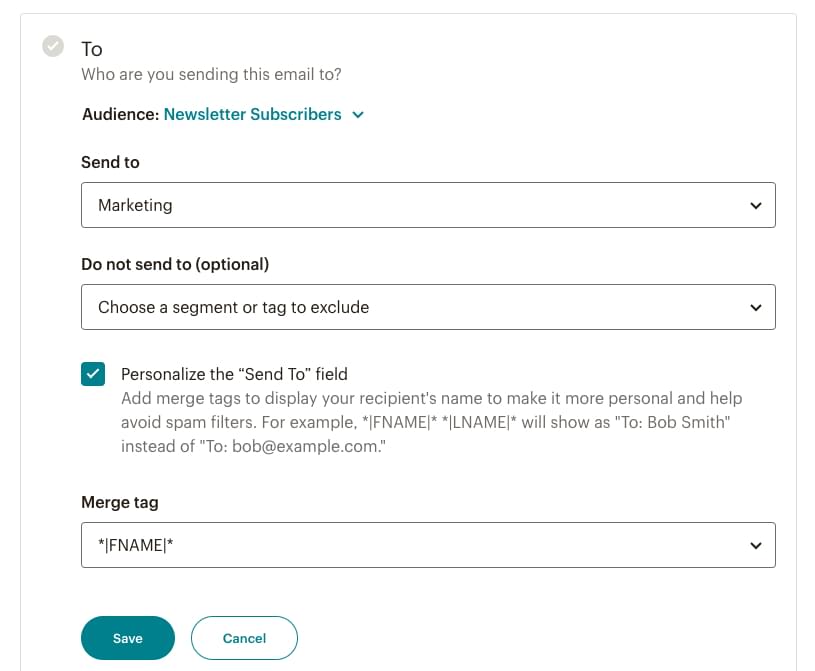
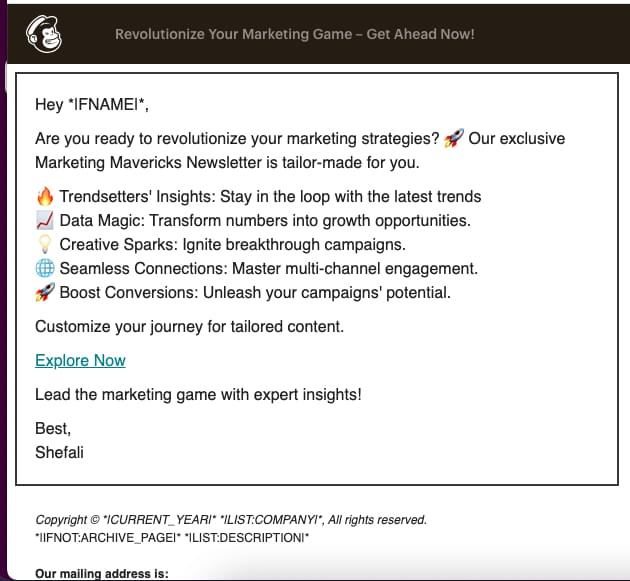
An e-mail that makes use of the viewers’s first identify is at all times simpler than one which doesn’t. So, let’s add the FNAME merge tag to the “To” subject. It can be added to the Topic or e-mail content material (see screenshot under).
Triggers and Automation
A set off initiates automation. For instance, you may set a set off to ship an automatic e-mail to each new one who indicators up to your e-newsletter. There are a lot of pre-built triggers accessible in Mailchimp so that you can use. You too can craft your individual customized automation journey.
I’ll take you thru a fast instance of organising an automatic welcome e-mail to all these new signups to your e-newsletter. That implies that, as quickly as anybody makes use of your E-newsletter Signup type in your Drupal web site, they’ll obtain a welcome e-mail. Notice that this characteristic requires a paid Mailchimp plan.
In your Mailchimp dashboard, head to Automations > Pre-built Journeys > Discover & welcome new contacts > Welcome new contacts.
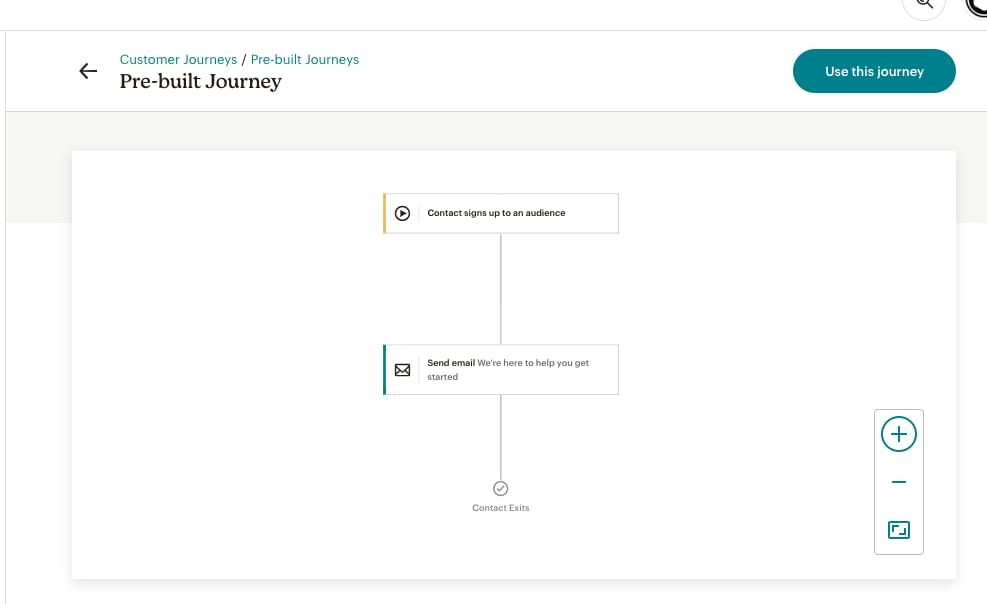
You’ll perceive by way of the circulate that this can be a easy buyer journey that has only one set off and one motion. Now while you click on on the Use this journey button on the highest proper, it’s going to ask you to pick an viewers from a dropdown listing. As soon as you choose the viewers, you’ll now be capable to:
- Filter out the viewers. This implies that you could ship personalised welcome emails primarily based on their preferences (in my instance, the curiosity subject) by creating totally different journeys for every section.
- Design and personalize your welcome e-mail through the use of pre-built templates or by creating your individual.
- Choose a schedule for the welcome emails to set off.
- Add a distinct start line for his or her journey aside from a brand new signup — for instance, primarily based on their engagement ranges or signup date to have a good time their anniversary.
If you’ve set it up, all you might want to do is Activate the journey you simply constructed. Congratulations on creating a customized e-mail marketing campaign!
Wrapping Up
So there you’ve got it, the dynamic duo of Mailchimp and Drupal working in excellent concord. Bringing them collectively can do wonders to your advertising and marketing efforts. Regardless of quickly evolving advertising and marketing developments, the non-public contact won’t ever exit of fashion. So, go forward and craft these focused campaigns. With Mailchimp and Drupal, you’re in management, and your viewers is in for a deal with. Time to hit Ship and watch the outcomes roll in!