
On this tutorial, we’ll stroll by means of construct a customized Chatbot utility that may permit us to ask questions and obtain high-quality solutions. The bot will bear in mind earlier prompts, simulating context-aware dialog.

Chatbots have change into indispensable instruments for companies and builders looking for to enhance buyer interactions and streamline person experiences in at present’s quickly evolving digital panorama.
OpenAI’s ChatGPT has reworked from a cutting-edge experiment right into a powerhouse in chatbot improvement. Its meteoric rise to success is nothing wanting outstanding, fascinating customers worldwide.
The demo code of this challenge is out there on CodeSandbox. You’ll have to offer your personal OpenAI API key within the .env file to check it stay. To get one, create an account on the OpenAI, log in, navigate to the API keys and generate a brand new API key.
Planning Options and UI
Our utility will probably be based mostly on React, and we’ll use OpenAI API to entry the information and use CSS modules for styling.
Using React will permit us to create a dynamic and responsive person interface, enhancing the general person expertise.
The OpenAI API will allow us to achieve entry to superior language processing capabilities, offering information for creating insightful interactions.
Moreover, CSS modules will permit us to keep up a modular design, facilitating environment friendly improvement and customization of the app.
The options we’ll be implementing embody:
- A delegated enter space the place customers will be capable to craft prompts, inviting contextually related inquiries.
- A Submit button that may permit customers to submit their prompts to the API, initiating the dialog course of.
- Message gadgets that will probably be showcased as chat-style messages throughout the dialog window, enhancing the interactive chat expertise.
- Message gadgets to show ChatGPT replies that may present a conversational movement.
- A Historical past characteristic that may checklist the entire person’s latest prompts. This may also permit customers to revisit earlier conversations.
- A Clear button that may permit the elimination of generated content material, providing a clear slate for brand spanking new conversations.
The picture under exhibits our component-based wireframe.
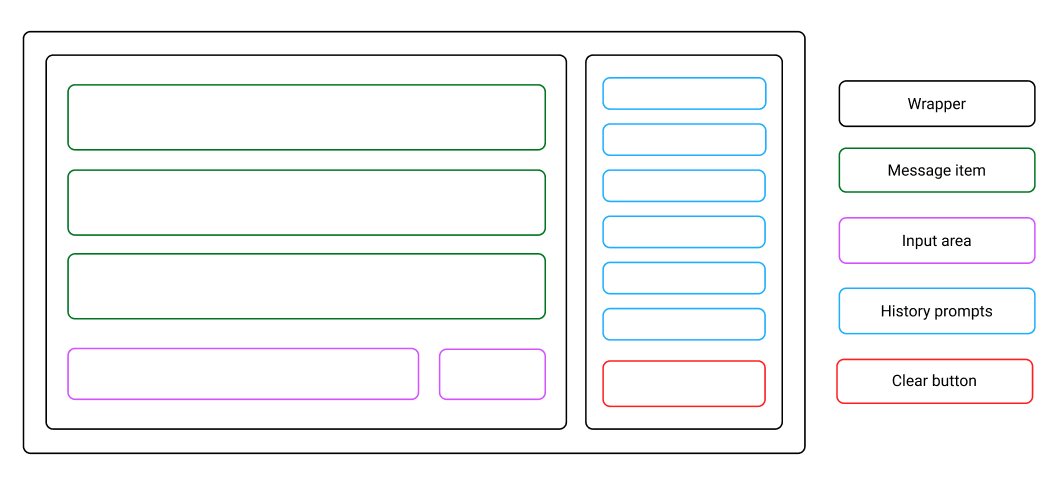
The entire utility will probably be wrapped in the principle container, which is able to maintain the entire components collectively. It is going to be additional divided right into a two-column format.
The primary column will embody the entire messages from the person and ChatGPT. On the backside of the column, there will probably be an enter space and a button for submitting the immediate.
The second column will maintain the historical past of the entire latest prompts. On the backside of the column, there will probably be a Clear button that may permit the person to wipe the generated content material.
Choosing a Coloration Scheme
The appliance design will prioritize the convenience of content material notion. This can permit us to offer a few necessary advantages:
- Customers will be capable to rapidly comprehend the introduced data, resulting in a extra intuitive and user-friendly expertise.
- It’s going to additionally improve accessibility, making certain that people of various backgrounds and skills will be capable to simply navigate and have interaction with the content material.
The picture under exhibits our colour scheme.
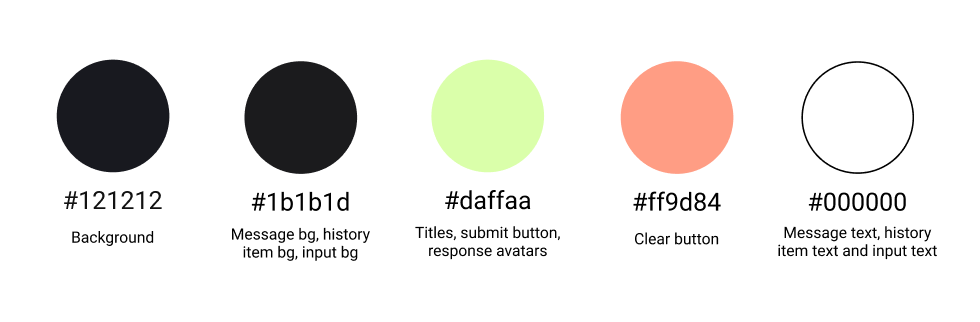
The background of the applying will probably be black, whereas the messages, historical past gadgets, and enter type will probably be darkish grey.
The textual content on the messages and enter backgrounds will probably be white, offering a pleasant distinction and make textual content simple to learn.
To provide the app some highlights, the column titles, Submit button, and response message avatars will use a vivid, lime-green tone.
To accent the Clear button, a light purple tone will probably be used. This may also assist customers keep away from clicking the button unintentionally.
Setting Up the React App
We’ll use create-react-app to create our utility. Run npx create-react-app react-chatgpt to create a brand new React challenge.
Look ahead to a minute for the setup to finish, after which change the working listing to the newly created folder by cd react-chatgpt and run npm begin to start out the developer server.
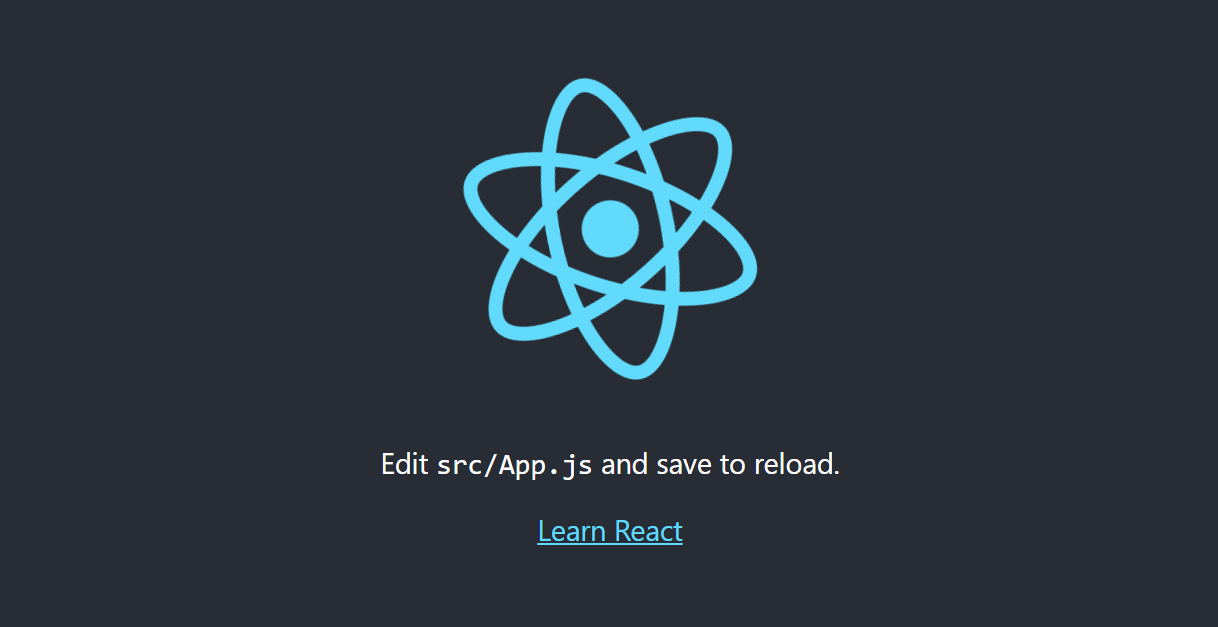
This could open up our challenge in our default browser. If not, navigate to http://localhost:3000 to open it manually. We ought to be introduced with the React welcome display screen, as pictured under.
Including World Types
We’ll add international styling to determine a constant and unified visible look throughout all elements of the applying.
Open index.css and embody the next styling guidelines:
@import url("https://fonts.googleapis.com/css2?household=Varela+Spherical&show=swap");

* {
  margin: 0;
  padding: 0;
  box-sizing: border-box;
  font-family: "Varela Spherical", sans-serif;
}

physique {
  background-color: #121212;
}
First, we import the Varela Spherical font and set the entire app to make use of it.
We additionally take away any pre-defined margins and paddings, in addition to set box-sizing to border-box so the app seems the identical on totally different browsers.
Lastly, we set the background of the physique to a darkish tone, which permits us to focus on the content material of the applying.
We’ll want a few avatars to signify the authors of the messages from the person and OpenAI API. This manner, they’ll be simpler to differentiate.
Create a brand new icons folder contained in the src listing and embody the bot.png and person.png icons.
You possibly can obtain samples from icons listing right here, or you need to use customized ones from websites like FlatIcon or Icons8, so long as you retain the above file names.
Constructing the Parts
First, we’d like a well-organized file construction that matches the wireframe design.
We’ll use the terminal to create the required folder and element recordsdata. Every element can have its personal JavaScript file for performance and CSS file for styling.
Change the working listing within the src folder by operating cd src after which run the next command:
mkdir elements && cd elements && contact Message.js Message.module.css Enter.js Enter.module.css Historical past.js Historical past.module.css Clear.js Clear.module.css
The command above will first create a /elements/ folder, then change the working listing to it, and create all the required recordsdata inside it.
The Message element
The Message element will show person prompts and API responses throughout the dialog, facilitating the real-time change of data between the person and the chatbot.
Open the Message.js file and embody the next code:
import bot from "../icons/bot.png";
import person from "../icons/person.png";

import kinds from "./Message.module.css";

export default operate Message({ function, content material }) {
  return (
    <div className={kinds.wrapper}>
      <div>
        <img
          src={function === "assistant" ? bot : person}
          className={kinds.avatar}
          alt="profile avatar"
        />
      </div>
      <div>
        <p>{content material}</p>
      </div>
    </div>
  );
}
First, we import the downloaded icons for avatars after which import the exterior CSS guidelines for styling.
After that, we create the wrapper for the Message element, which is able to comprise each icons and textual content content material.
We use the function prop within the conditional to show the suitable avatar because the picture src.
We additionally use the content material prop, which will probably be handed in because the textual content response from the OpenAI API and person enter immediate.
Now let’s type the element so it seems like a chat message! Open the Message.module.css file and embody the next guidelines:
.wrapper {
  show: grid;
  grid-template-columns: 60px auto;
  min-height: 60px;
  padding: 20px;
  margin-bottom: 20px;
  border-radius: 10px;
  background-color: #1b1b1d;
}

.avatar {
  width: 40px;
  top: 40px;
}
We divide the format into two columns, with the avatars proven within the fixed-width container on the best and the textual content on the left.
Subsequent, we add some padding and margin to the underside of the message. We additionally type the message to have spherical borders and set the background to darkish grey.
Lastly, we set the avatar icon to a set width and top.
The Enter element
The Enter element will probably be an interface aspect designed to seize person queries, serving because the means by means of which customers work together and have interaction with the chatbot.
Open the Enter.js file and embody the next code:
import kinds from "./Enter.module.css";

export default operate Enter({ worth, onChange, onClick }) {
  return (
    <div className={kinds.wrapper}>
      <enter
        className={kinds.textual content}
        placeholder="Your immediate right here..."
        worth={worth}
        onChange={onChange}
      />
      <button className={kinds.btn} onClick={onClick}>
        Go
      </button>
    </div>
  );
}
We first import the exterior stylesheet to type the element.
We return the element wrapper that features the enter subject for the person prompts and the button to submit it to the API.
We set the placeholder worth to be displayed when the enter type is empty, and create the worth prop to carry the entered immediate, in addition to the onChange prop that will probably be referred to as as soon as the enter worth adjustments.
For the button, the onClick prop will probably be referred to as as soon as the person clicks on the button.
Now let’s type the element in order that the enter space seems lovely and the person is inspired to offer prompts! Open the Enter.module.css file and embody the next guidelines:
.wrapper {
  show: grid;
  grid-template-columns: auto 100px;
  top: 60px;
  border-radius: 10px;
  background-color: #323236;
}

.textual content {
  border: none;
  define: none;
  background: none;
  padding: 20px;
  colour: white;
  font-size: 16px;
}

.btn {
  border: none;
  border-radius: 0 10px 10px 0;
  font-size: 16px;
  font-weight: daring;
  background-color: rgb(218, 255, 170);
}

.btn:hover {
  cursor: pointer;
  background-color: rgb(200, 253, 130);
}
We set the wrapper to be divided into two columns, with a set width for the button and the remainder of the obtainable width devoted to the enter space.
We additionally outline the precise top of the element, set the rounded borders for it, and set the background to darkish grey.
For the enter space, we take away the default border, define, background and add some padding. We set the textual content colour to white and set a selected font dimension.
The Historical past element
The Historical past element will show the sequence of previous person and chatbot interactions, offering customers with a contextual reference of their dialog.
Open the Historical past.js file and embody the next code:
import kinds from "./Historical past.module.css";

export default operate Historical past({ query, onClick }) {
  return (
    <div className={kinds.wrapper} onClick={onClick}>
      <p>{query.substring(0, 15)}...</p>
    </div>
  );
}
We first import the exterior type guidelines for the element. Then we return the wrapper that may embody the textual content.
The textual content worth will probably be handed in as a query prop from the person immediate, and solely the primary 15 characters of the textual content string will probably be displayed.
Customers will probably be allowed to click on on the historical past gadgets, and we’ll move the onClick prop to manage the press conduct.
Now let’s type the element to make sure it’s visually interesting and matches nicely within the sidebar! Open the Historical past.module.css file and embody the next guidelines:
.wrapper {
  padding: 20px;
  margin-bottom: 20px;
  border-radius: 10px;
  background-color: #1b1b1d;
}

.wrapper:hover {
  cursor: pointer;
  background-color: #323236;
}
We set some padding, add the margin to the underside, and set the rounded corners for the historical past gadgets. We additionally set the background colour to darkish grey.
As soon as the person hovers over the merchandise, the cursor will change to a pointer and the background colour will change to a lighter shade of grey.
The Clear element
The Clear element will probably be a UI aspect designed to reset or clear the continuing dialog, offering customers with a fast technique to begin a brand new interplay with out navigating away from the present interface.
Open the Clear.js file and embody the next code:
import kinds from "./Clear.module.css";

export default operate Clear({ onClick }) {
  return (
    <button className={kinds.wrapper} onClick={onClick}>
      Clear
    </button>
  );
}
We first import the exterior stylesheet to type the element.
We return the button that may permit customers to clear the content material of the applying. We’ll move the onClick prop to realize the specified conduct.
Now let’s type the element to make it stand out and scale back the probabilities of customers urgent it unintentionally! Open the Clear.module.css file and embody the next guidelines:
.wrapper {
  width: 100%;
  top: 60px;
  background-color: #ff9d84;
  border: none;
  border-radius: 10px;
  font-size: 16px;
  font-weight: daring;
}

.wrapper:hover {
  cursor: pointer;
  background-color: #ff886b;
}
We set the button to fill the obtainable width of the column, set the precise top, and set the background colour to delicate purple.
We additionally take away the default border, set the rounded corners, set a selected font dimension, and make it daring.
On hover, the cursor will change to a pointer and the background colour will change to a darker shade of purple.
Constructing the Person Interface
Within the earlier part, we constructed the entire mandatory elements. Now let’s put them collectively and construct the person interface for the applying.
We’ll configure their performance to create a practical and interactive chatbot interface with organized and reusable code.
Open the App.js file and embody the next code:
import { useState } from "react";

import Message from "./elements/Message";
import Enter from "./elements/Enter";
import Historical past from "./elements/Historical past";
import Clear from "./elements/Clear";

import "./kinds.css";

export default operate App() {
  const [input, setInput] = useState("");
  const [messages, setMessages] = useState([]);
  const [history, setHistory] = useState([]);

  return (
    <div className="App">
      <div className="Column">
        <h3 className="Title">Chat Messages</h3>
        <div className="Content material">
          {messages.map((el, i) => {
            return <Message key={i} function={el.function} content material={el.content material} />;
          })}
        </div>
        <Enter
          worth={enter}
          onChange={(e) => setInput(e.goal.worth)}
          onClick={enter ? handleSubmit : undefined}
        />
      </div>
      <div className="Column">
        <h3 className="Title">Historical past</h3>
        <div className="Content material">
          {historical past.map((el, i) => {
            return (
              <Historical past
                key={i}
                query={el.query}
                onClick={() =>
                  setMessages([
                    { role: "user", content: history[i].query },
                    { function: "assistant", content material: historical past[i].reply },
                  ])
                }
              />
            );
          })}
        </div>
        <Clear onClick={clear} />
      </div>
    </div>
  );
}
First, we import the useState hook that we’ll use to trace the information state for the applying. Then we import all of the elements we constructed and the exterior stylesheet for styling.
Then we create the enter state variable to retailer the person immediate enter, messages to retailer the dialog between the person and ChatGPT, and historical past to retailer the historical past of person prompts.
We additionally create the principle wrapper for the entire app that may maintain two columns.
Every column can have a title and content material wrapper that may embody the dialog messages, enter space, and Submit button for the primary column and historical past gadgets and the Clear button for the second column.
The dialog messages will probably be generated by mapping by means of the messages state variable and the historical past gadgets — by mapping by means of the historical past state variable.
We set the enter onChange prop to replace the enter state variable every time person enters any worth within the enter type.
As soon as the person clicks the Ship button, the person immediate will probably be despatched to the OpenAI API to course of and obtain the reply.
For the historical past gadgets, we set the onClick prop in order that the messages state variable will get up to date to the precise immediate and reply.
Lastly, for the Clear button, we move the onClick prop a operate that may clear each the message and historical past values, clearing the applying information.
Creating the App Structure
On this part, we’ll prepare the person interface elements to create an intuitive construction for efficient person interplay.
Open App.css and embody the next styling guidelines:
.App {
  show: grid;
  grid-template-columns: auto 200px;
  hole: 20px;
  max-width: 1000px;
  margin: 0 auto;
  min-height: 100vh;
  padding: 20px;
}

.Column {
  colour: white;
}

.Title {
  padding: 20px;
  margin-bottom: 20px;
  border-radius: 10px;
  colour: black;
  background-color: rgb(218, 255, 170);
}

.Content material {
  top: calc(100vh - 200px);
  overflow-y: scroll;
  margin-bottom: 20px;
}

::-webkit-scrollbar {
  show: none;
}
We cut up the principle app wrapper into two columns, separated by a spot through the use of CSS grid format, and we set the left column for historical past gadgets to a set width.
Subsequent, we set the wrapper to by no means exceed a sure width, heart it on the display screen, make it use the entire display screen viewport top, and add some padding inside it.
For every column’s contents, we set the textual content colour to white.
For the column titles, we set some padding, add the underside margin, and set the rounded corners. We additionally set the title aspect background colour to lime-green and set the textual content colour to black.
We additionally type the columns themselves by setting the rule that the content material shouldn’t exceed a sure top and set the content material to be scrollable if it reaches outdoors the peak. We additionally add a margin to the underside.
We additionally conceal the scrollbars, in order that we don’t must type them to override the default values for every browser. This rule is non-compulsory and we may depart it out.
Getting the API Key from OpenAI
When you haven’t already arrange your personal API key for the Sandbox within the introduction of this tutorial, make sure that to create an account on the OpenAI web site.
Subsequent, log in and navigate to the API keys and generate a brand new API key.
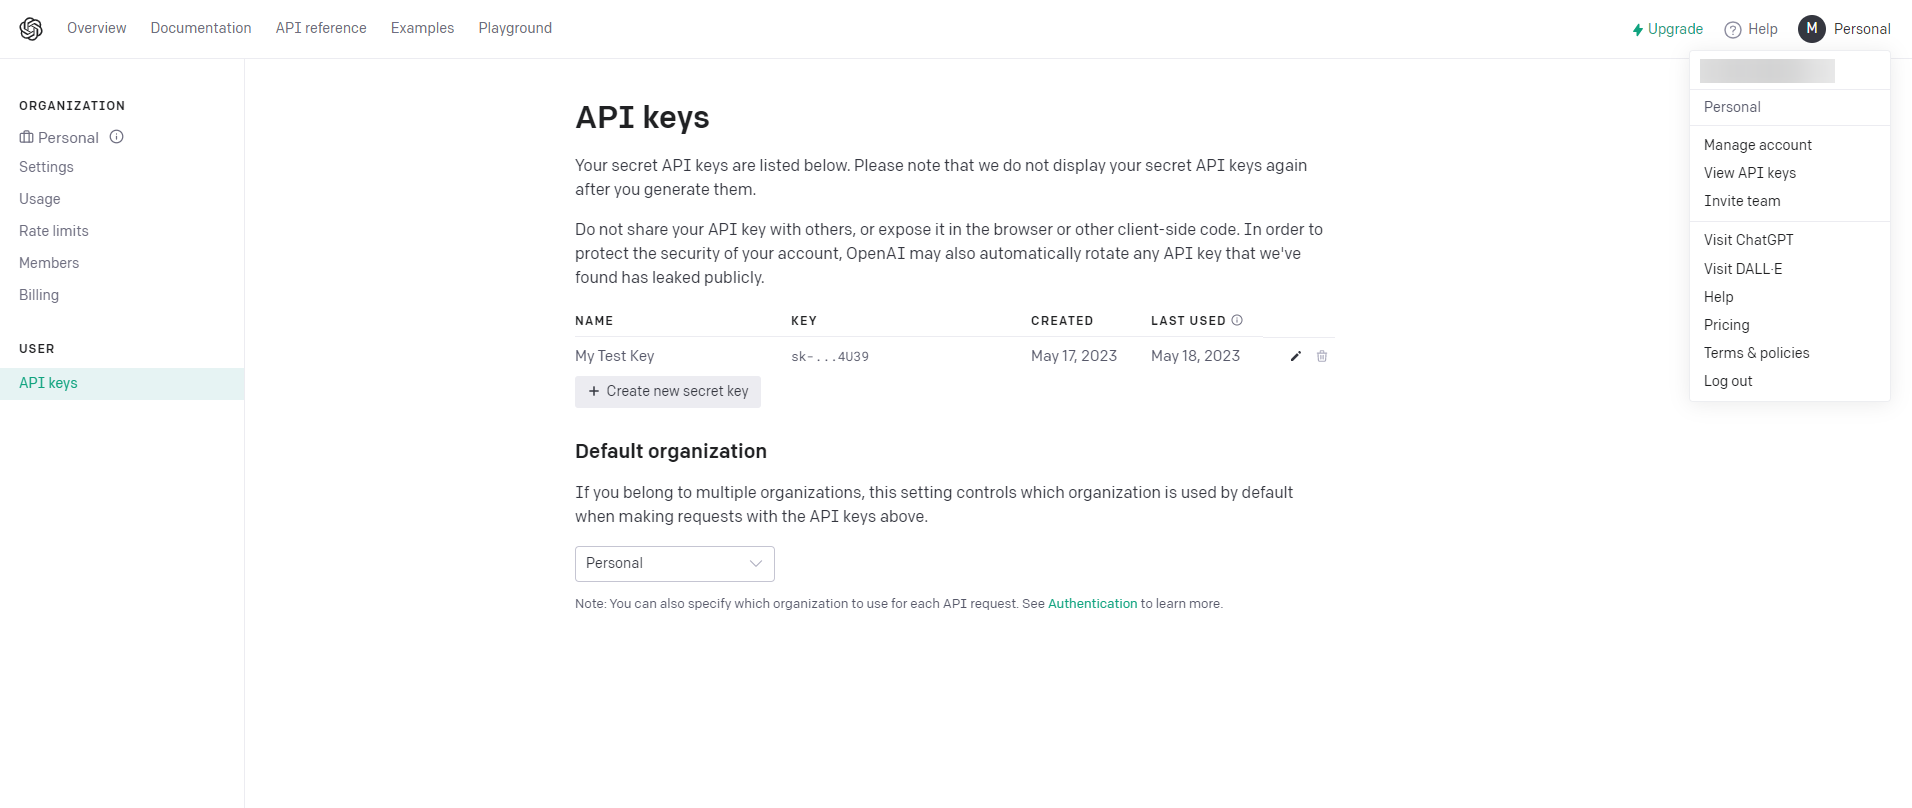
Copy the important thing to the clipboard and open your challenge.
Create a brand new .env file in your challenge root and paste the worth for the next key like so:
REACT_APP_OPENAI_API_KEY=paste-your-code-here
Making ready the Request Name to OpenAI API
By the OpenAI API, our chatbot will be capable to ship textual prompts to the OpenAI server, which is able to then course of the enter and generate human-like responses.
That is achieved by leveraging a strong language mannequin that’s been skilled on numerous textual content sources. By offering the mannequin with a dialog historical past and the present person immediate, our chatbot will obtain context-aware responses from the API.
On this part, we’ll put together the request and implement the decision to the API to obtain the response and set the information to the state variable we outlined earlier.
Open the App.js once more and add the next code:
export default operate App() {


  const handleSubmit = async () => {
    const immediate = {
      function: "person",
      content material: enter,
    };

    setMessages([...messages, prompt]);

    await fetch("https://api.openai.com/v1/chat/completions", {
      technique: "POST",
      headers: {
        Authorization: `Bearer ${course of.env.REACT_APP_OPENAI_API_KEY}`,
        "Content material-Sort": "utility/json",
      },
      physique: JSON.stringify({
        mannequin: "gpt-3.5-turbo",
        messages: [...messages, prompt],
      }),
    })
      .then((information) => information.json())
      .then((information) => {
        const res = information.selections[0].message.content material;
        setMessages((messages) => [
          ...messages,
          {
            role: "assistant",
            content: res,
          },
        ]);
        setHistory((historical past) => [...history, { question: input, answer: res }]);
        setInput("");
      });
  };

  const clear = () => {
    setMessages([]);
    setHistory([]);
  };

  return <div className="App">
}
First, we create a separate handleSubmit operate, which will probably be executed as soon as the person has entered the immediate within the enter type and clicks the Submit button.
Inside handleSubmit, we first create the immediate variable that may maintain the function person and the immediate itself as an object. The function is necessary as a result of, when storing our messages, we’ll must know which of them are person messages.
Then we replace the messages state variable with the person immediate.
Subsequent, we make an precise fetch name to the api.openai.com/v1/chat/completions endpoint to entry the information from the OpenAI API.
We specify that it’s a POST request, and set the headers with the authorization token and the content material sort. For the physique parameters, we specify which API mannequin to make use of, and we move the messages variable because the content material from the person.
As soon as the response is acquired, we retailer it within the res variable. We add the thing consisting of the function assistant and the response itself to the message state variable.
We additionally replace the historical past state variable with the thing, with the query and corresponding reply because the keys.
After the response is acquired and state variables are up to date, we clear the enter state variable to arrange the enter type for the subsequent person immediate.
Lastly, we create a easy clear operate to clear the messages and historical past state variables, permitting the person to clear the information of the applying.
Testing the Software
At this level, we should always have created a completely practical chat utility! The very last thing left to do is to check it.
First, let’s attempt to ask ChatGPT a single query.

The animation above exhibits a query being submitted and a solution being acquired.
Now let’s attempt to create a dialog.
As proven within the animation above, the chatbot remembers the context from the earlier messages, so we are able to communicate with it whereas being absolutely context-aware.
Now let’s see what occurs as soon as we click on on the Historical past button.
Discover how the chat switches to the respective person immediate and reply. This could possibly be helpful if we wish to resume the dialog from a selected level.
Lastly, let’s click on on the Clear button.
As anticipated, the contents of the app are cleared. This can be a helpful possibility when there’s loads of content material and the person needs to start out contemporary.
Conclusion
On this tutorial, we’ve discovered create an easy-to-use person interface, construction our code through elements, work with states, make API calls, and course of the acquired information.
With the mixture of superior pure language processing capabilities of the OpenIAI API and the pliability of React, you’ll now be capable to create subtle chatbot purposes you could customise additional to your liking.
Discover that this tutorial shops the API key on the frontend, which could not be safe for manufacturing. If you wish to deploy the challenge, it will be advisable to create an Categorical server and use the API key there.
Additionally, in order for you the historical past prompts to be obtainable after the subsequent preliminary launch, you would retailer after which learn them from native storage, and even join a database to your app and retailer and browse information from there.