
Introduction
In a comfy nook of a tech fanatic’s workshop, the search started: may a tiny Raspberry Pi deal with the facility of superior AI? This text follows that journey, displaying how you can remodel this small system right into a succesful software for sensible doc processing. We’ll information you thru establishing the Raspberry Pi, putting in the wanted software program, and constructing a system to deal with doc ingestion and QnA duties. By the top, you’ll see how even the smallest tech devices can obtain spectacular outcomes with a little bit of creativity and energy.
Studying Targets
- Learn to configure a Raspberry Pi for headless operation.
- Perceive the method of putting in and managing dependencies like Ollama.
- Uncover how you can develop a system for loading and processing PDF paperwork.
- Acquire expertise in making a Retrieval-Augmented Era (RAG) pipeline for answering queries.
- Be taught strategies for verifying the performance of your software.
- Discover how you can put together your software for deployment with FastAPI and construct a person interface with Reflex.
This text was revealed as part of the Information Science Blogathon.
Setting Up Your Raspberry Pi
First we have to setup our Raspberry Pi for the applying to be working. Step one is to have a correct OS setup within the system. If you have already got this performed, you possibly can skip this. We might be utilizing Ubuntu server picture for this demo, however the default OS can be used. All you want is a microSD of minimal 16GB to flash the OS picture.
Steps to Flash SD card
Comply with the steps beneath to flash the SD card with the OS picture:
- Obtain Raspberry Pi Imager based mostly in your system from this hyperlink, and set up it. All default settings are advisable.
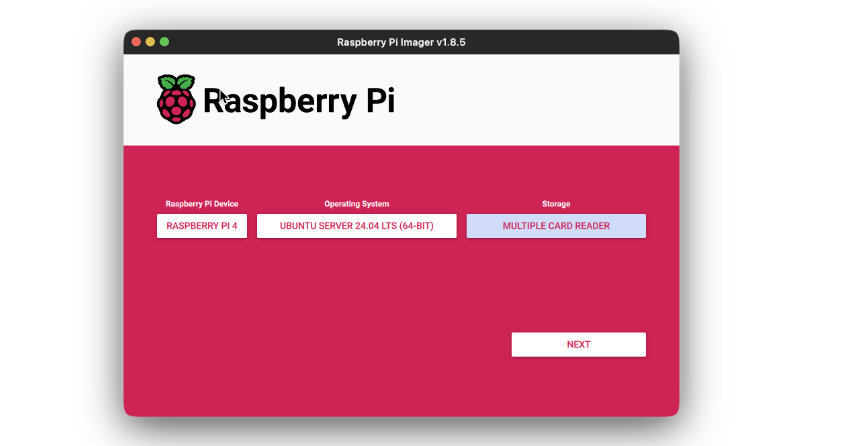
- Open the Imager software and first choose the system.
- Then choose the OS that you simply wish to set up. On this case, Ubuntu Server 24.04.
- Then selected the storage the place the picture might be flashed. This would be the SD card the place picture is to be flashed.
- Click on on subsequent. You’ll be prompted to edit the settings for brand spanking new system. We might be setting the Raspberry Pi for headless improvement, by way of SSH.
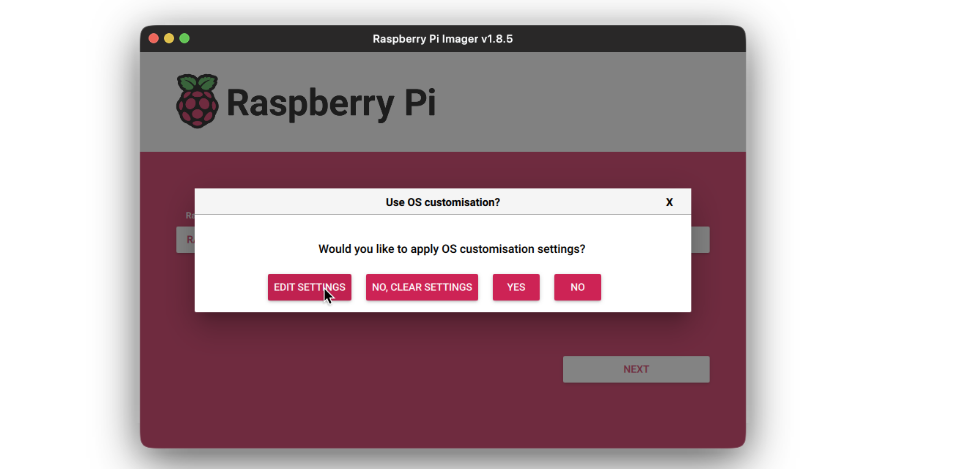
- Add the username and password for the person to login to. Then add an WiFi SSID and it’s password, for the system to routinely login to that WiFi community on boot up. That is vital because the we are going to want the system to hook up with the community routinely for us to have the ability to connect with it by way of SSH.

- On the Companies tab, test the Allow SSH and choose the Use username and password choice. Click on Save.

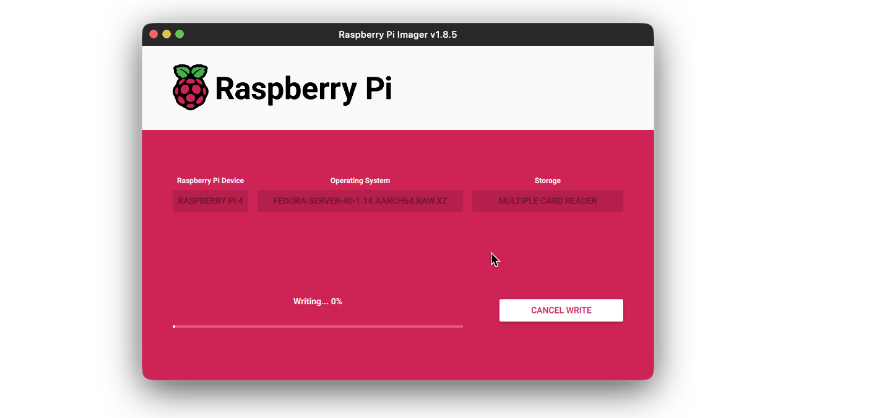
- Then press the Write button and look ahead to the flashing to finish.
As soon as the SD card is flashed with the OS, insert it into the system and begin it. It ought to take jiffy on first boot as much as full preliminary setup. The system will routinely connect with WiFi after booting. Now from one other system, ideally utilizing a laptop computer or desktop, login to your Raspberry Pi utilizing it’s IP. In case you are undecided what it’s IP is, you should use Fing android/ios app to loo-up for the IP.
After getting the IP, SSH into your system utilizing the username and password you used throughout the setup. The command for me
could be:
ssh [email protected]Updating the Packages
Now, we have to replace the packages for all issues to be put in accurately. Replace your system utilizing the next instructions:
sudo apt replace
sudo apt improve
Subsequent, want to put in Ollama to make use of the Language mannequin and the Embedding mannequin in our system. Set up Ollama utilizing the next command:
curl -fsSL https://ollama.com/set up.sh | shWhen you see any error when working the above command, run the next command to put in curl and check out once more:
sudo apt set up curlAs soon as Ollama is put in, use the next instructions to obtain Phi3 mannequin and Embeddings mannequin:
ollama pull phi3
ollama pull nomic-embed-text
After the 2 fashions are downloaded, create a undertaking inside any listing of your alternative and begin constructing the Utility.
Constructing the Utility Spine
Now that now we have the system setup, we are going to transfer ahead with constructing the RAG software.
Step1: Atmosphere Setup
First we could have the surroundings setup. Create a digital surroundings and set up the next packages:
deeplake
boto3==1.34.144
botocore==1.34.144
fastapi==0.110.3
gunicorn==22.0.0
httpx==0.27.0
huggingface-hub==0.23.4
langchain==0.2.6
langchain-community==0.2.6
langchain-core==0.2.11
langchain-experimental==0.0.62
langchain-text-splitters==0.2.2
langsmith==0.1.83
marshmallow==3.21.3
numpy==1.26.4
pandas==2.2.2
pydantic==2.8.2
pydantic_core==2.20.1
PyMuPDF==1.24.7
PyMuPDFb==1.24.6
python-dotenv==1.0.1
pytz==2024.1
PyYAML==6.0.1
reflex==0.5.6
requests==2.32.3
Step2: Creating config.py File
Subsequent, create a config.py file and add the next fields in it:
LANGUAGE_MODEL_NAME = "phi3"
EMBEDDINGS_MODEL_NAME = "nomic-embed-text"
OLLAMA_URL = "http://localhost:11434"
Now we have setup our undertaking with needed packages and configs for the Utility.
Step3: Creating Ingestion Class
Now, let’s create the Ingestion class that might be used to ingest doc into the vector retailer. Beneath is the code for whole Ingestion class:
import os
import config as cfg

from pinecone import Pinecone
from langchain.vectorstores.deeplake import DeepLake
from langchain.embeddings.ollama import OllamaEmbeddings
from .doc_loader import PDFLoader

class Ingestion:
    """Doc Ingestion pipeline."""
    def __init__(self):
        strive:
            self.embeddings = OllamaEmbeddings(
                mannequin=cfg.EMBEDDINGS_MODEL_NAME,
                base_url=cfg.OLLAMA_URL,
                show_progress=True,
            )
            self.vector_store = DeepLake(
                dataset_path="information/text_vectorstore",
                embedding=self.embeddings,
                num_workers=4,
                verbose=False,
            )
        besides Exception as e:
            increase RuntimeError(f"Didn't initialize Ingestion system. ERROR: {e}")

    async def create_and_add_embeddings(
        self,
        file: str,
    ):
        strive:
            loader = PDFLoader(
                file_path=file,
            )

            chunks = await loader.load_document()
            dimension = await self.vector_store.aadd_documents(paperwork=chunks)
            return len(dimension)
        besides (ValueError, RuntimeError, KeyError, TypeError) as e:
            increase Exception(f"ERROR: {e}")
Within the above class, we outline the init technique the place the embeddings mannequin and the vector retailer cases are initialized. We additionally outlined an asynchronous technique create_and_add_embeddings that can take the file path, load it, chunk it and ingest it into the doc. Now we have used a PDFLoader class to load the PDF file and chunk it. This class is outlined to make a separate chunking logic based mostly on necessities.
Step4: Code for PDFLoader
Beneath is the code for PDFLoader:
import os
from langchain.schema import Doc
from langchain.document_loaders.pdf import PyMuPDFLoader
from langchain.text_splitter import CharacterTextSplitter


class PDFLoader():
    def __init__(self, file_path: str) -> None:
        self.file_path = file_path

    async def load_document(self):
        self.file_name = os.path.basename(self.file_path)
        loader = PyMuPDFLoader(file_path=self.file_path)

        text_splitter = CharacterTextSplitter(
            separator="n",
            chunk_size=1000,
            chunk_overlap=200,
        )
        pages = await loader.aload()
        total_pages = len(pages)
        chunks = []
        for idx, web page in enumerate(pages):
            chunks.append(
                Doc(
                    page_content=web page.page_content,
                    metadata=dict(
                        {
                            "file_name": self.file_name,
                            "page_no": str(idx + 1),
                            "total_pages": str(total_pages),
                        }
                    ),
                )
            )

        final_chunks = text_splitter.split_documents(chunks)
        return final_chunks
Clarification
Let’s breakdown the PDFLoader class. We first initialize the file_path parameter utilizing an init technique. We
have outlined a load_document technique that does the next issues:
- Extracts the filename from the file_path.
- Masses the PDF file utilizing PyMuPDFLoader from Langchain. Be aware that some other PDFLoader can be used at this level.
- Initializes a CharacterTextSplitter to separate the doc into a number of smaller chunks of outlined dimension.
- Then we asynchronously load the doc utilizing the PyMuPDFLoader object occasion.
- We then iterate over the pages and create Doc object utilizing the web page content material. We additionally add customized metadata fields of alternative. On this case will add file_name, page_no and the total_pages fields.
- Then we take all of the chunks and cut up them utilizing CharacterTextSplitter object occasion and at last return the chunks.
Now that now we have the Ingestion pipeline prepared, we are going to begin working with the QnA pipeline.
Step5: Code for QnA Pipeline
Beneath is the code for QnA pipeline:
import os
import config as cfg

from pinecone import Pinecone
from langchain.vectorstores.deeplake import DeepLake
from langchain.embeddings.ollama import OllamaEmbeddings
from langchain_community.llms.ollama import Ollama
from .doc_loader import PDFLoader

class QnA:
    """Doc Ingestion pipeline."""
    def __init__(self):
        strive:
            self.embeddings = OllamaEmbeddings(
                mannequin=cfg.EMBEDDINGS_MODEL_NAME,
                base_url=cfg.OLLAMA_URL,
                show_progress=True,
            )
            self.mannequin = Ollama(
                mannequin=cfg.LANGUAGE_MODEL_NAME,
                base_url=cfg.OLLAMA_URL,
                verbose=True,
                temperature=0.2,
            )
            self.vector_store = DeepLake(
                dataset_path="information/text_vectorstore",
                embedding=self.embeddings,
                num_workers=4,
                verbose=False,
            )
            self.retriever = self.vector_store.as_retriever(
                search_type="similarity",
                search_kwargs={
                    "ok": 10,
                },
            )
        besides Exception as e:
            increase RuntimeError(f"Didn't initialize Ingestion system. ERROR: {e}")

    def create_rag_chain(self):
        strive:
            system_prompt = """<Directions>nnContext: {context}"
            """
            immediate = ChatPromptTemplate.from_messages(
                [
                    ("system", system_prompt),
                    ("human", "{input}"),
                ]
            )
            question_answer_chain = create_stuff_documents_chain(self.mannequin, immediate)
            rag_chain = create_retrieval_chain(self.retriever, question_answer_chain)

            return rag_chain
        besides Exception as e:
            increase RuntimeError(f"Didn't create retrieval chain. ERROR: {e}")
Let’s break down the QnA class. Within the init technique, we initialize the embeddings occasion, the mannequin occasion and the vector retailer occasion. Utilizing the vector retailer occasion, we outline the retriever occasion. That is the place we will outline metadata filters and ok, the max variety of chunks to be fetched. Within the create_rag_chain technique, we outline the system_prompt, the place all of the directions for the Language
mannequin is outlined. This method immediate could be outlined based mostly in your use-case. We then create the chat immediate utilizing the system immediate.
Lastly, utilizing the mannequin and immediate we create doc chain, and utilizing the retriever and doc chain we create the retrieval chain and return it. This retrieval chain might be used to invoke the mannequin
utilizing person question.
Now let’s check out each the Ingestion and QnA pipelines to test all the pieces works as meant. We’ll use Apple 2023 10K doc for this experiment. First let’s implement the Ingestion pipeline to ingest the doc into the vector retailer.
Code Implementation
from backend.src.ingestion import Ingestion

ingestion = Ingestion()
file = "information/Apple-10K-2023.pdf"

ids = await ingestion.create_and_add_embeddings(file=file)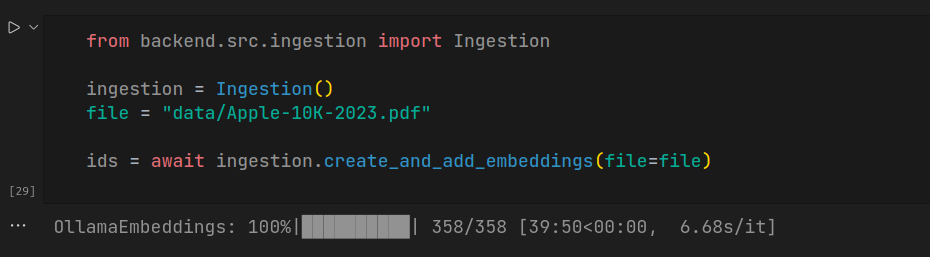
Be aware that the ingestion takes quiet lengthy, which depends upon the ingesting doc dimension.
Step6: Utilizing Rag Chain to Ask Queries
Subsequent, let’s use the rag chain to ask queries on the ingested doc.
from backend.src.qna import QnA

qna = QnA()
rag_chain = qna.create_rag_chain()
for chunk in rag_chain.decide("reply").stream({"enter": "What is that this doc about?"}):
    print(chunk, finish="")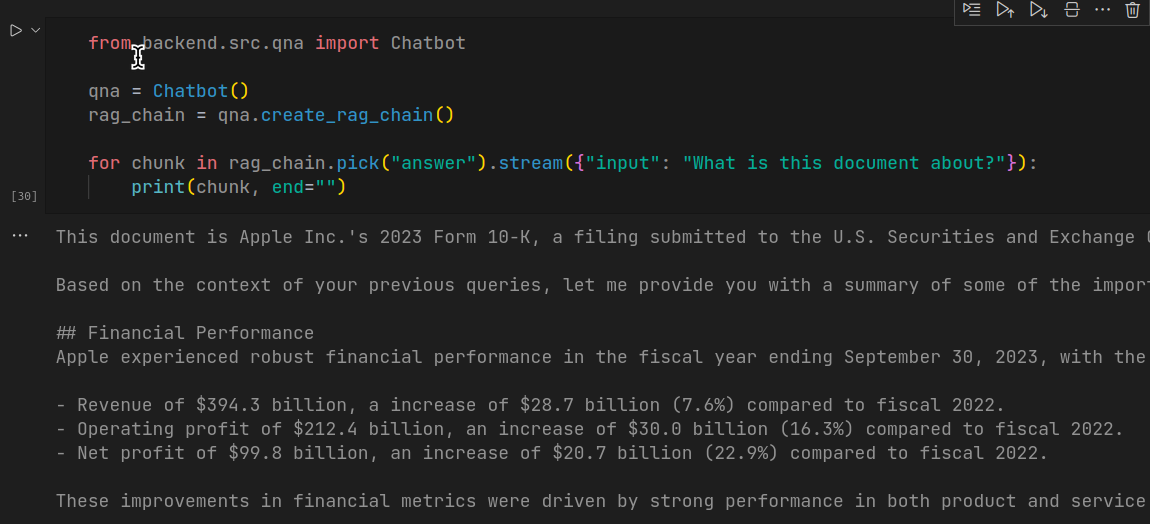
This code generates response for the question in a stream, similar to the way you see in ChatGPT interface. Though the response time is big, the response generated by the mannequin is correct.
With this, now we have accomplished implementation of our Raspberry Pi RAG software setup. Within the subsequent a part of this text, we are going to wrap our app utilizing FastAPI and construct an UI utilizing Reflex. Reflex is a Python solely UI library to construct internet software for cellular and desktop.
Conclusion
Now we have now accomplished the setup of Raspberry Pi and efficiently applied the spine of a RAG software. From putting in the OS and getting ready the surroundings to constructing the Ingestion and QnA
pipelines, every step has been important in creating the doc query answering system. By following the steps, you’ve geared up your Raspberry Pi to deal with complicated doc ingestion and question duties. Within the subsequent a part of this text, we are going to deal with wrapping our software utilizing FastAPI and creating an interactive person interface with Reflex, a Python-based UI library. This may improve the usability and accessibility of the RAG software, making it prepared for real-world purposes. Keep tuned for the subsequent
steps!
Key Takeaways
- We discovered to arrange how you can put together and configure a Raspberry Pi for working a RAG software.
- Putting in and managing dependencies like Ollama and mannequin downloads.
- Constructing a system to ingest and course of PDF paperwork right into a vector retailer.
- Implementing a Retrieval-Augmented Era chain for answering queries.
- Verifying the applying performance and getting ready for deployment with FastAPI and Reflex.
Often Requested Query
A. Utilizing Raspberry Pi to host RAG software is totally a topic of choice. For customers (particularly hobbyists and college students) not keen to spend month-to-month payments on GPUs, OpenAI API or cloud platforms, can use Raspberry Pi or some other edge gadgets to construct and host their RAG software, both as a undertaking or prototype for some closing product.
Contemplating the longer response time, the RAG software could be utilized for use-cases the place time is an inconsiderable issue. To call a number of:
i. Private emails summarizer app that may summarize all of your emails or the day in 500 phrases, saving your time that may have somewhat gone studying all of them.
ii. Podcast summarizer software, that may summarize your favorite podcasts when you are at work.
A. Sure, a mannequin bigger than Phi3 can be utilized, however, that’s not advisable for Raspberry Pi, not even 8GB mannequin. Bigger fashions like Llama 2, 3, Mistral are enormous and would require extra RAM to run on the system. Gemma 2B is an alternate mannequin that can be utilized as an alternative of Phi3.
A. Completely! You should utilize some other embedding service as an alternative of working it by way of Ollama. This may save useful resource and be quicker to do doc ingestion.
The media proven on this article is just not owned by Analytics Vidhya and is used on the Creator’s discretion.