Hiya, at this time we will present the best way to arrange single and multi-GPU H100 situations with Paperspace. Observe alongside utilizing the connected video as we go over the setup process, launch settings, and accessing the machine with as little overhead as attainable.
In case you want to entry the machines utilizing SSH out of your native, you’ll want to setup SSH earlier than launching the Machine -> Video Tutorial on setting SSH
Navigating the Paperspace Web site
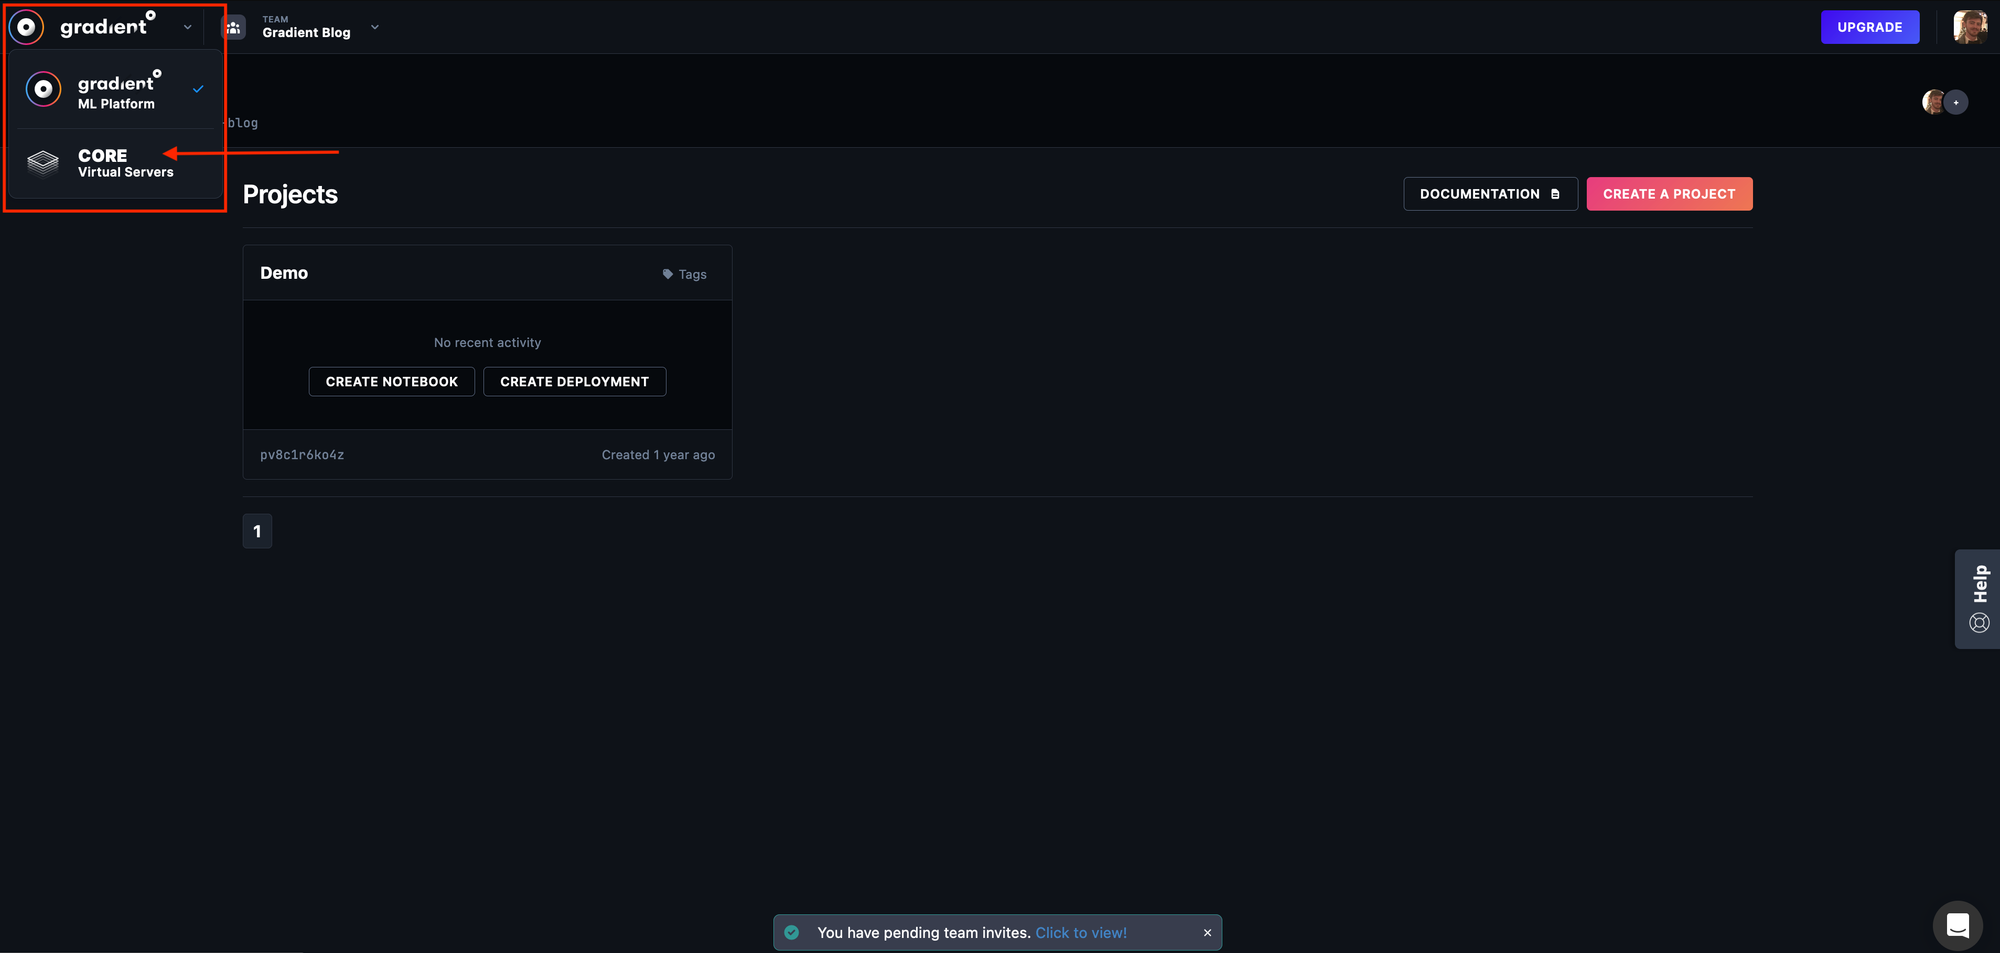
The primary we’ll do is signal into the console. If we don’t have already got an account on Paperspace, then we have to make one. Subsequent, be sure we’re within the Core product. We will change between Core and Gradient utilizing the dropdown menu within the prime left of the display screen.
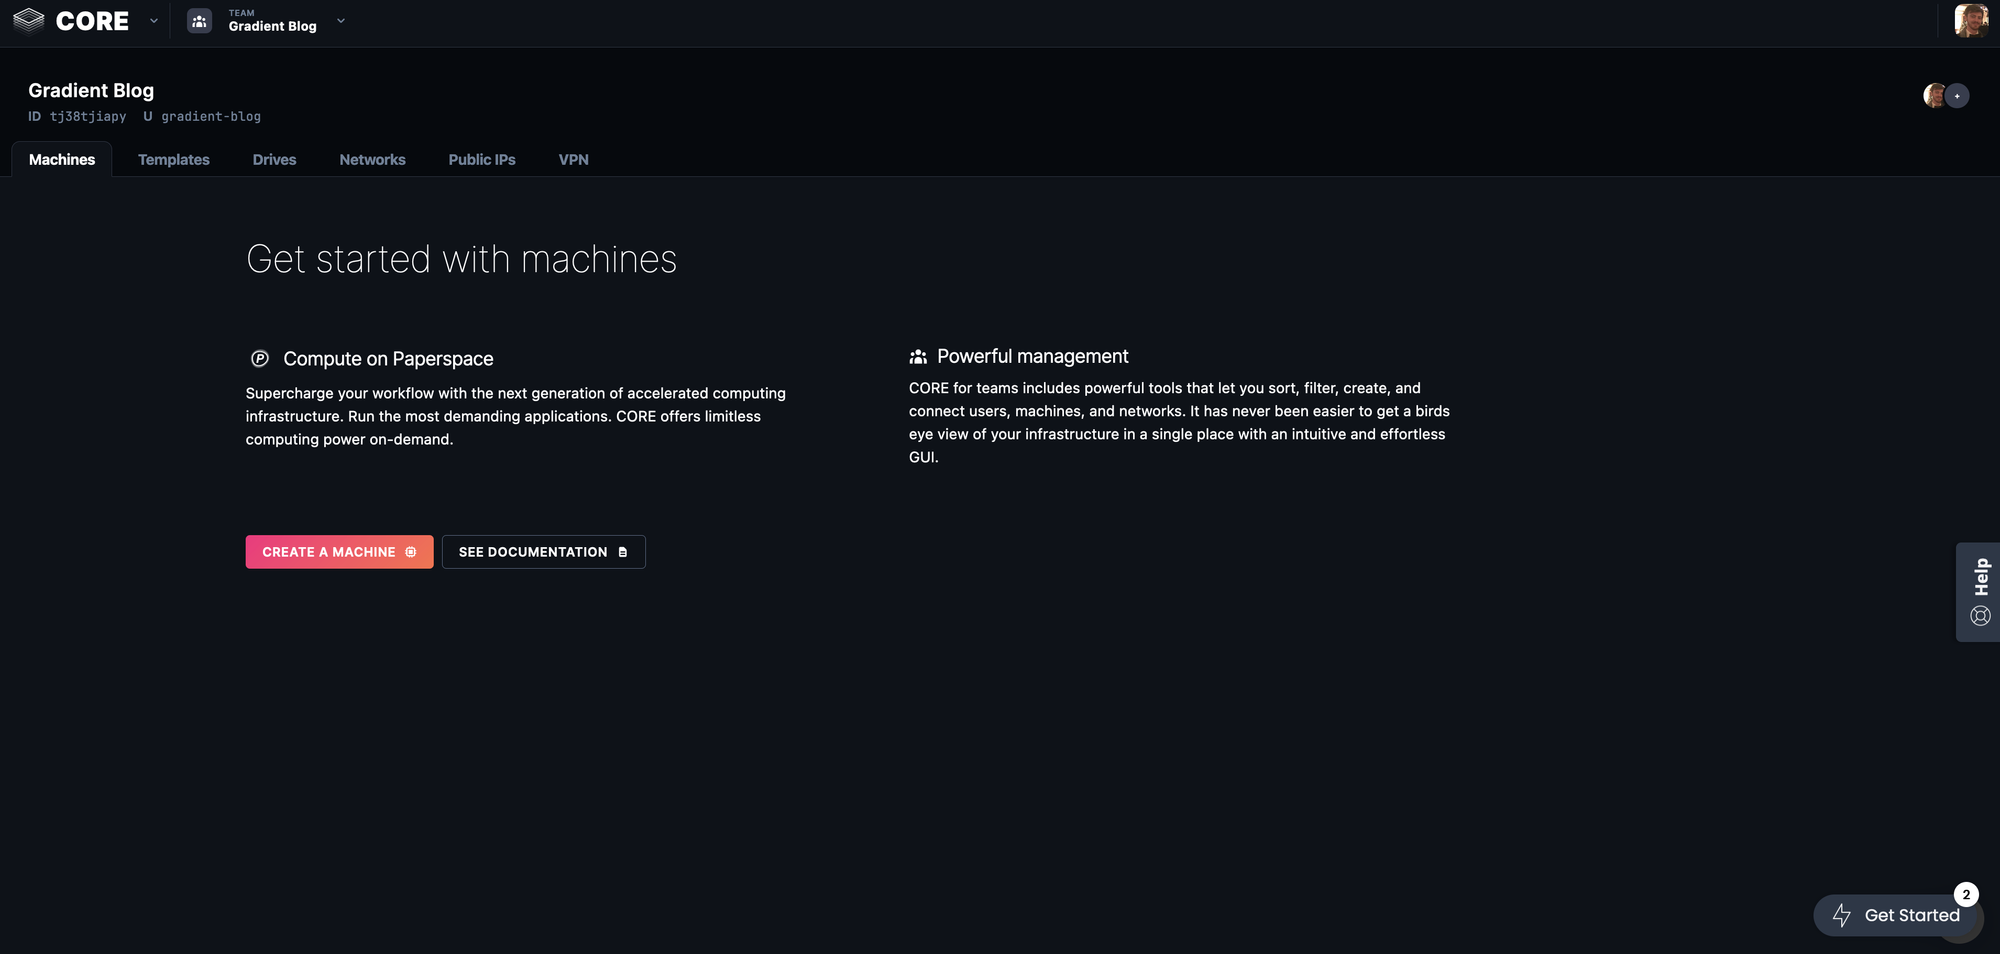
We will affirm that we’re in the suitable part if we see “Machines” and “Templates” within the tabs. Subsequent, click on the pink “Create a Machine” button to start machine creation.
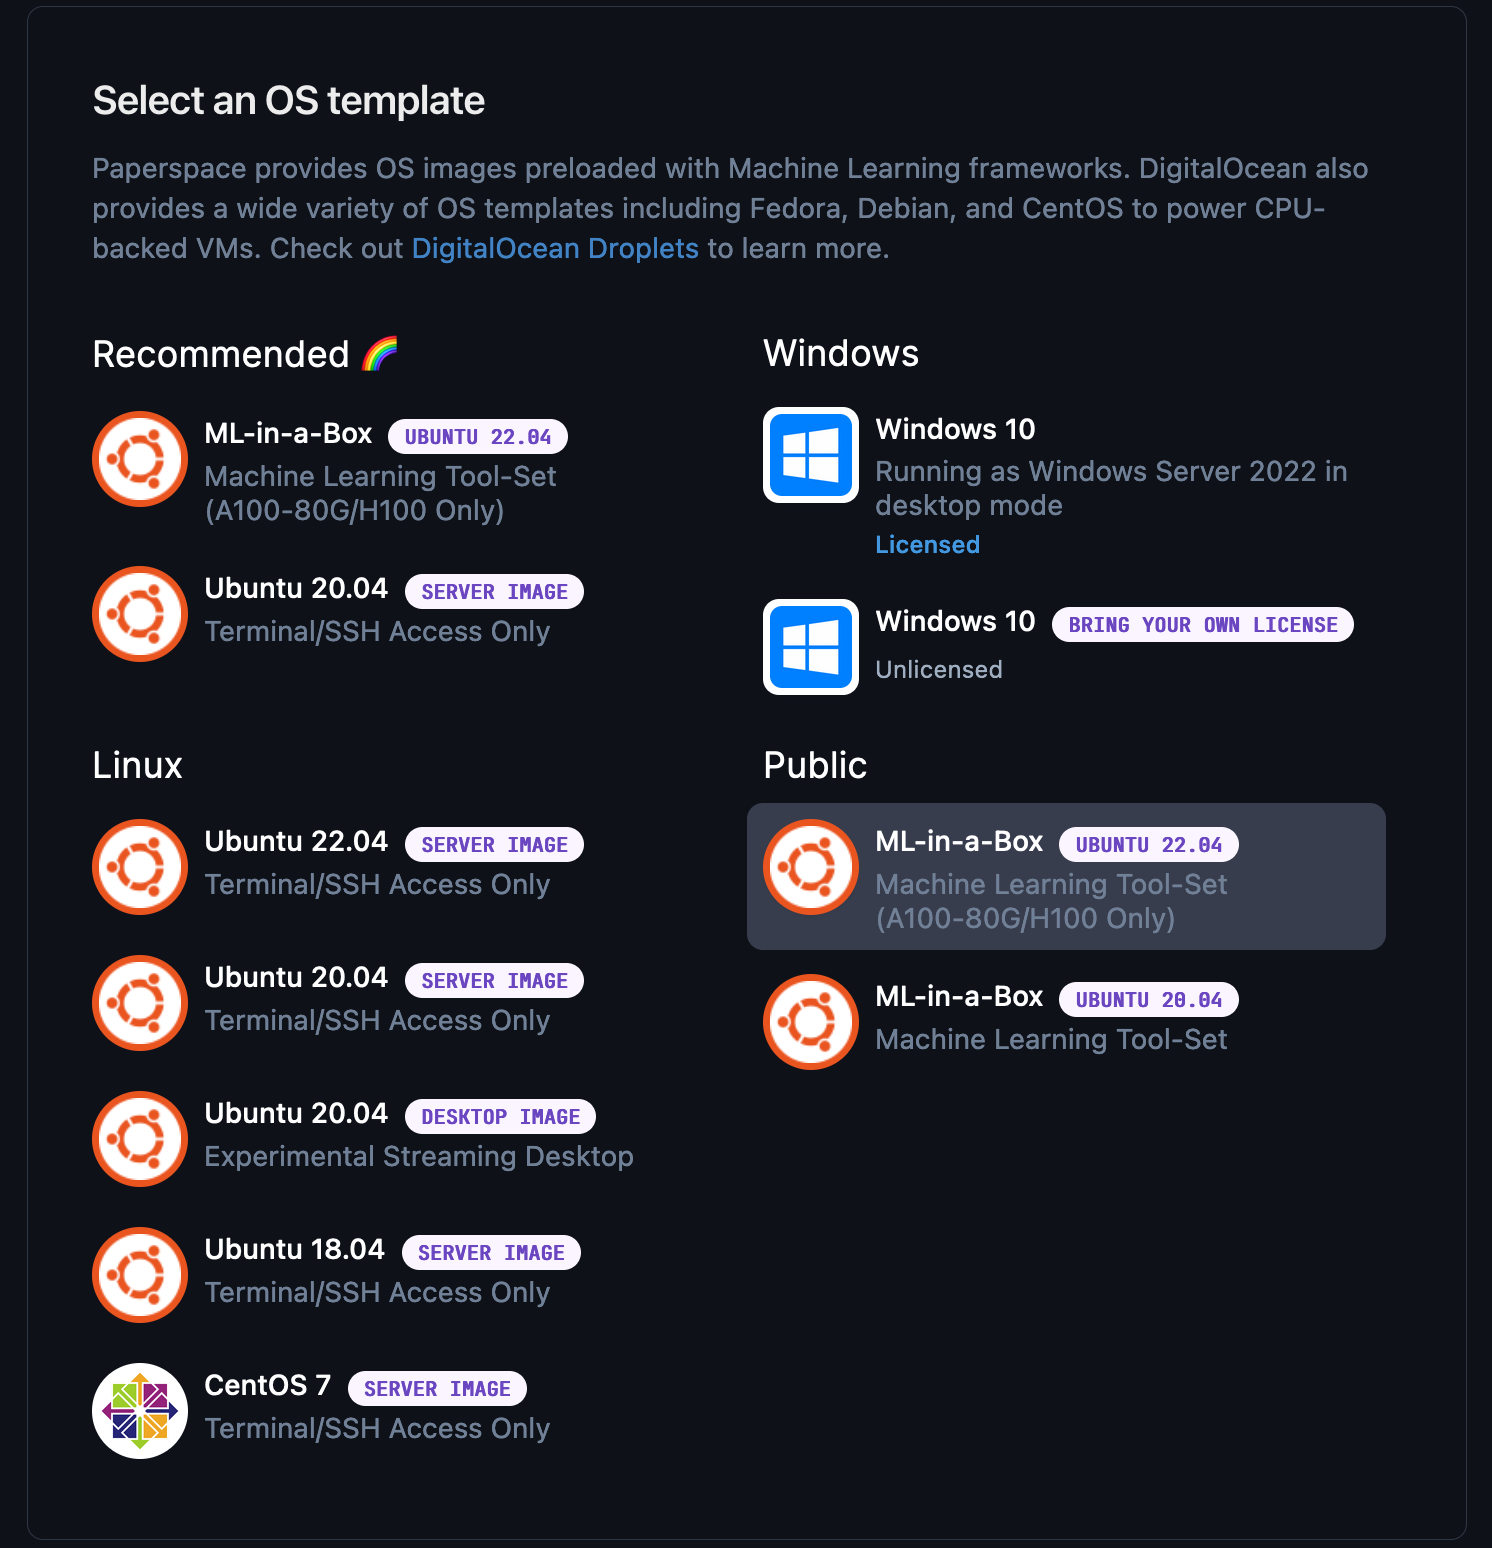
Inside the Machine creation web page, now we have a variety of totally different selections. First, we might want to choose our template. These templates present prepared installations of Linux and Home windows working methods with related packages for our customers. On this instance, we are going to use the ML-in-a-box template. This template has been optimized for Deep Studying and AI improvement, is repeatedly up to date to take care of parity with in style bundle releases, and is our beneficial template for any consumer in who needs to work on DL or AI.
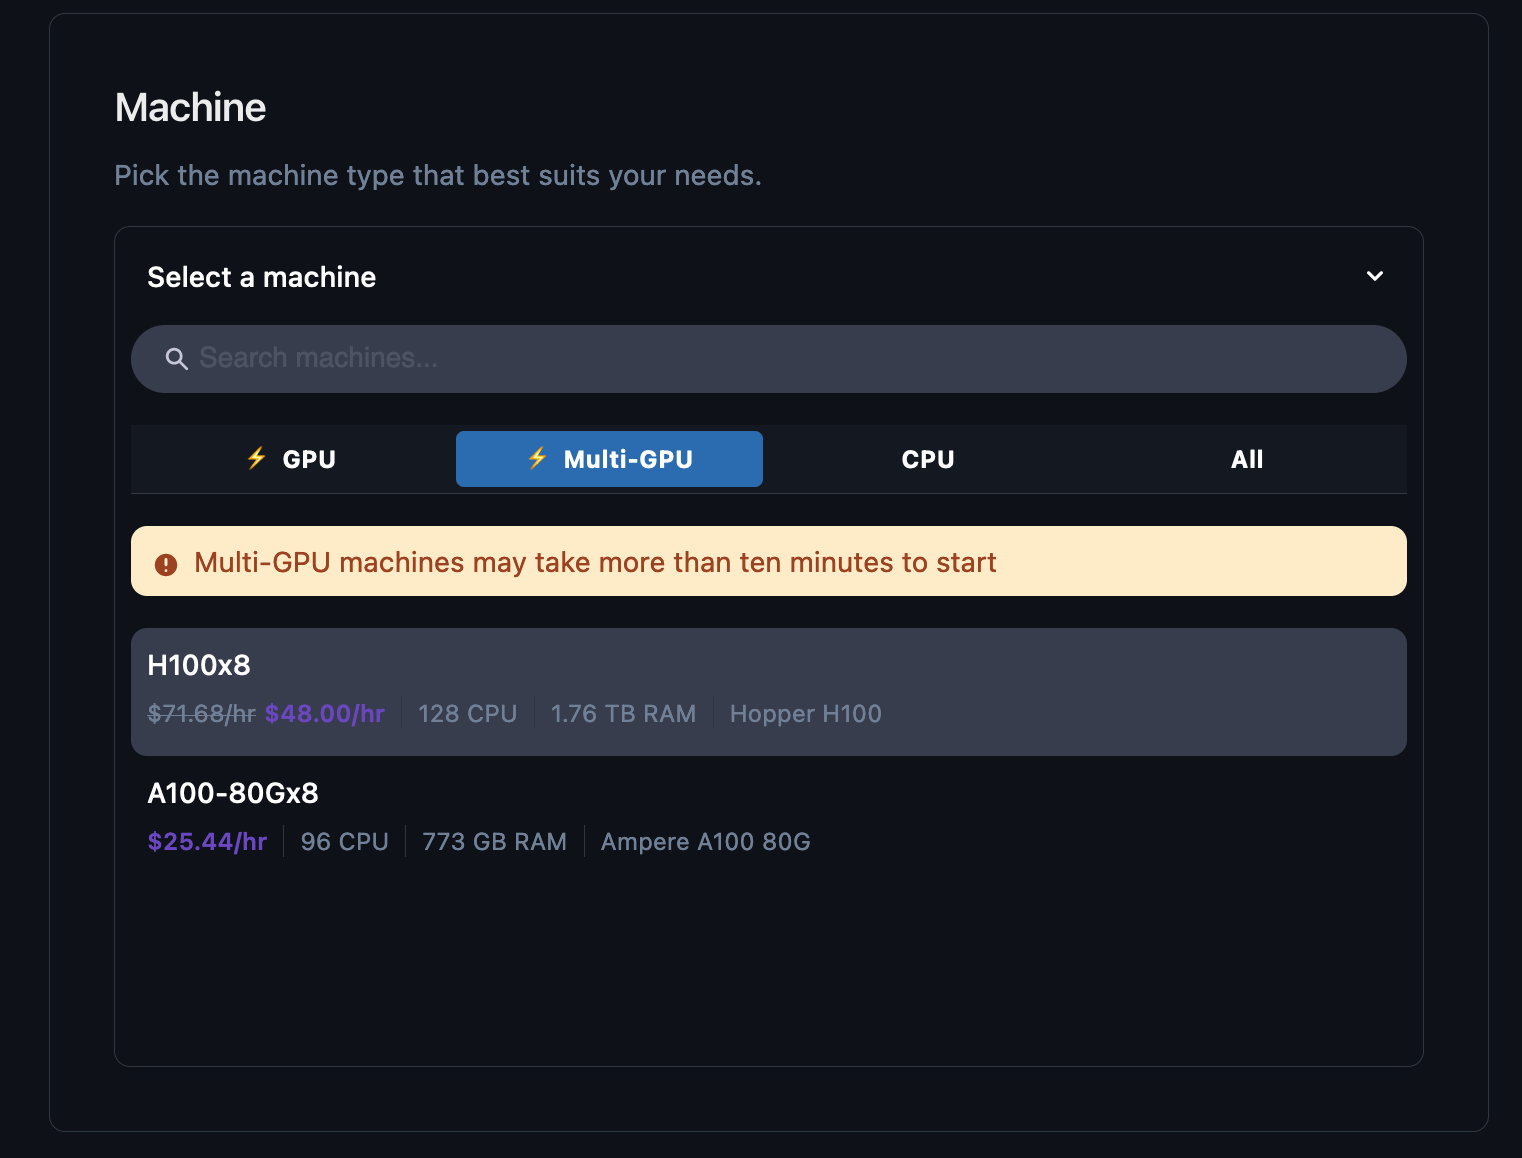
Subsequent, now we have the machine choice. Notably, on the time of this text’s writing, there’s a main low cost on each H100 and A100 machines. Regardless, for the video instance, we selected to make use of the 8-way H100.

After the machine choice, now we have some widespread settings for customers to regulate, specifically the area, personal community. obtainable disk dimension, and NVLink. The area and NVLink are immutable, required settings so we are able to ignore them. It’s price noting, nevertheless, that these machines are at present all working at our east coast, USA (NY2) information middle. This will have an effect on us if we’re working someplace distant from the US, so please hold that in thoughts when testing.
Subsequent, to pick an H100 it is going to require a non-public community, so go forward and instantiate a non-public community along with your title of alternative. We known as ours “testnet”. Ensure to set this up, or the machine is not going to launch.
Final, we are able to select our disk dimension. If we’re engaged on any type of AI program you might have considered trying 500 gigabytes or a terabyte. The utmost storage is 2 TB, however contacting our gross sales staff may give entry to extra cupboard space, as wanted.
To spherical out this machine creation course of, we even have a plethora of superior settings we are able to regulate. We advocate toggling this part to make a number of modifications to verify every thing runs easily.
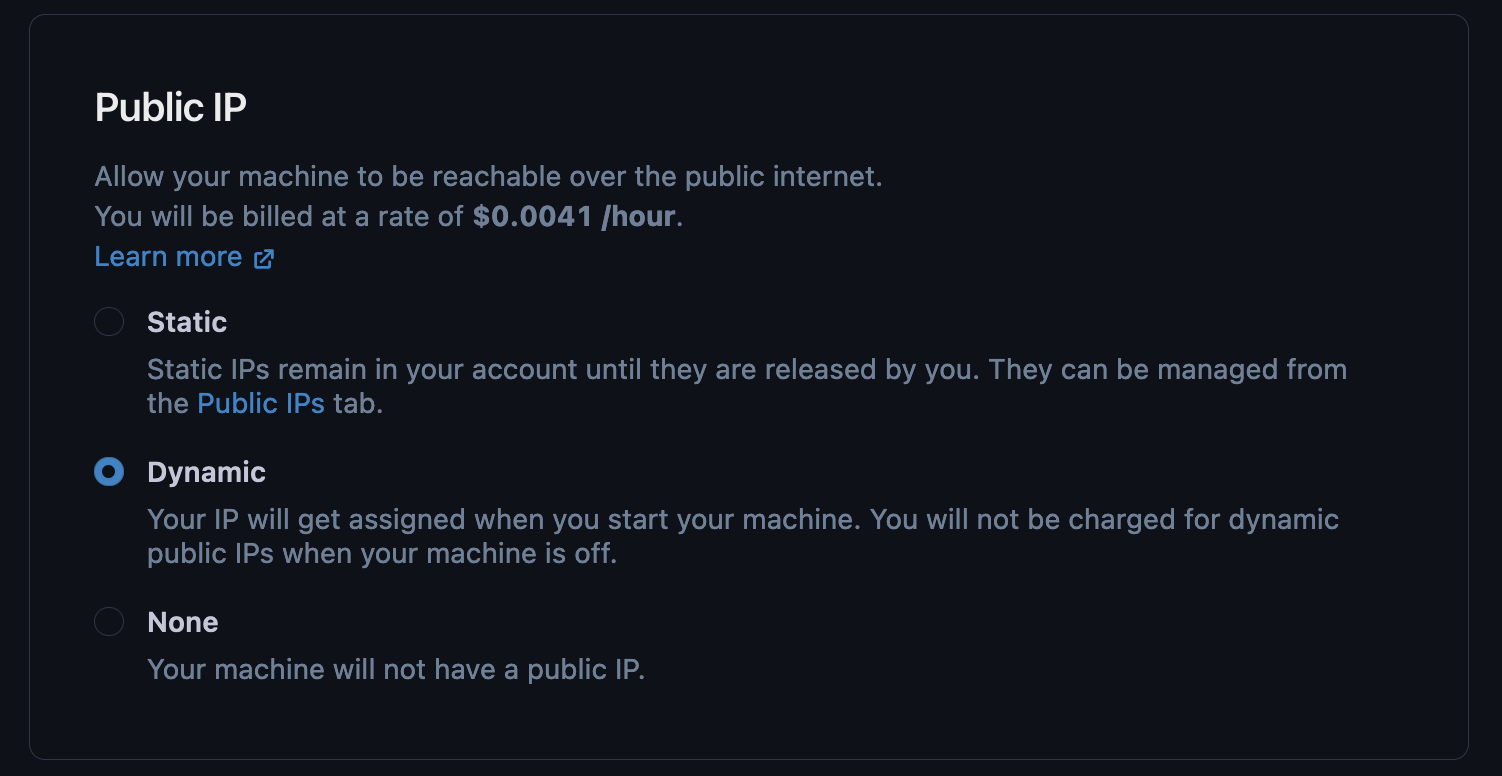
First, set a Machine title. That is simply greatest follow. Subsequent, make sure the Public IP is ready to “Dynamic” if you want SSH entry to the machine out of your native surroundings. Subsequent, we are able to regulate the cadence of taking snapshots. These snapshots will act as backups for our work, and can be utilized to regress the machine again to a earlier state.
Lastly, we get to try the value abstract. This offers an correct measure of every of the related prices the machine will incur, offline and on-line, when you requisition the Machine. Storage, public IPs, and automated snapshotting all comes with a cost lower than 1 US cent per hour.
As soon as that is all carried out, we are able to hit begin!
In case you want to entry the machines utilizing SSH out of your native, you’ll want to setup SSH earlier than launching the Machine -> Video Tutorial on setting SSH
The Machine particulars web page
As soon as the Machine launches, we’re redirected to the brand new Machines Particulars web page. The Machine particulars web page incorporates every thing wanted to entry, preserve, and handle our Machine, in addition to our listing of Snapshots and different helpful info.
Utilizing the tabs in prime proper of the small print window above, we are able to take a look at a wide range of helpful integrations to our machine:
- We will generate a snapshot and regulate snapshot settings
- We will generate a template of our pc at a moments discover
- We will take a look at the logs of all of the work our machine’s carried out
- We will connect shared drives and setup storage throughout totally different Machines
- We will additionally do extra minor or common settings adjustment if we have to make them. We will additionally deactivate our machine from right here if we have to and set an auto shutdown time.
Utilizing our machine
Again within the particulars web page we are able to click on on the “open desktop” button to stream our desktop inside our browser. As we are able to see within the video walkthrough, this can be a Linux Ubuntu desktop simply in a browser window, and ought to be very acquainted to most pc customers. Inside the desktop we are able to do issues like open up an internet browser, open up a terminal, and many others. like several native machine. For our instance, we ran nvidia-smi to point out the GPUs within the system. Now that is simply one of many methods you possibly can entry your core machine.
Moreover, you can too SSH in. As we talked about at the beginning, you’ll want to arrange SSH earlier than beginning your Machine to keep away from any connectivity points. As we are able to see within the video, subsequent to the button to stream the desktop, there’s an “Entry Your Machine” button. We will additionally get it from the principle machines web page by hovering over the working machine and clicking “Join”. Doing so will give us our SSH passcode, and if we have already arrange our terminal beforehand to simply accept SSH keys from Paperspace, then you need to be good to go. Simply merely enter in your SSH passcode into your native terminal, and you will get began. Within the video, we once more ran nvidia-smi. simply to point out that we’re certainly on the identical machine right here with our eight linked H100s with NVLink.
We will now start doing no matter work we have to do on the H100x8 occasion! Thanks for studying, and luxuriate in utilizing Paperspace.