32
As we work on our computer systems, the space for storing accessible to us can rapidly diminish because of the accumulation of information and purposes. This difficulty just isn’t unique to standard working programs similar to Home windows or macOS, however additionally it is prevalent in ChromeOS, notably when utilizing Linux. From my perspective, the mix of Linux and ChromeOS is intriguing because it enhances the complexity and flexibility of the in any other case simple ChromeOS setup.
Nevertheless, amidst the options and advantages, we come upon a roadblock, the tedious process of resizing the Linux storage measurement on ChromeOS. A process that originally appeared formidable to me however finally changed into a street of discovery and studying. On this article, I’ll information you step-by-step, sharing not solely the directions but additionally sprinkling in a few of my private experiences – the likes, the dislikes, and every little thing in between. So, let’s embark on this journey collectively.
Understanding the necessity to resize Linux storage on ChromeOS
Earlier than we dive into the sensible side, it’s necessary to know why one would wish to resize Linux storage on ChromeOS. It wasn’t too way back when I discovered myself in a state of affairs the place I needed to deal with giant datasets for a venture I used to be engaged on. I spotted that resizing the space for storing was an unavoidable process, a obligatory step to make room for extra advanced, space-consuming operations.
The need comes from the truth that Linux on ChromeOS, by default, allocates a restricted quantity of space for storing which could be rapidly consumed relying in your utilization. Resizing it ensures that you could proceed to put in new purposes and retailer information with out worrying about working out of house.
Getting ready for the resizing: Understanding your present storage state of affairs
To start, let’s assess the present storage state of affairs. It’s important to have a well-organized workspace. Begin by eradicating any unused information or purposes which might be taking on house. It’s like uncovering hidden treasures whereas cleansing a room as a baby. Within the realm of ChromeOS, this would possibly entail discovering information or purposes that serve no sensible goal and are simply taking on house.
To verify the present storage state of affairs, you’d wish to:
- Open the Linux terminal in your ChromeOS.
- Sort the next command and hit enter:
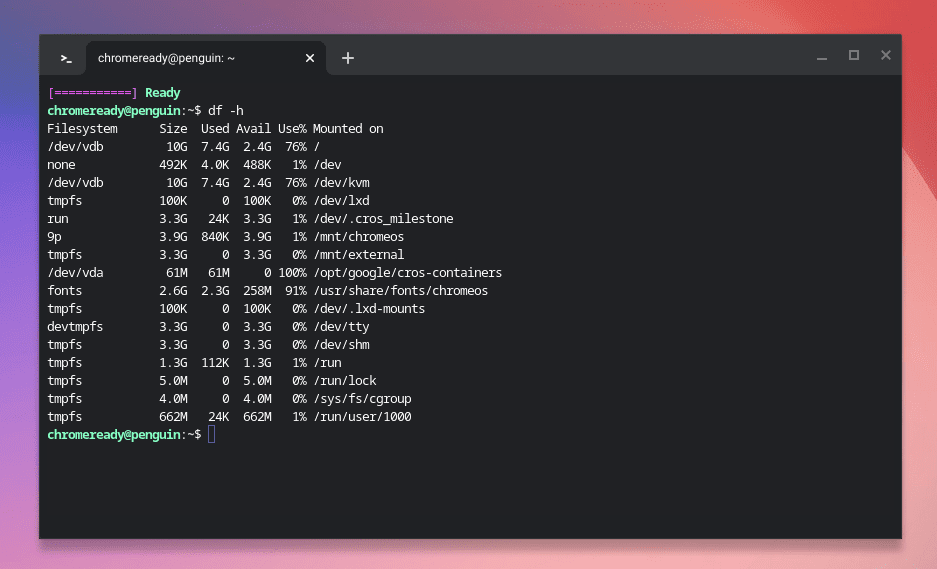
Checking house consumed by Linux on ChromeOS
This command will present you the quantity of house accessible and utilized in a human-readable format. Notice down the main points as we’d be referring again to them as we proceed.
Initiating the resizing course of: A step-by-step information
After understanding your storage wants, let’s transfer on to the primary occasion: resizing the Linux storage measurement on ChromeOS. That is the place my journey acquired a bit intricate and detailed. It felt like entering into an artist’s studio, able to mould my workspace to my choice, albeit with a little bit of warning.
Step 1: Launching the Linux (Beta) settings
As soon as your information is backed up and protected, navigate to your ChromeOS settings. Within the settings, search for the “Superior”> “Builders” part and choose “Linux (Beta)”. That is the place we are going to discover choices to handle the Linux container, together with resizing the disk measurement.
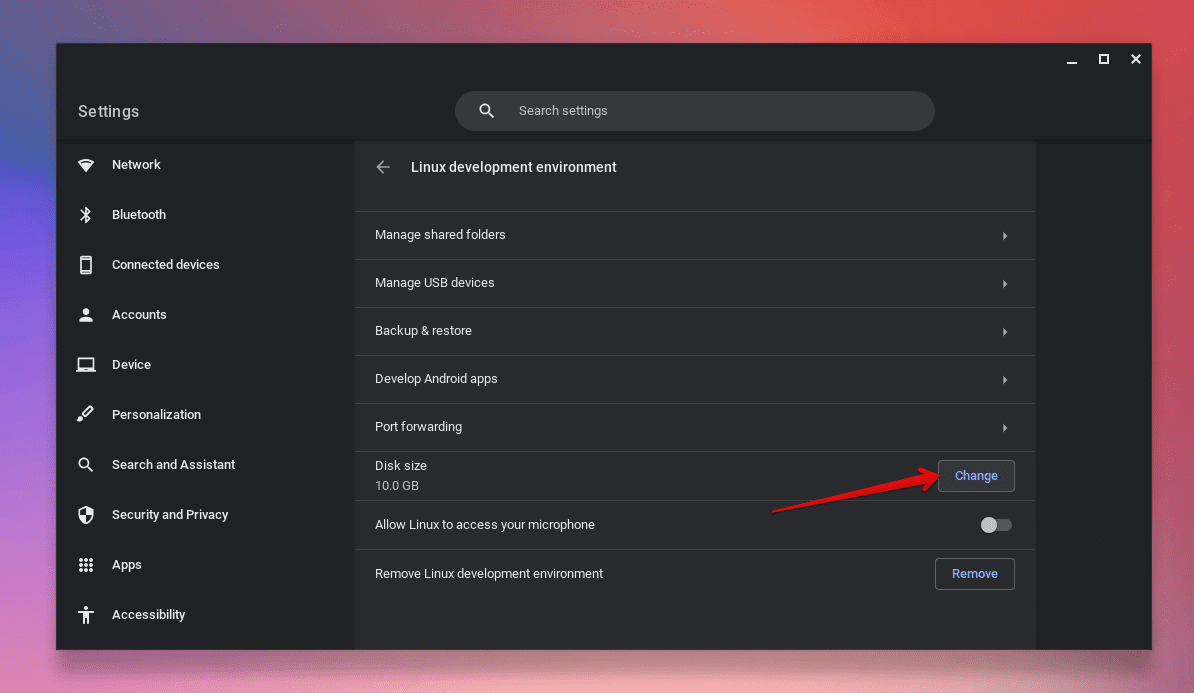
ChromeOS settings – Linux measurement
Step 3: Resizing the Disk
Now, this step felt like standing in entrance of a canvas, prepared to color my masterpiece. However earlier than wielding my brush, I needed to set the stage proper. Equally, earlier than we resize the disk, we have to make sure that the Linux container is turned off. You’ll be able to flip it off by clicking on the “Shutdown” button within the Linux (Beta) settings.
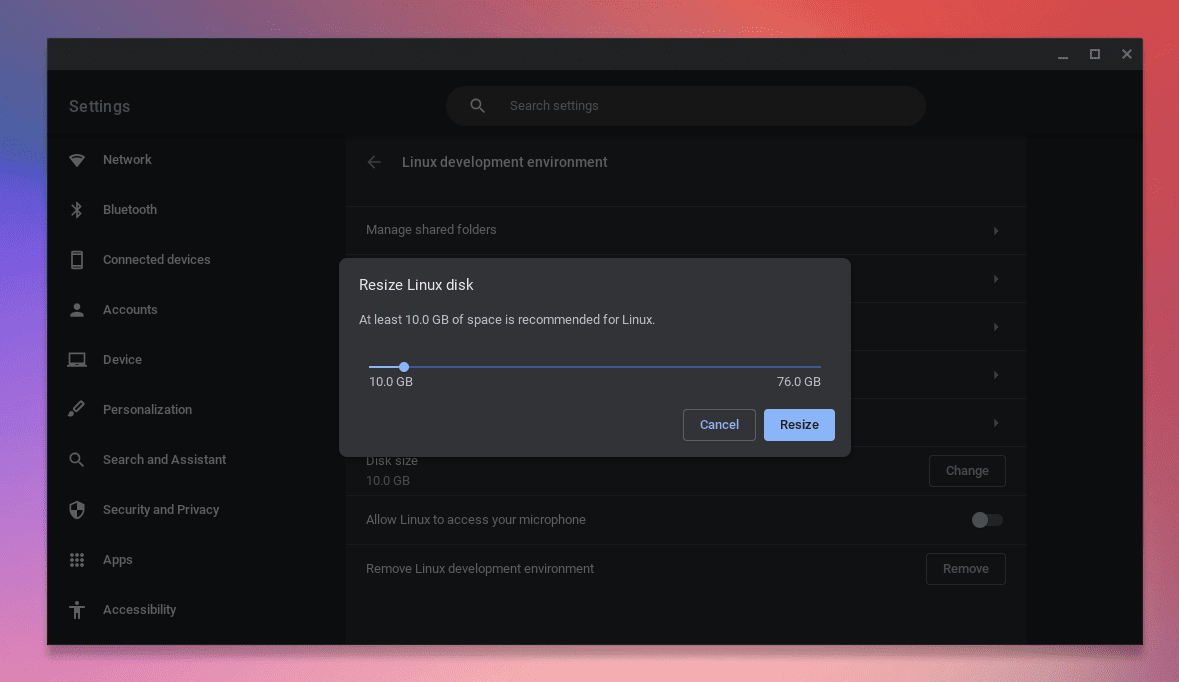
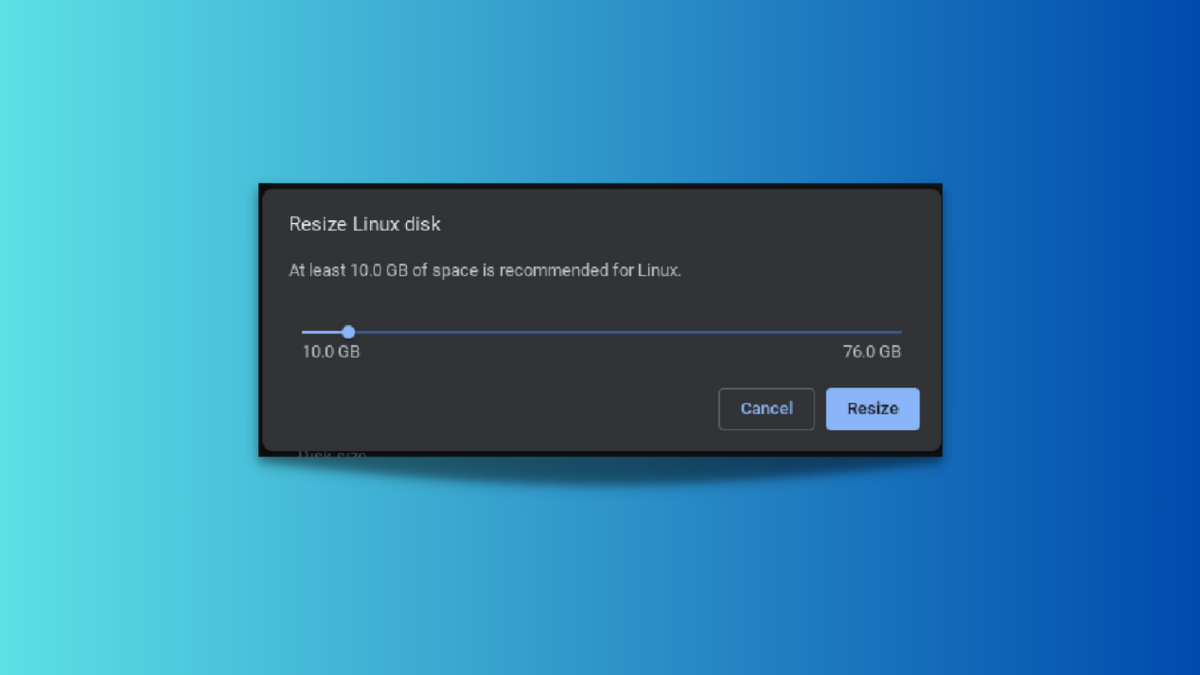
Asjusting Linux measurement on ChromeOS
As soon as the Linux container is shut down, you’ll discover the “Disk” part the place you may modify the disk measurement by shifting the slider. Transfer the slider to allocate the specified quantity of house. Bear in mind, it’s at all times good to allocate a bit extra space than you suppose you’ll want. Personally, I choose having a beneficiant quantity of house in order that I don’t need to undergo the resizing course of often.
After getting chosen your required house, merely click on on the “Resize” button to provoke the method. Please be aware that it might take a couple of minutes for the resizing to be accomplished. Throughout this time, I skilled a mixture of eagerness and expectation just like that of eagerly awaiting a wonderfully ready gourmand meal.
Testing the brand new setup
As soon as the resizing course of is accomplished, it’s time to check the brand new setup. It jogs my memory of the joyous second once I step again and admire my newly organized room, taking a psychological be aware of the adjustments. Equally, launch the Linux terminal and use the df -h command as soon as once more to verify the brand new storage measurement. It’s satisfying to see that extra house, prepared to deal with new purposes and information. For example, check out the screenshot beneath. I now have an extra 5GB of storage on Linux in comparison with the earlier screenshot.
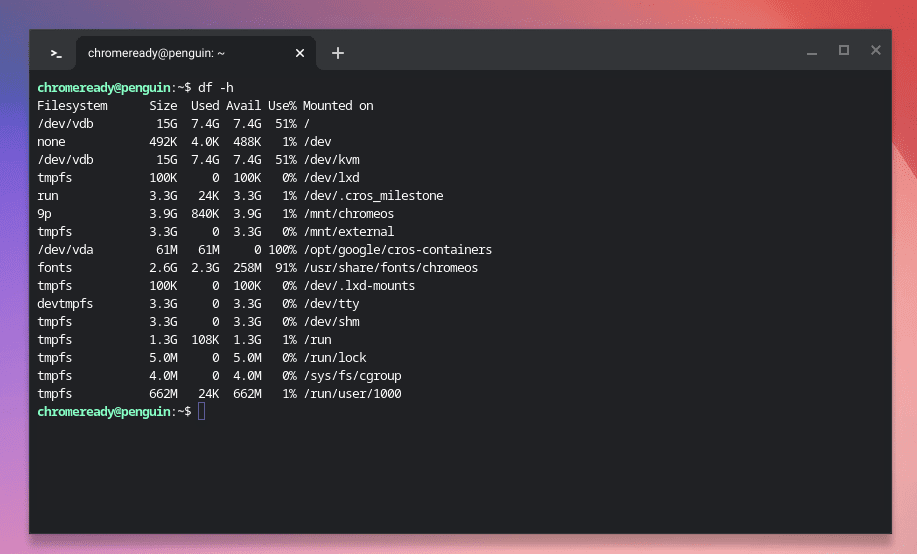
Checking disk house utilization
Conclusion
Relating to resizing, it’s crucial to be meticulous and diligent. Though the process is probably not overly sophisticated, it calls for cautious consideration to stop information loss or errors. It’s advisable to allocate barely extra space than you anticipate needing to keep away from having to resize once more within the close to future. This strategy is not going to solely save time but additionally defend the system from potential errors attributable to inadequate house.