
Chrome Accessibility Options for the Classroom
All About Chromebook Accessibility Options
Chromebooks are quick and easy units for the classroom, however are they a superb choice for learners with particular wants?
How do Chromebook accessibility options evaluate with iPad accessibility options, text-to-speech instruments, or display readers out there on Home windows units?
What accessibility choices can be found on a Chromebook?
Google’s mission is to arrange the world’s info and make it accessible to everybody, together with people with disabilities.
“Everybody ought to have the ability to entry and benefit from the net. We’re dedicated to creating {that a} actuality.” – The Google Accessibility group (@GoogleAccess)
The Google Accessibility group has made vital enhancements to the accessibility options for Chromebooks. Options like ChromeVox (display reader), Choose-to-speak (Textual content to speech), Dictation (voice typing) assist college students and adults navigate and work together with the net.
I’m not a particular schooling or adaptive expertise skilled, however I’ve had many college students in my classroom with IEPs and varied studying challenges. I additionally work with plenty of topic space academics in the identical scenario.
This Chromebook accessibility information offers you easy, clear explanations of every Chromebook accessibility function and recommend ways in which you should use them to assist college students overcome studying obstacles.
It’s our responsibility as educators to do no matter we are able to to eradicate obstacles to scholar studying. Understanding the accessibility options out there on a Chromebook is a superb place to start out!
You is likely to be stunned!
Whereas these Chromebook accessibility options had been created people with visible impairments, studying disabilities, or bodily impairments, they’ve some inventive purposes that may profit everybody!
As I examined and experimented with these Chromebook accessibility options I found that a lot of them are extremely helpful when presenting to a big group of scholars or adults.
Options like Display zoom, “spotlight mouse cursor” and dictation are fantastic for expertise academics and trainers!
Don’t restrict your use of Chromebook accessibility options to college students with studying wants! Everybody can profit!
Chromebook Accessibility Apps and Extensions
This submit focuses solely on the built-in Chromebook accessibility options.
There are some useful Chrome apps and extensions that supply much more assist for college kids with particular studying wants. However for now, we’ll simply be wanting on the built-in accessibility options for Chromebooks.
Let’s get began!
How one can allow accessibility options on a Chromebook
Accessibility options are turned off by default on a Chromebook. The very first thing you’ll want to do is flip them on in order that they are often simply accessed by means of the system menu the place you sometimes log off, connect with wifi, and so on.
How one can allow accessibility function on a Chromebook:
- Click on on the “snowman” on the high proper nook of the Chrome browser and choose “settings”
- On the settings web page, seek for “accessibility”
- Search for the choice that claims “At all times present accessibility choices within the system menu” and switch the swap on.
- That’s it! The accessibility options are actually simply accessible within the system menu on the backside proper nook of your Chromebook.
How one can Disable Chromebook Accessibility Options
You possibly can simply allow and disable accessibility options by means of the system menu. That is necessary as some accessibility options are annoying to have enabled on a regular basis.
As a expertise coach, I often flip options like dictation and spotlight mouse cursor on and off all through the day.
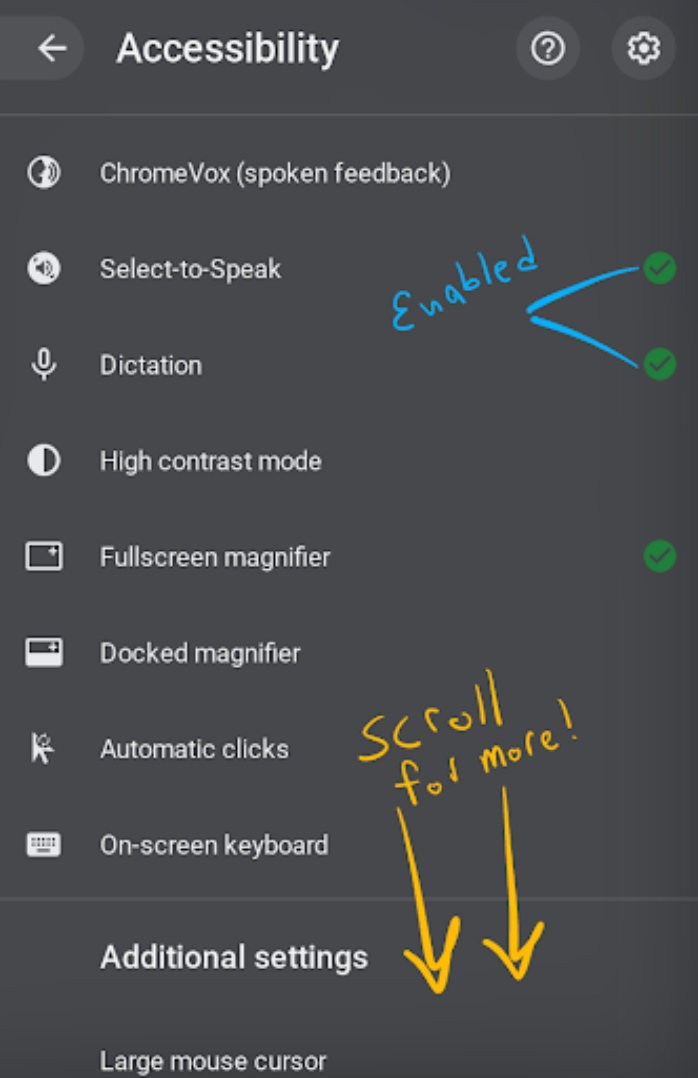
Simply click on the system menu (backside proper nook of your Chromebook, the place you sometimes log off), choose “accessibility” and choose the function you wish to allow or disable.
Options which might be enabled are recognized with a inexperienced verify mark.
Alter your accessibility settings within the Google Admin console to keep away from issues
Chromebook accessibility options are “gadget sticky” by default. This could trigger issues in a classroom setting.
Here’s a quite common scenario:
- Scholar A makes use of a Chromebook throughout first interval and turns an accessibility function on
- Scholar B makes use of the identical Chromebook throughout second interval and discovers that the accessibility options are nonetheless enabled.
In a faculty setting the place Chromebooks are shared by many various college students, you need accessibility settings to be related to a scholar account, not the gadget.
When accessibility settings are “gadget sticky” issues can happen!
Center college college students discover it entertaining to activate the extra annoying accessibility settings (like ChromeVox) proper earlier than they signal out of the gadget.
The following scholar who indicators into the Chromebook is startled when their Chromebook begins speaking to them!
To keep away from this irritating scenario I like to recommend that district directors verify a single, necessary field within the Google Admin console: “Flip off accessibility setting on sign-in display upon logout.”
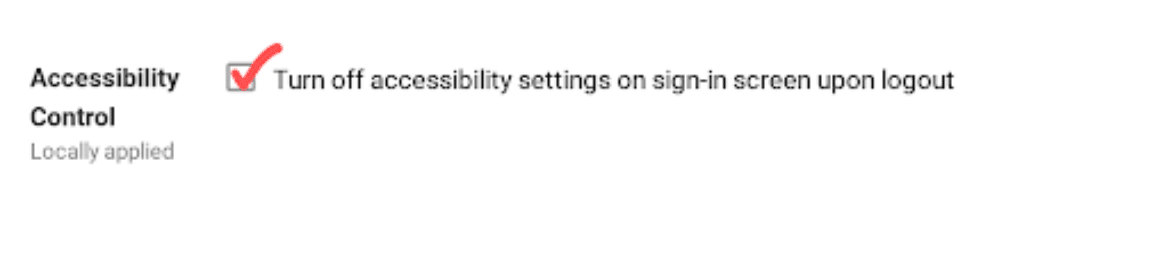
Admin Console Path: Gadget administration > Chrome > Gadget Settings > Signal In Settings > Accessibility Management
Checking this field will disable any enabled accessibility when consumer indicators out of a Chromebook.
Enabling this setting won’t stop a scholar from utilizing accessibility options when they’re signed in, however these adjustments gained’t affect different college students who use the identical gadget.
▶ Word: to make this variation you’ll need entry to the Google Admin console.
Now that we’ve these necessary setup notes out of the way in which, let’s dive into every Google Accessibility function and take into account how we are able to use it within the classroom.
ChromeVox (Spoken Suggestions)
ChromeVox is a display reader for blind customers that enables them to navigate the net by means of verbal prompts.
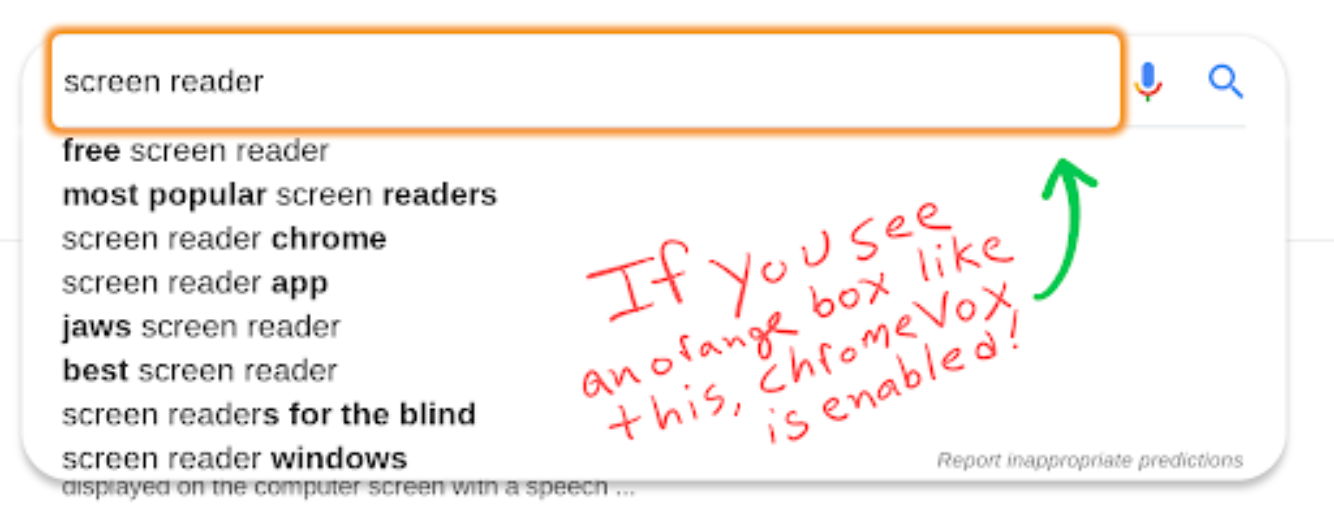
When enabled, ChromeVox locations an orange field round chosen objects and reads the on-screen textual content.
Of the entire accessibility options on a Chromebook, ChromeVox is essentially the most excessive and the one you’re least probably to make use of.
If you’re blind, ChromeVox is succesful display reader. If you’re not blind ChromeVox is extremely annoying!
One of many high accessibility associated searches on Google is “How one can eliminate the orange field on Chromebook.” This function often will get turned on by accident and could be fairly startling and irritating if you happen to don’t know learn how to disable it!
▶ To disable ChromeVox, click on on the system menu of your Chromebook, choose accessibility options, and take away the inexperienced checkmark by clicking “ChromeVox”.
Whereas it is likely to be the primary function listed within the Chromebook accessibility menu, ChromeVox spoken suggestions is designed for a really particular incapacity. Until you could have a blind scholar in your classroom, you possibly can flip off Chromevox.
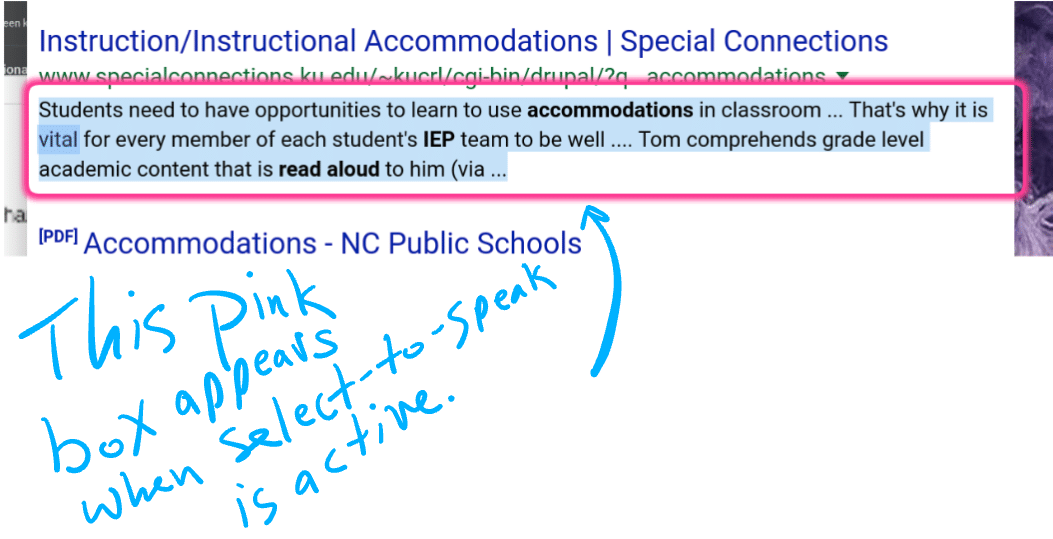
Choose-to-Converse (Textual content to Speech for Chromebooks)
Choose to talk is a Chromebook reader that may learn most on-screen textual content!
Whereas much like ChromeVox, select-to-speak doesn’t activate until a scholar requests it. This makes it a extra helpful classroom accessibility function for college kids who would profit from having textual content learn aloud, however don’t want it on a regular basis.
First, you’ll need to allow select-to-speak from the accessibility system menu in your Chromebook.
As soon as enabled you will notice a brand new icon seem on the shelf (the black bar on the backside of your Chromebook).

You possibly can allow choose to talk in two methods:
- Press the speaker icon on the Chrome Shelf after which drag to pick out the textual content you need learn.
- Spotlight some textual content in your display and press search + s
Choose-to-speak works on MOST web sites together with:
- Google Docs
- Google Kinds
- Google Slides
- PDFs (most, not all)
Choose to talk may help you meet probably the most frequent lodging listed in IEPs – having textual content learn aloud. It even works in Google Kinds throughout a locked quiz!
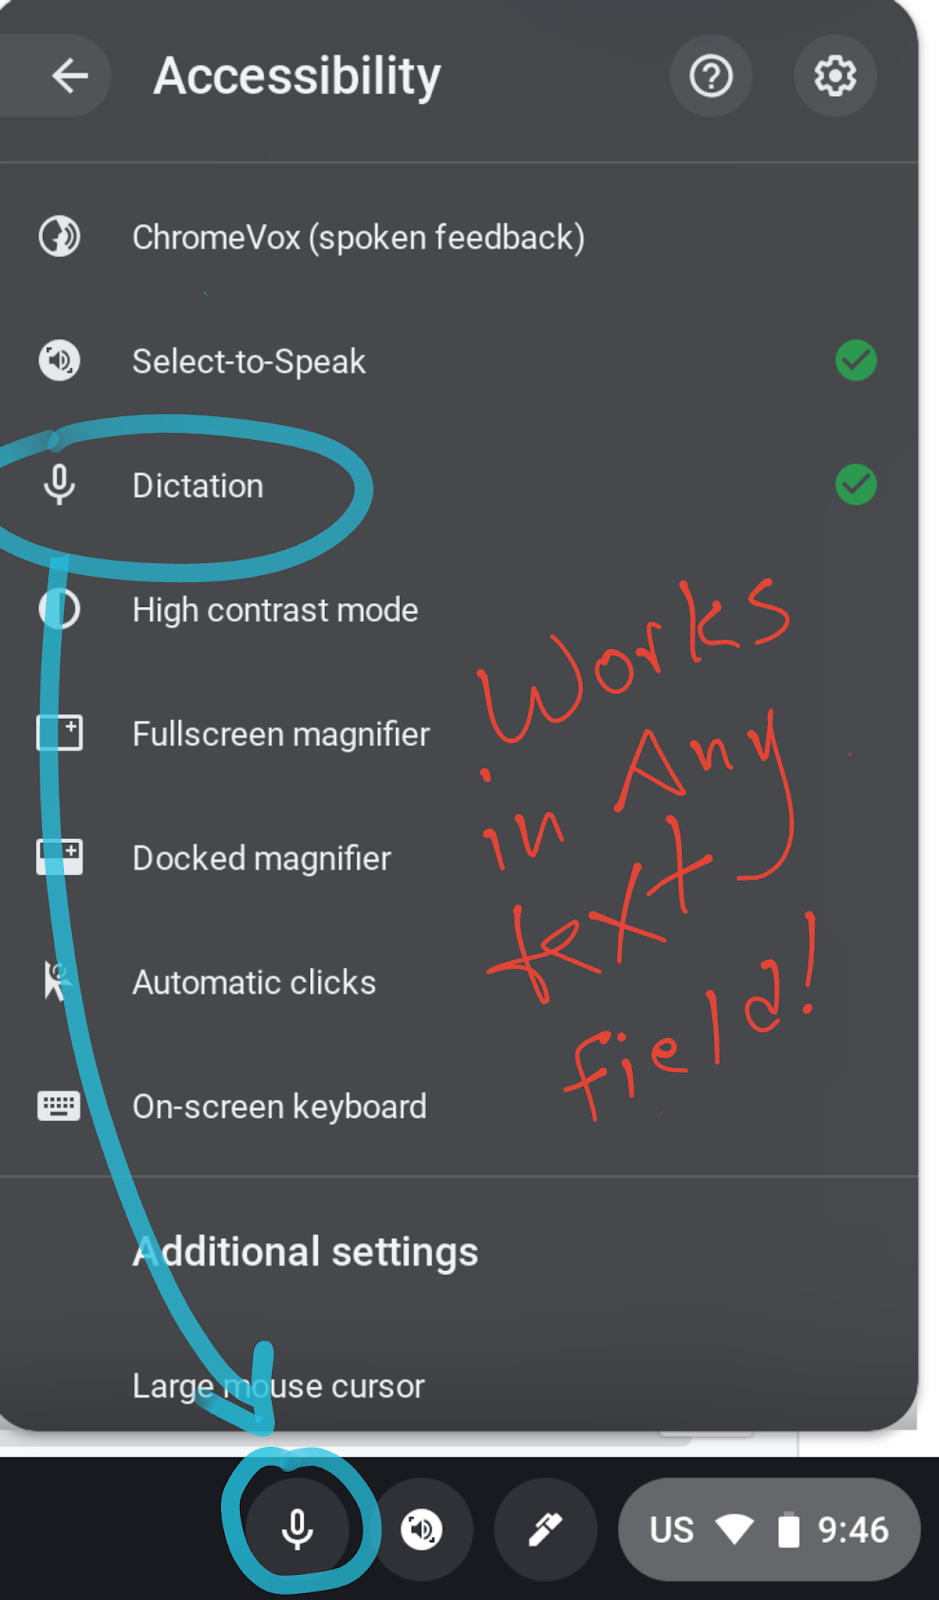
 Dictation
The Dictation function (Chromebook voice typing) is the latest addition to the accessibility lineup…And it’s superior!
Most grownup smartphone customers will likely be acquainted with the idea of voice typing. This function is now out there on all Chromebooks!
Voice typing is superior for college kids who’re gradual typers, poor spellers, or want some further assist getting their ideas “on paper.”
First, you’ll need to guarantee that dictation is enabled by means of the Chromebook accessibility menu.
When you’ve completed that, you will notice a microphone icon seem on the shelf, proper subsequent to the select-to-speak icon.
Click on it to allow Google voice typing in your Chromebook!
I’m typing this sentence proper now utilizing the dictation to textual content function! You possibly can even add punctuation by saying “interval,” “exclamation level” or “query mark.”
▶ You possibly can activate voice typing by utilizing the keyboard shortcut Search + d
The dictation function will work in any textual content subject, together with Google Docs, Slides, Drawing, and so on.
When you present this to your college students and fellow academics they may wish to know learn how to activate Google voice typing too!
You possibly can allow voice typing in two methods:
- Click on in a textual content subject after which press the mic icon on the Chrome Shelf. When you hear a tender “chirp”, start speaking.
- Click on in a textual content subject and press search + d
▶ Word: Google Docs and Slides even have a function known as “voice typing” nonetheless the dictation accessibility function is way extra versatile and can work in additional locations. Give it a strive!
Excessive distinction mode
Excessive distinction mode is a Chromebook accessibility for visually impaired customers.
Some college students who’re delicate to vivid lights can also profit from enabling excessive distinction mode.
Some academics have complained that the “white” look of Google classroom is troublesome for college kids to learn and causes elevated eye pressure.
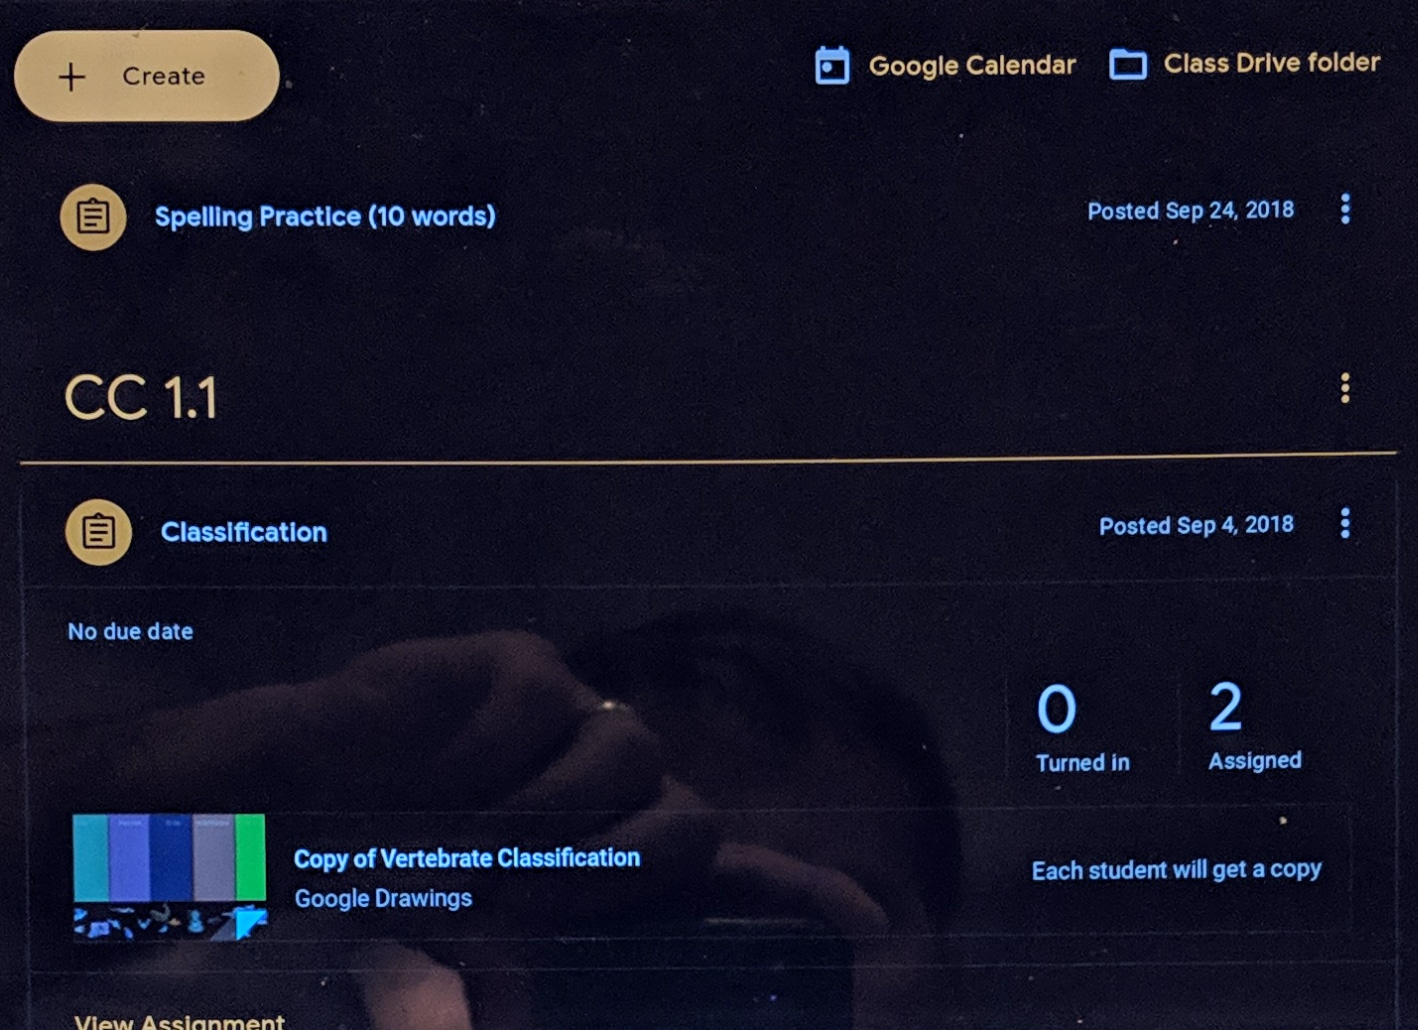
Whilst you can’t regulate the theme of Google Classroom, turning on high-contrast mode would possibly assist.
This image illustrates what Google Classroom seems to be like with high-contrast mode turned on.
▶ You possibly can activate excessive distinction utilizing the keyboard shortcut Search + ctrl + h
Fullscreen magnifier
That is one other function for customers with visible impairments, nevertheless it additionally occurs to be a function I depend on each day!
Fullscreen magnifier is often used to enlarge a portion of the display for simpler studying or to cut back display muddle, serving to college students who’re simply distracted give attention to a selected activity.
It will also be utilized by expertise academics who wish to emphasize a component of the Chrome browser throughout a reside demo.
This can be a marvelous function that I take advantage of as a presenter each day.
Allow full-screen magnifier within the accessibility menu. Once you do that, your display will zoom in slightly bit.
Press and maintain ctrl + alt whereas “scrolling” with two fingers on the trackpad. It will zoom the display in / or out based mostly in your scroll course.
▶ To unzoom a Chromebook display, maintain the ctrl + alt key and “scroll” out along with your fingers, or disable display zoom from the Chromebook accessibility menu.
It’s a bit powerful to elucidate this in phrases. Watch the video embedded beneath for a visible information to utilizing the display zoom function.
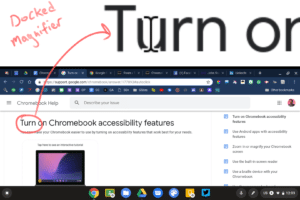
Docked magnifier
Docked magnifier is a variation of the fullscreen magnifier. When enabled, the highest third of your display reveals a extremely enlarged portion of the underside 2/3 of your display.
Lots of people by accident allow this function and it may be fairly annoying if you happen to don’t need it! To unzoom your Chromebook display, click on on accessibility and uncheck docked magnifier.
The docked magnifier can also be helpful for graphic design tasks if it’s essential exactly align objects or have a look at one thing all the way down to the closest pixel.
For those who go to the accessibilities settings you possibly can regulate the zoom magnification from 4x-20x.

You possibly can activate the docked magnifier by utilizing the keyboard shortcut ctrl + search + d
Computerized clicks
Whoever named this function did a fantastic job! When enabled, blue and inexperienced circles will seem round your mouse. When the inexperienced circle is full, a click on is enabled.
This function is useful for people who’re unable to make use of each palms or for youthful college students who wrestle to click on successfully.
On-screen keyboard
It’d come as a shock that the Chromebook, a tool that has a bodily keyboard, additionally has an on-screen keyboard. This is identical expertise that you’ve in your telephone or pill.
The on-screen keyboard is often utilized by people who use eye-tracking software program to navigate their gadget. It’s also activated when you’ve got a Chromebook that converts right into a pill.
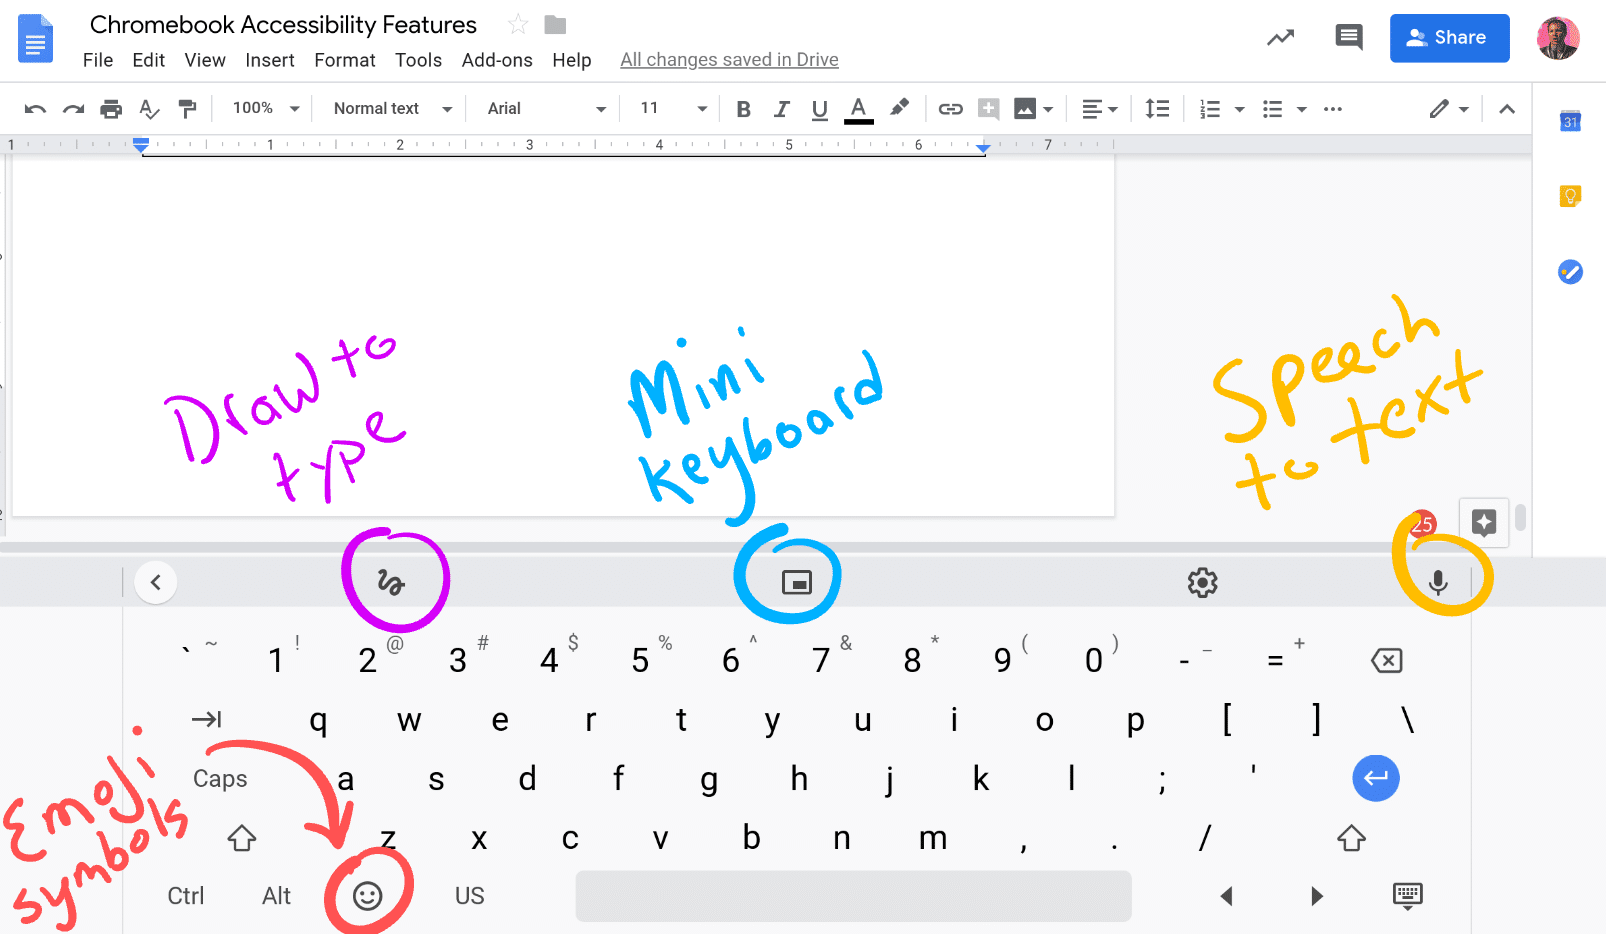
At first look, the on-screen keyboard is fairly regular. However if you happen to take a better look, there are some fairly neat options you possibly can’t discover anyplace else!
Draw to Sort – click on the squiggly line on the keyboard and you’ll draw to kind! This may very well be an incredible approach to assist elementary college students observe their writing abilities!
Emoji Keyboard – similar to your telephone, the Chromebook on-screen keyboard offer you entry to a whole lot of emoji characters!
Dictation – The speech-to-text function is baked proper into the on-screen keyboard, making it straightforward to jot down, kind, or communicate your content material onto the display.
Mini Keyboard – that is really fairly helpful. You possibly can “come out” the on-screen keyboard right into a mini display that floats on high of your different home windows. That is handy if you happen to solely want the keyboard for emoji or particular math symbols.
If the on display keyboard retains popping up, it may be tremendous annoying. To cover the on-screen keyboard you’ll need to disable it from the accessibility menu in your Chromebook.
- Click on the Chrome settings menu (three dots within the higher proper nook)
- Click on on settings
- Seek for “accessibility” from the settings menu
- Open up the accessibility settings and search for “on-screen keyboard”
- Slide the swap to disable the on display keyboard for Google Chrome
Mouse Pointer Accessibility Options
Ever lose your mouse cursor on the display? It occurs.
People with low imaginative and prescient or youthful college students who’re nonetheless studying to navigate their Chromebook can profit from a number of mouse cursor accessibility options:
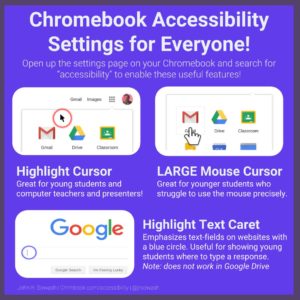
Giant mouse cursor
Enlarges the mouse cursor for elevated visibility. That is useful for younger college students who wrestle to click on exactly.
Spotlight Textual content Caret
When enabled, this function identifies textual content fields with a blue circle; A very good choice for college kids who lose the cursor on an internet web page.
Spotlight object with Keyboard Focus
This function is similar to spotlight textual content caret, however as an alternative of emphasizing the mouse cursor, it highlights your complete textual content subject with an orange field, much like ChromeVox.
Word: Spotlight textual content caret and keyboard focus don’t work in Google Docs or Slides.
Spotlight mouse cursor
When enabled a crimson circle seems across the mouse pointer always. That is a substitute for the massive mouse cursor and could be useful for college kids who often lose the pointer on the web page.
This can be a nice function for laptop academics and expertise trainers. I allow spotlight mouse cursor when I’m main Chromebook workshops. It’s loads simpler to see from the again row when you possibly can comply with the crimson circle!
▶ To eliminate the crimson circle round your cursor, go to the settings web page on your Chromebook, and search for “spotlight mouse cursor.” Disable it and the crimson circle will disappear!
Mono audio
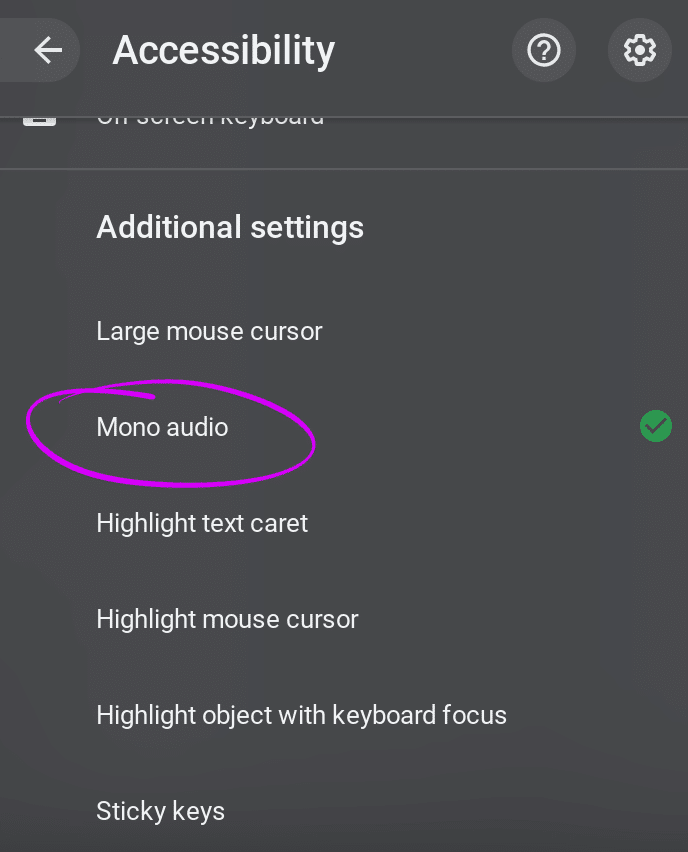
Most audio recordings (music, podcasts, YouTube movies, and so on) are recorded with stereo audio which implies there are barely completely different sounds coming from the left and proper audio system in your Chromebook. In case you have headphones in, take one out and you’ll hear the completely different channels.
Audio recorded in stereo generally is a downside for people who’re deaf in a single ear as they solely hear one a part of the recording.
Enabling mono audio in your Chromebook forces audio to play the identical sounds from each the left and proper channels so that you gained’t miss a factor.
You possibly can hear the distinction by listening to a music on Spotify and flipping the mono audio setting on and off a couple of occasions.
Sticky keys
Typing requires quite a lot of coordination! There are roughly 100 keys on a standard keyboard, however due to varied keyboard mixtures, these 100 keys could be mixed to make hundreds of mixtures when urgent the shift, management, or alt keys.
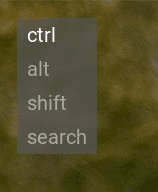
What do sticky keys do? This function was developed for people who’ve problem urgent a number of keys concurrently. When enabled, ctrl, alt, shift, and search turn into “sticky” so that you just don’t have to press two keys on the identical time.
This can be a helpful function for college kids with bodily impairments that stop using each palms (i.e. a scholar who breaks an arm) or younger college students who’re nonetheless growing their tremendous motor abilities.
When sticky keys are enabled, a clear notification will seem within the high left nook of your display if you happen to press the ctrl, shift, alt or search keys.
Wrapping Up
Though I’d take into account myself a Chromebook skilled, (hey, I WROTE the guide on Chromebook!?) I’ve realized a lot by researching this submit.
My major takeaway is that accessibility options are NOT only for people with particular wants. Many of those options I’ve begun utilizing frequently (spotlight mouse cursor, dictation, and display zoom are my favorites!).
However right here’s the factor. For me, these accessibility options are a pleasant BONUS that makes my life simpler. For people who’ve disabilities, these options are important.
“For folks with out disabilities, expertise makes issues simpler. For folks with disabilities, expertise makes issues attainable.” – IBM Coaching Guide 1991
Each trainer has a accountability to develop a primary understanding of the options and controls that may open alternative for college kids with particular wants. That goes for iPads, PCs, and Chromebooks; no matter gadget you utilize in your classroom. I hope this detailed overview of Chromebook accessibility options will make it easier to assist the learners in your classroom!
Contributors: I want to thank Robin Pegg (@RSPegg), Jeff Crocket (@jeffcrockett8), and Karen Chichester (@kchichester) for reviewing and contributing to this submit.