
Authentication is the method of verifying a consumer’s identification earlier than granting entry to an software. This is a vital facet of growth, because it not solely protects our customers’ knowledge but in addition enhances the general consumer expertise. We are able to additionally use the verified particulars to personalize our consumer’s expertise, present tailor-made content material, and supply options like user-specific settings or saved preferences.
On this article, we’ll present a step-by-step information on find out how to authenticate customers in React functions utilizing Appwrite. We’ll additionally have a look at find out how to make use of Appwrite’s options to implement login and signup performance, handle consumer classes, and guarded routes.
What’s Appwrite?
Appwrite is a free, open-source software that helps builders to combine backend know-how into net functions. As a backend service, Appwrite affords totally different options for authentication, starting from multi-factor authentication to account verification and restoration. This makes it simpler for builders to implement safe consumer authentication seamlessly.
Stipulations for Establishing Appwrite in React Initiatives
Earlier than following the steps to combine Appwrite into our React challenge, we have to have the next in place:
- Node.js put in on our machine
- a fundamental understanding of React and JavaScript
- an Appwrite account (we are able to create one totally free)
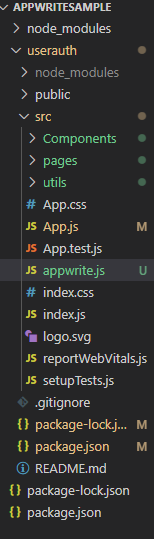
1. Create a React app
Open the terminal and run the next command:
npx create-react-app userauthNavigate to the challenge listing:
2. Select an Appwrite set up methodology
Appwrite gives varied set up choices, permitting us to decide on the set up methodology that most closely fits our preferences. Listed here are among the choices accessible for putting in Appwrite:
- Docker. This selection leverages Docker to simplify the setup and administration inside a containerized setting.
- Self-hosted. This selection gives direct set up on our server, thereby providing extra management however requiring guide configuration.
- Cloud-based deployment. This makes use of a cloud supplier for managed companies, scalability, and minimal setup overhead.
- Appwrite command-line interface. This works by putting in Appwrite regionally for growth and testing functions.
For this text, we’ll be utilizing the cloud-based deployment choice, because it’s comparatively simpler to arrange and affords higher accessibility for customers.
3. Create an Appwrite challenge
To combine Appwrite into our app, now we have to be logged in to our account. As soon as we’re logged in, we are able to comply with these steps:
- Create a brand new challenge.
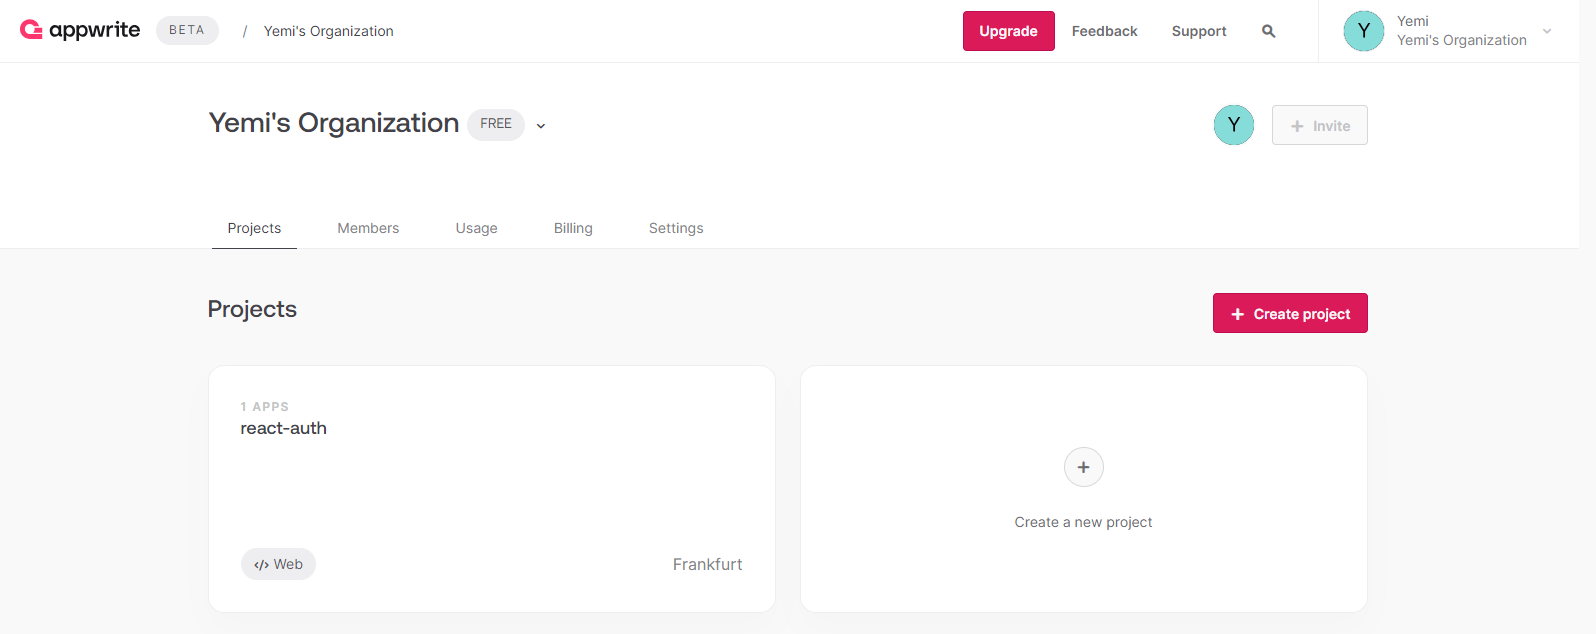
- Choose
Internet App
because the platform.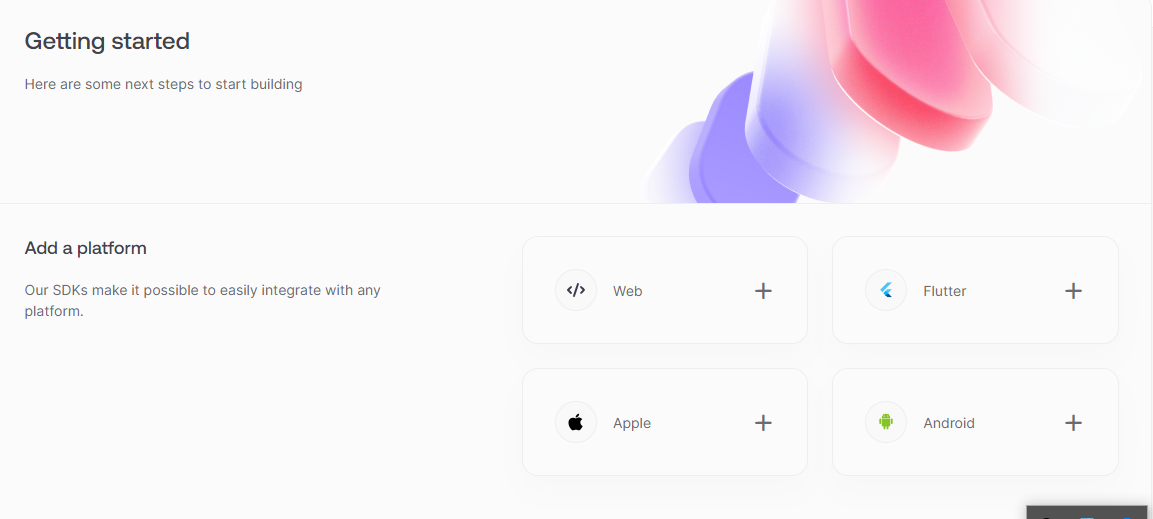
- Select
localhost
because the host and title the app.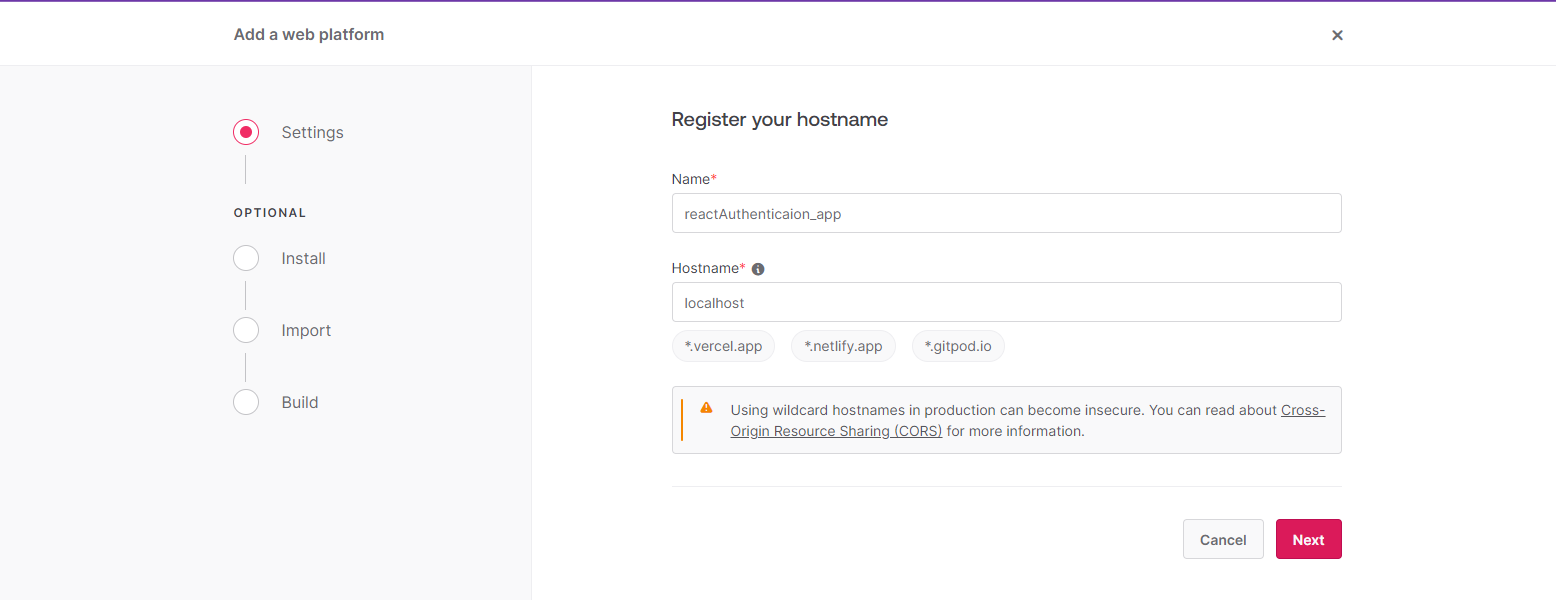
- Open an internet browser and navigate to the dashboard.
Putting in Appwrite’s SDK within the React App
To combine Appwrite into our React app, we have to set up the Appwrite JavaScript SDK. We are able to do that by means of the next steps.
Firstly, run the next command within the challenge’s root listing:
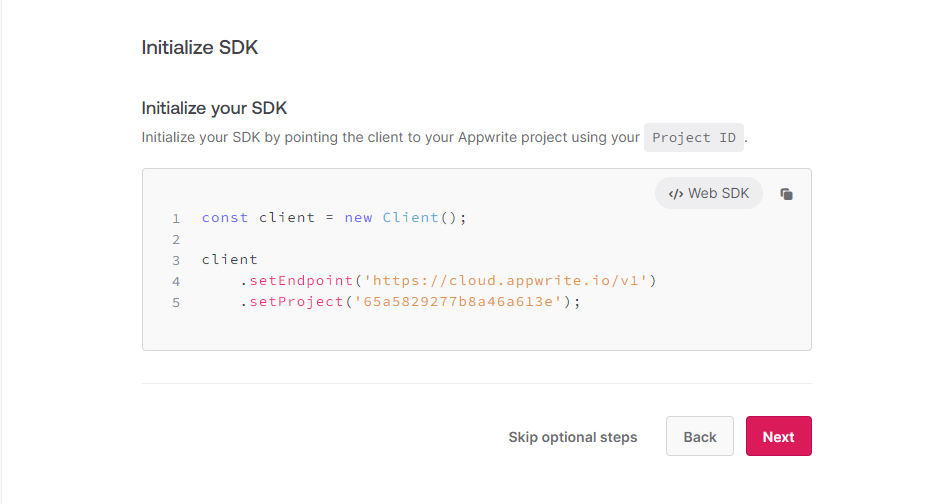
Subsequent, create a configuration file (Appwrite.js) within the src folder to retailer the Appwrite endpoint and challenge ID.
import { Consumer, Account } from 'appwrite';

export const API_ENDPOINT = 'https://cloud.appwrite.io/v1'
export const PROJECT_ID = 'YOUR PROJECT ID HERE'

const consumer = new Consumer()
    .setEndpoint(API_ENDPOINT)
    .setProject(PROJECT_ID);

export const account = new Account(consumer);

export default consumer;
Change placeholders 'YOUR_APPWRITE_ENDPOINT' and 'YOUR_APPWRITE_PROJECT_ID' with the Appwrite endpoint and challenge ID, which might be gotten from the Appwrite dashboard.
Initialize Appwrite in our React app. In our principal index.js or App.js file, import and initialize Appwrite utilizing the configuration file we created earlier:
import React from 'react';
import ReactDOM from 'react-dom';
import App from './App';
import { Appwrite } from 'appwrite';
import appwriteConfig from './appwrite';


const appwrite = new Appwrite();
appwrite.setEndpoint(appwriteConfig.endpoint).setProject(appwriteConfig.challenge);

ReactDOM.render(
  <React.StrictMode>
    <App />
  </React.StrictMode>,
  doc.getElementById('root')
);`
Constructing the Major App
As soon as the configuration is accomplished, we are able to now construct our app. On this app, we’ll have login, register, and logout logic, which can make use of functionalities from our Appwrite SDK.
Implementing registration performance
To permit customers to create accounts and register in our React app, we have to do the next.
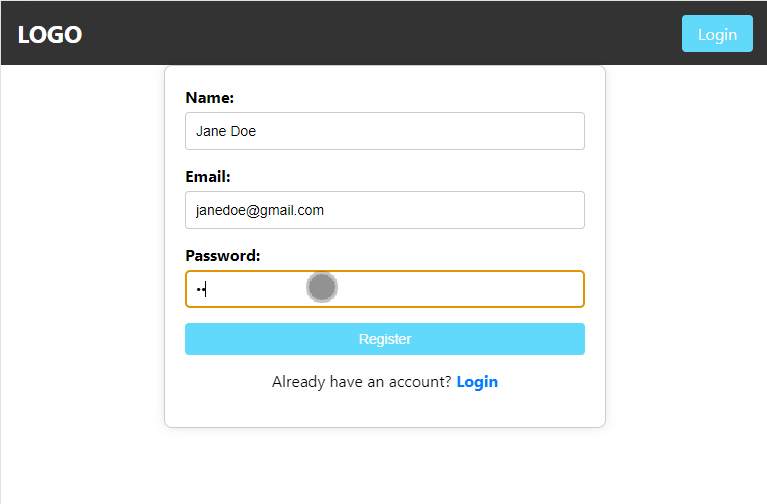
Firstly, we create a registration type. The shape will accumulate the required info, reminiscent of e mail and password, and ship it to the Appwrite server for consumer creation:
return (
  <div className="container">
    <type ref={registerForm} onSubmit={handleRegistration}>
      <div className="form-field-wrapper">
        <label>Identify:</label>
        <enter required kind="textual content" title="title" placeholder="Enter title..." />
      </div>

      <div className="form-field-wrapper">
        <label>Electronic mail:</label>
        <enter
          required
          kind="e mail"
          title="e mail"
          placeholder="Enter e mail..."
        />
      </div>

      <div className="form-field-wrapper">
        <label>Password:</label>
        <enter
          kind="password"
          title="password1"
          placeholder="Enter password..."
          autoComplete="password1"
        />
      </div>

      <div className="form-field-wrapper">
        <enter kind="submit" worth="Register" className="btn" />
      </div>
    </type>

    <p>{}</p>
  </div>
);
Subsequent, now we have to create a perform that makes an API name to create a brand new consumer within the Appwrite server every time a button is clicked:
import React, { useRef } from "react";

import { ID } from "appwrite";
import { account } from "../appwrite";

const Register = () => {
  const registerForm = useRef(null);

  const handleRegistration = async (e) => {
    e.preventDefault();

    const title = registerForm.present.title.worth;
    const e mail = registerForm.present.e mail.worth;
    const password1 = registerForm.present.password1.worth;

    attempt {
      const response = await account.create(
        ID.distinctive(),
        e mail,
        password1,
        title
      );
      console.log("Registration profitable:", response);

    } catch (error) {
      console.error("Registration failed:", error);

    }
  };

  return(


  )

};

export default Register;
On this code snippet, we’re making a registration type that accepts enter from the consumer and sends it to the Appwrite SDK. Right here’s a breakdown of the perform that handles consumer registration.
- Operate definition.
const handleRegistration = async (e) => { ... }defines an asynchronous perform namedhandleRegistrationthat accepts an occasion object (e) as an argument. - Stop default type submission.
e.preventDefault();prevents the default conduct of the shape submission, which might usually reload the web page. This permits us to deal with the registration course of utilizing JavaScript. - Try registration. We make use of the
attempt...catchblock to deal with potential errors in the course of the registration course of by implementing the primary logic within the attempt block and catching potential errors within the catch block. - Utilizing Appwrite’s account creation. In
const response = await consumer.account.create(e mail, password);we name theaccount.createmethodology of the Appwrite consumer which we used to create a brand new consumer account with the e-mail and password supplied by the consumer.awaitpauses the perform execution till the asynchronous API name completes.consumerrefers back to the initialized Appwrite consumer occasion.
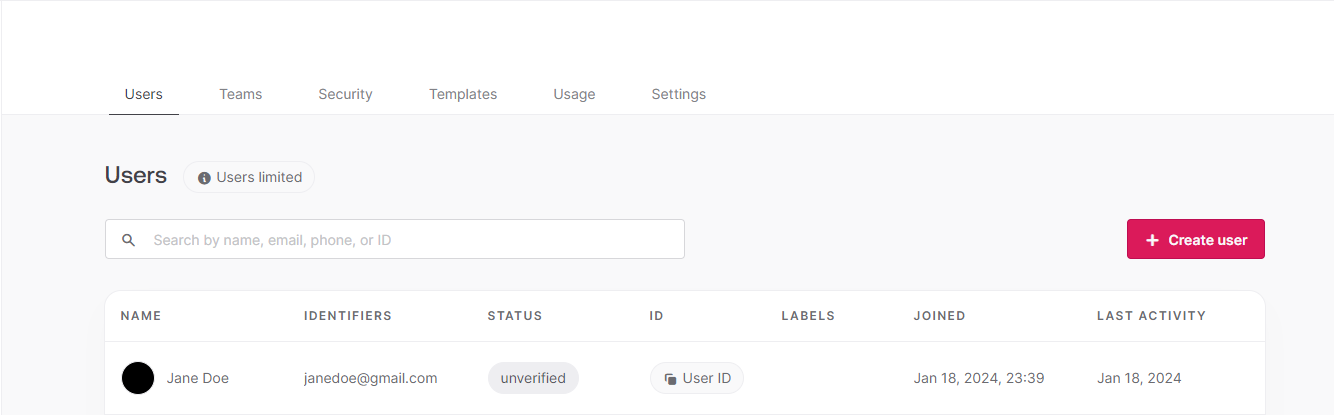
As soon as the Consumer is registered, a brand new row that shops the consumer’s particulars is created.
Implementing the login performance
To log in utilizing Appwrite’s SDK, we make use of a perform that takes the consumer’s e mail and password as parameters and handles the authentication course of. If the credentials are legitimate, the server returns an authentication token, which we are able to retailer within the client-side storage (reminiscent of native storage or cookies) for future API calls:
import React, { useRef } from "react";

import { ID } from "appwrite";
import { account } from "../appwrite";

const Login = () => {
  const loginForm = useRef(null);

  const handleLogin = async (e) => {
    e.preventDefault();

    const title = loginForm.present.title.worth;
    const e mail = loginForm.present.e mail.worth;
    const password1 = loginForm.present.password1.worth;

    attempt {
      const response = await account.createEmailSession(e mail, password1);
      console.log("Consumer has been Logged In:", response);

    } catch (error) {
      console.error("Login failed:", error);

    }
  };

  return (
    <div className="container">
      <type ref={loginForm} onSubmit={handleLogin}>
        <div className="form-field-wrapper">
          <label>Identify:</label>
          <enter required kind="textual content" title="title" placeholder="Enter title..." />
        </div>

        <div className="form-field-wrapper">
          <label>Electronic mail:</label>
          <enter
            required
            kind="e mail"
            title="e mail"
            placeholder="Enter e mail..."
          />
        </div>

        <div className="form-field-wrapper">
          <label>Password:</label>
          <enter
            kind="password"
            title="password1"
            placeholder="Enter password..."
            autoComplete="password1"
          />
        </div>

        <div className="form-field-wrapper">
          <enter kind="submit" worth="Login" className="btn" />
        </div>
      </type>

      <p>{}</p>
    </div>
  );
};

export default Login;
Like within the registration logic, we’re making a element that returns a type. This kind accepts the consumer enter and sends it to a perform that verifies the small print and logs within the consumer if approved.
Right here’s a breakdown of the code that implements the login logic:
- Operate definition. The primary line of the
handleLoginperformconst handleLogin = async (e) => { ... }defines an asynchronous perform namedhandleLoginthat takes an occasion object (e) as enter. Theasynckey phrase reveals that it makes use of guarantees for dealing with asynchronous operations. We additionally used thepreventDefaultmethodology to stop the browser’s default type submission conduct. - Name Appwrite’s session creation.
const response = await consumer.account.createSession(e mail, password);is used to name theaccount.createSession, which creates a session and logins within the consumer if the supplied particulars correspond with the small print saved within the storage.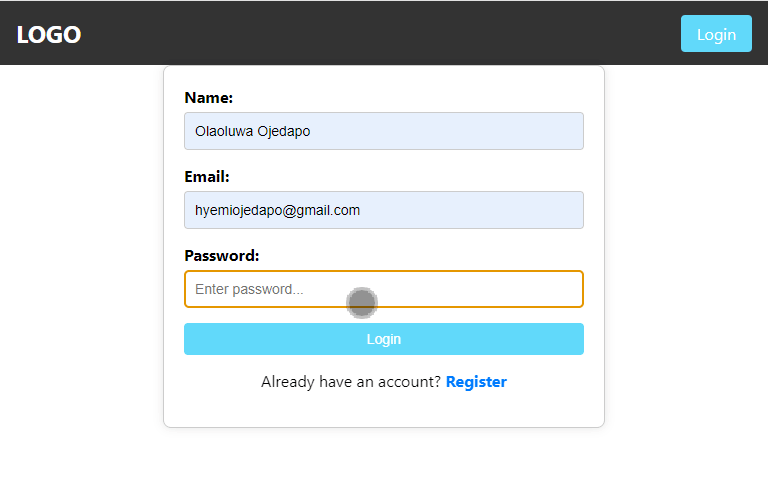
Creating protected pages
Protected pages are ones which might be inaccessible to customers who aren’t authenticated. As an example, now we have a profile web page that shows the consumer’s particulars, however we wish that web page to be accessed by customers who’re logged in alone. To realize this utilizing Appwrite, now we have to first create a perform that retains observe of the authenticated consumer. This perform is created on a separate web page that we hook to different pages needing verification.
Creating the authentication hook
To handle consumer authentication and session monitoring in a React app, we are able to create a customized hook known as useAuth. This hook will preserve observe of the authenticated consumer’s session and supply the required capabilities to verify the authentication standing:
import { createContext, useState, useEffect, useContext } from "react";
import { account } from "../appwrite";
import { useNavigate } from "react-router-dom";
import { ID } from "appwrite";

const AuthContext = createContext();

export const AuthProvider = ({ youngsters }) => {
  const navigate = useNavigate();

  const [loading, setLoading] = useState(true);
  const [user, setUser] = useState(null);

  useEffect(() => {
    checkUserStatus();
  }, []);

  const checkUserStatus = async () => {
    attempt {
      const accountDetails = await account.get();
      setUser(accountDetails);
    } catch (error) {
      console.error("Error checking consumer standing:", error);
    } lastly {
      setLoading(false);
    }
  };

  const contextData = {
    consumer,
    loading,
  };

  return (
    <AuthContext.Supplier worth={contextData}>
      {loading ? <div>Loading...</div> : youngsters}
    </AuthContext.Supplier>
  );
};


export const useAuth = () => {
  return useContext(AuthContext);
};

export default AuthContext;
Within the AuthProvider element, we use the useState and useEffect hooks to maintain observe of the consumer’s authentication standing. We additionally initialize the authentication state by fetching account particulars from Appwrite’s SDK. The useAuth customized hook permits different elements to make use of the authentication context, by offering entry to the present consumer and loading state.
Making a separate protected route
To limit entry to sure pages primarily based on the consumer’s authentication standing, we’d like a element that has entry to the hook we created earlier. This ProtectedRoute element will verify if the consumer is authenticated and both render the supposed web page or redirect the consumer to the login web page if not authenticated:
import { Outlet, Navigate } from "react-router-dom";
import { useAuth } from "./useAuth";

const ProtectedRoute = () => {
  const { consumer } = useAuth();

  return consumer ? <Outlet /> : <Navigate to="/login" />;
};

export default ProtectedRoute;
Within the ProtectedRoute element, we use the useAuth hook to verify if the consumer is authenticated. If the consumer is authenticated, the youngsters (supposed web page) are rendered. In any other case, the consumer is redirected to the login web page utilizing the Navigate element from react-router-dom.
Making use of safety to supposed pages
To use the safety to our supposed pages, we are able to use the ProtectedRoute element inside our routing setup in the primary JSX file:
import "./App.css";
import { BrowserRouter as Router, Routes, Route } from "react-router-dom";

import { AuthProvider } from "./utils/useAuth";
import House from "./pages/House";
import Profile from "./pages/Profile";
import Login from "./pages/login";
import Register from "../src/pages/registeration";
import NavBar from "./Elements/NavBar";
import Logout from "./pages/Logout";
import ProtectedRoute from "./utils/ProtectedRoute";

perform App() {
  return (
    <Router>
      <AuthProvider>
        <NavBar />
        <Routes>
          <Route path="/login" factor={<Login />} />
          <Route path="/logout" factor={<Logout />} />
          <Route path="/register" factor={<Register />} />
          <Route path="https://www.sitepoint.com/" factor={<House />} />
          <Route
            path="/profile"
            factor={
              <ProtectedRoute>
                <Profile />
              </ProtectedRoute>
            }
          />
        </Routes>
      </AuthProvider>
    </Router>
  );
}

export default App;
Within the previous code snippet, we’re utilizing the ProtectedRoute element to wrap the House element. This makes it a baby of the ProtectedRoute elements and ensures that the House element is simply accessible to authenticated customers.
Displaying the consumer’s particulars on a profile web page
When a consumer has been authenticated, we might need to show the consumer’s particulars, reminiscent of their username, e mail, profile image, and so forth. This could additionally embrace displaying their cart info and wishlist. This may be achieved by retrieving the consumer’s info from Appwrite’s SDK and rendering it within the React elements:
import React, { useState, useEffect } from 'react';
import appwrite from './appwrite';

perform UserDetails() {
  const [user, setUser] = useState(null);

  useEffect(() => {
    const fetchUserDetails = async () => {
      attempt {
        const response = await appwrite.account.get();
        setUser(response);
      } catch (error) {
        console.error(error);
      }
    };

    fetchUserDetails();
  }, []);

  return (
    <div>
      {consumer && (
        <div>
          <p>Identify: {consumer.title}</p>
          <p>Electronic mail: {consumer.e mail}</p>
          <img src={consumer.avatar} alt="Consumer Avatar" />
        </div>
      )}
    </div>
  );
}

export default UserDetails;
Within the previous code, we’re utilizing the useEffect hook to fetch the consumer particulars when the element masses. We’re additionally calling the appwrite.account.get() methodology to retrieve the consumer’s info and retailer it within the consumer state. As soon as the consumer particulars can be found, we are able to render the consumer’s title, and e mail within the element:
Creating the logout performance
To implement the logout performance, now we have to create a perform that deletes the consumer session and clears the present consumer’s knowledge:
import React from "react";
import { Hyperlink } from "react-router-dom";
import { account } from "../appwrite";
import "./Logout.css";

perform Logout() {
  const logoutUser = async () => {
    attempt {
      const response = await account.deleteSession("present");

      console.log("Logout profitable:", response);

    } catch (error) {
      console.error("Logout failed:", error);

    }
  };

  return (
    <div className="logout-container">
      <h2 className="logout-message">Are you certain you need to sign off?</h2>
      <div className="logout-options">
        <p>
          <Hyperlink to="https://www.sitepoint.com/" className="header-link">
            No, I do not
          </Hyperlink>
        </p>

        <p>
          <button className="logout-button" onClick={logoutUser}>
            Sure, I'm certain
          </button>
        </p>
      </div>
    </div>
  );
}

export default Logout;
Within the logoutUser perform, we’re utilizing the account.deleteSession methodology to delete the present consumer session, successfully logging the consumer out. We are able to additionally carry out extra cleanup reminiscent of clearing consumer knowledge or resetting the app state.
Dealing with Errors in React and Appwrite
Constructing strong and user-friendly React functions requires efficient error dealing with, particularly when using backend companies like Appwrite. It’s because the consumer’s expertise might be simply disrupted by both a failed API name, community errors, invalid consumer enter, or sudden server conduct. Listed here are among the greatest practices we are able to use to deal with errors gracefully in our tasks.
- Utilizing attempt/catch blocks. Like in our earlier examples, make the most of
attempt/catchblocks round probably error-prone code. We are able to do that by writing the supposed logic within theattemptblock and utilizing thecatchblock to deal with the error appropriately by displaying informative messages, logging particulars, or redirecting customers to related pages. - Error Boundaries. We are able to additionally make use of React error boundaries to get errors in baby elements with out essentially affecting the complete software.
- Creating customized error elements. Creating devoted error elements that show user-friendly messages primarily based on the kind of error encountered helps to supply a extra personalised and informative expertise in comparison with generic error messages.
Conclusion
Selecting the best authentication system is an integral a part of making a safe software. Due to this fact, it’s extraordinarily necessary to contemplate our software’s necessities, the extent of safety wanted, and the consumer expertise we need to present when selecting the authentication strategies for our app.
By following the steps and greatest practices outlined on this article, we are able to implement a dependable and user-friendly authentication system in our React apps utilizing Appwrite.