
Microsoft Visible Studio Code is a versatile, cross-platform editor that may be reworked right into a full-blown IDE for many any language or workflow. Over the previous few years, it has exploded in recognition. Because of Microsoft’s Python extension for Visible Studio Code, VS Code has additionally turn into among the best instruments for working with Python. The Python extension gives not solely syntax highlighting, however linting instruments, atmosphere administration, and much extra, all tailor-made for the Python programming language.
On this article, we’ll stroll via the right way to get began with VS Code’s Python instruments, whether or not for brand spanking new tasks or present ones.
Set up VS Code and the Python extension
If you have not already arrange and familiarized your self with Visible Studio Code, that is your first step. Try InfoWorld’s information to organising VS Code.
You also needs to have an occasion of Python put in and be aware of how Python works, particularly the mechanics of Python digital environments. For those who’re utilizing the Anaconda distribution of Python, you should utilize that at the side of VS Code, too.
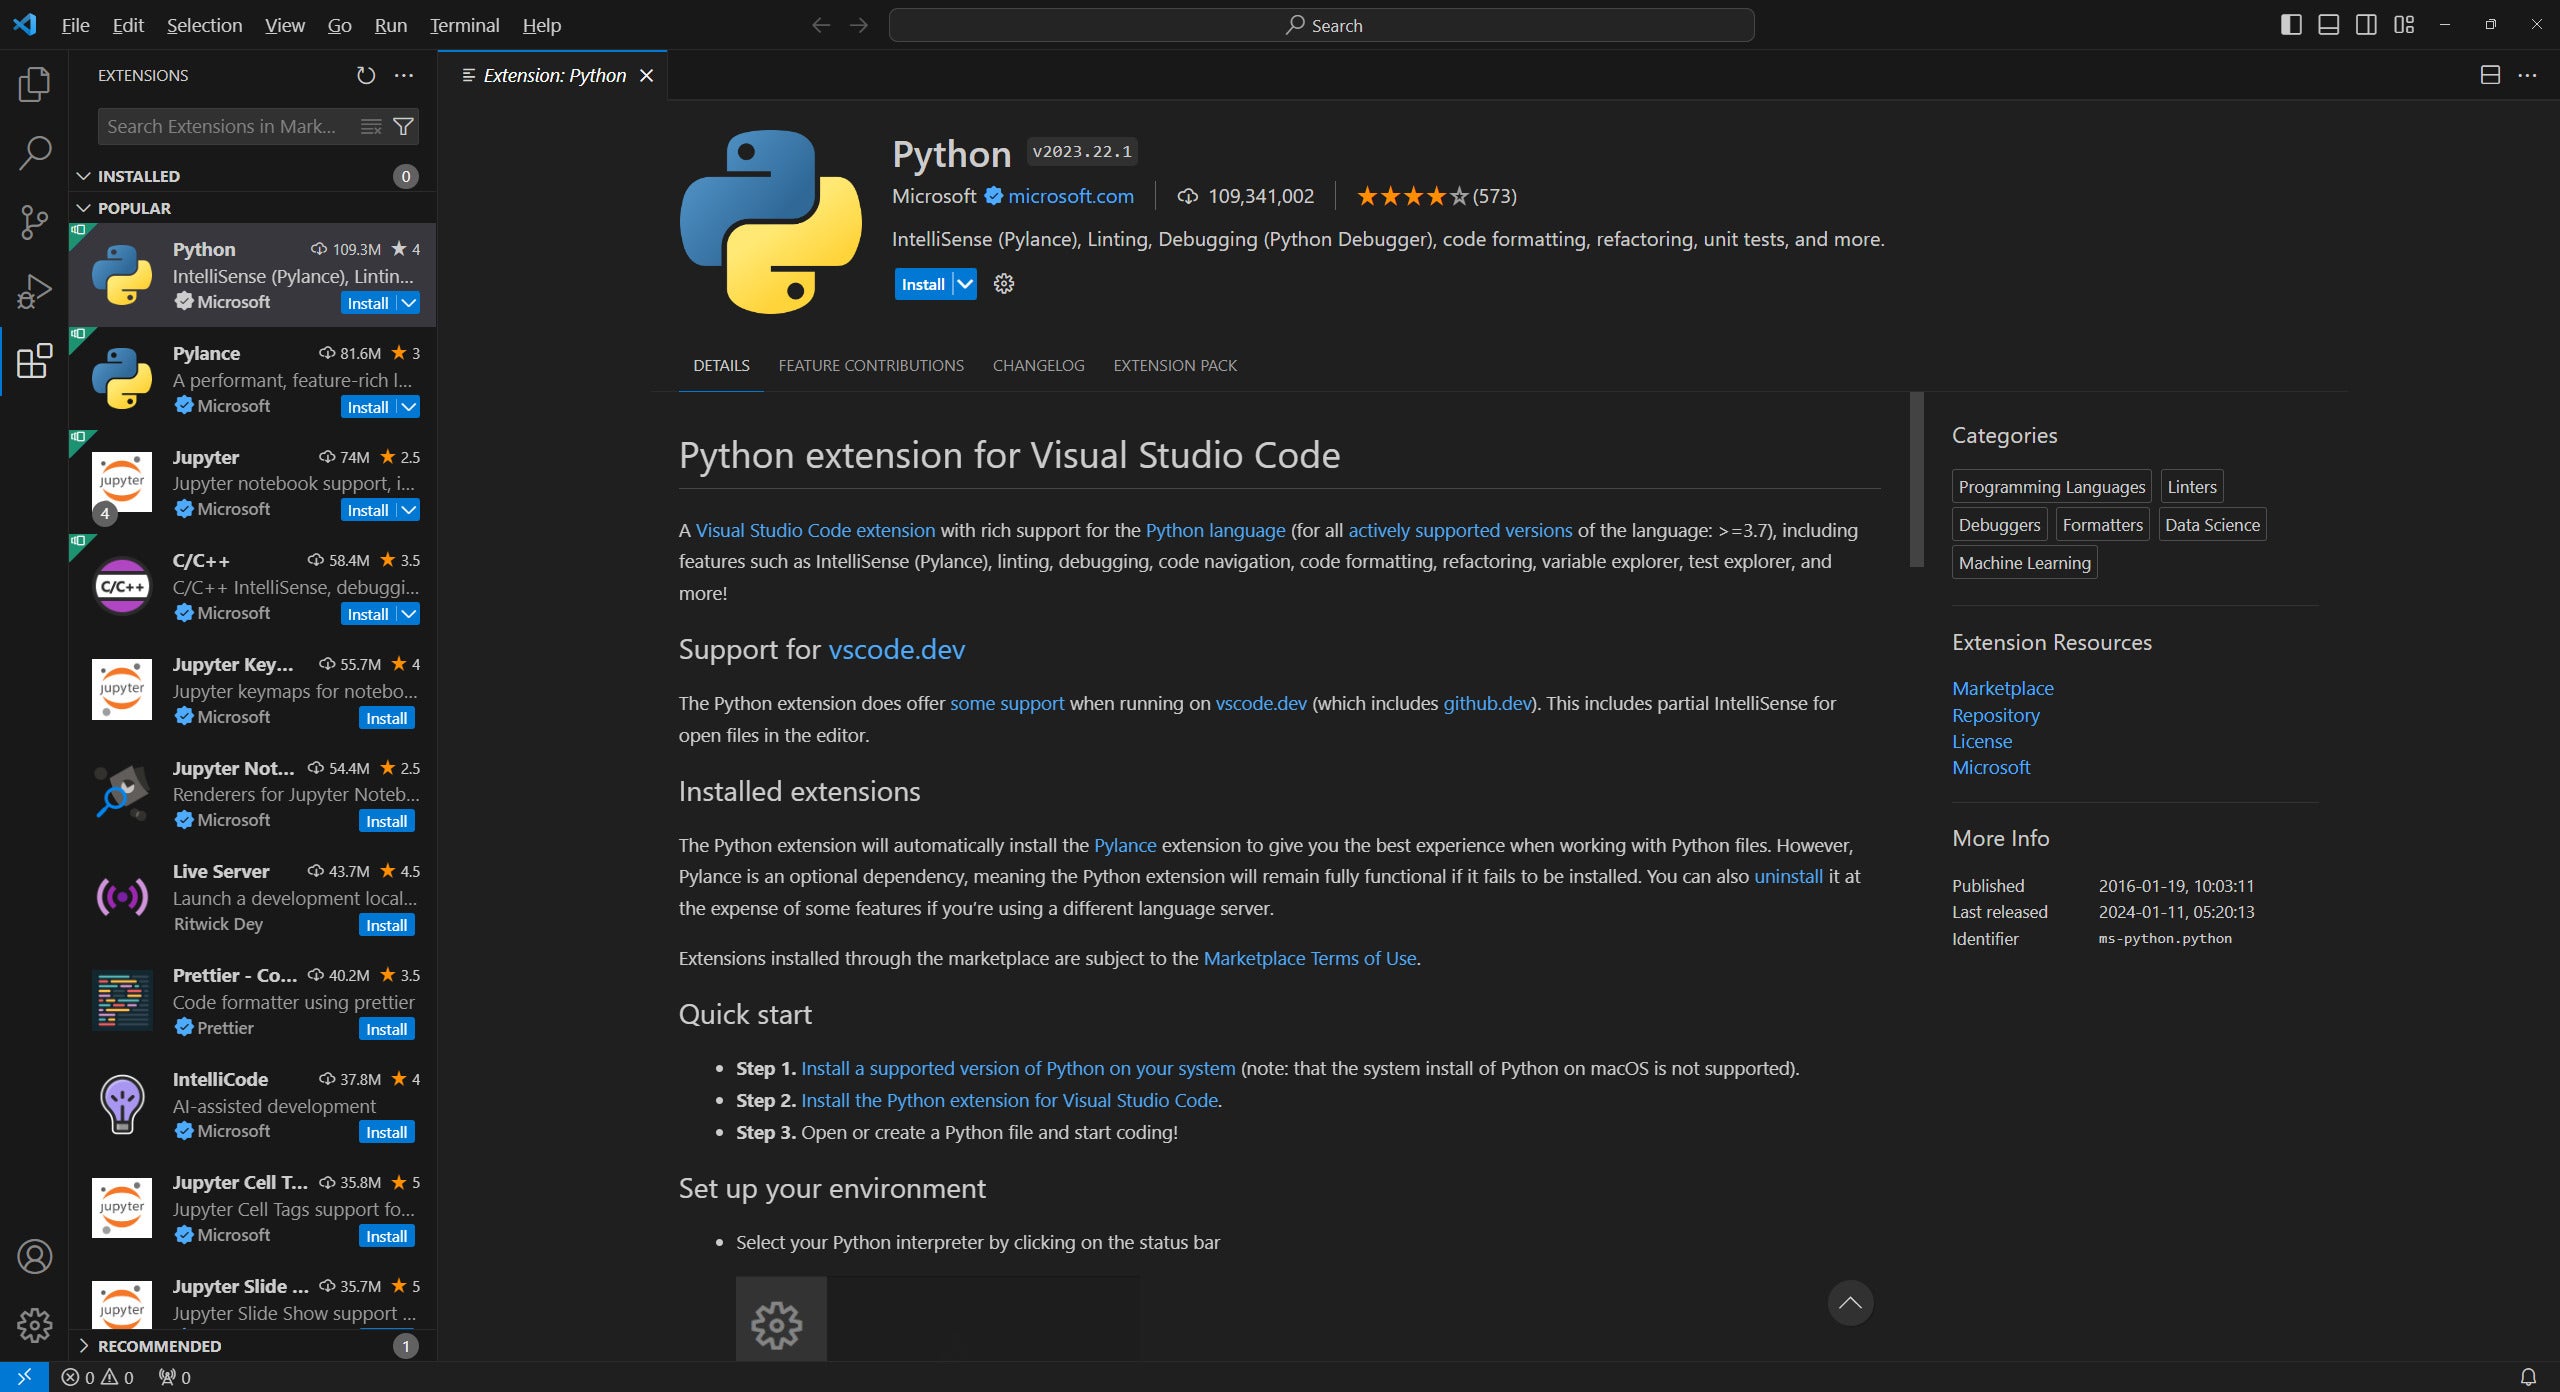
The core performance you’ll want to use Python in VS Code comes from Microsoft’s Python extension. This extension gives syntax highlighting, debugging instruments, code navigation, refactoring, and take a look at runners. It does not present linting, IntelliSense completion, or kind checking. These features are supplied in one other extension routinely put in together with the Python extension, referred to as Pylance. The 2 are saved separate to allow them to be developed independently, however you’ll virtually all the time need to use them collectively.
 IDG
IDGDetermine 1. The official Microsoft-authored extension for Python in VS Code additionally bundles the Pylance linting and type-checking extension.
Along with the Python and Pylance extensions, a number of different extensions are advisable for Python builders:
- Black Formatter provides computerized formatting of supply code with the de facto commonplace formatter for Python,
black. You need not set upblackinto the digital atmosphere the place you are doing all of your growth work to make use of it; the extension comes with its personal, independently up to date copy. - One other formatter for Python, ruff, is gaining consideration for being written within the Rust language, and so it runs a lot sooner than
black. It is nonetheless earlier in its growth thanblack, so it’s possible you’ll need to followblackfor the sake of correctness, however you possibly can all the time set up and toggle between the 2 extensions. - For those who use Jupyter Pocket book with Python, you possibly can add assist for it immediately in VS Code with the Jupyter extension.
- For those who’re on Home windows and utilizing the Home windows Subsystem for Linux to run your Python code, you should utilize the WSL extension to carry out your growth work immediately in WSL.
- The Python extension has some provisions for working with digital environments (extra on this quickly), however they’re comparatively minimal. If you’d like broader-scale administration for Python environments, seize the Python Setting Supervisor extension—it permits subtle operations like managing Conda-based environments, or routinely activating a
venvfor a given console session. - By default, the Python extension for VS Code does not have a characteristic for inaugurating or organising a brand new, clean Python challenge. Some third-party Python challenge administration instruments like
poetryorhatcharrange a brand new Python challenge listing and scaffolding from the command line, however VS Code’s Python extension does not but assist these features immediately. A third-party extension for working withpoetrydoes exist.
See the InfoWorld video tutorial, Organising the Python extensions for Microsoft Visible Studio Code, for additional setup directions.
Organising a brand new Python challenge in VS Code
Once you arrange a brand new Python challenge, there typically are two primary steps:
- Create a listing to carry the challenge.
- If wanted, create a digital atmosphere for the challenge and set up necessities into it.
The Python extension for VS Code does not deal with the primary half by itself. You create the listing you need on your challenge, then arrange scaffolding in it and populate it with different issues if wanted. In principle, you can begin a Python challenge with nothing however an empty listing, or as little as a listing with a single (empty) essential.py file.
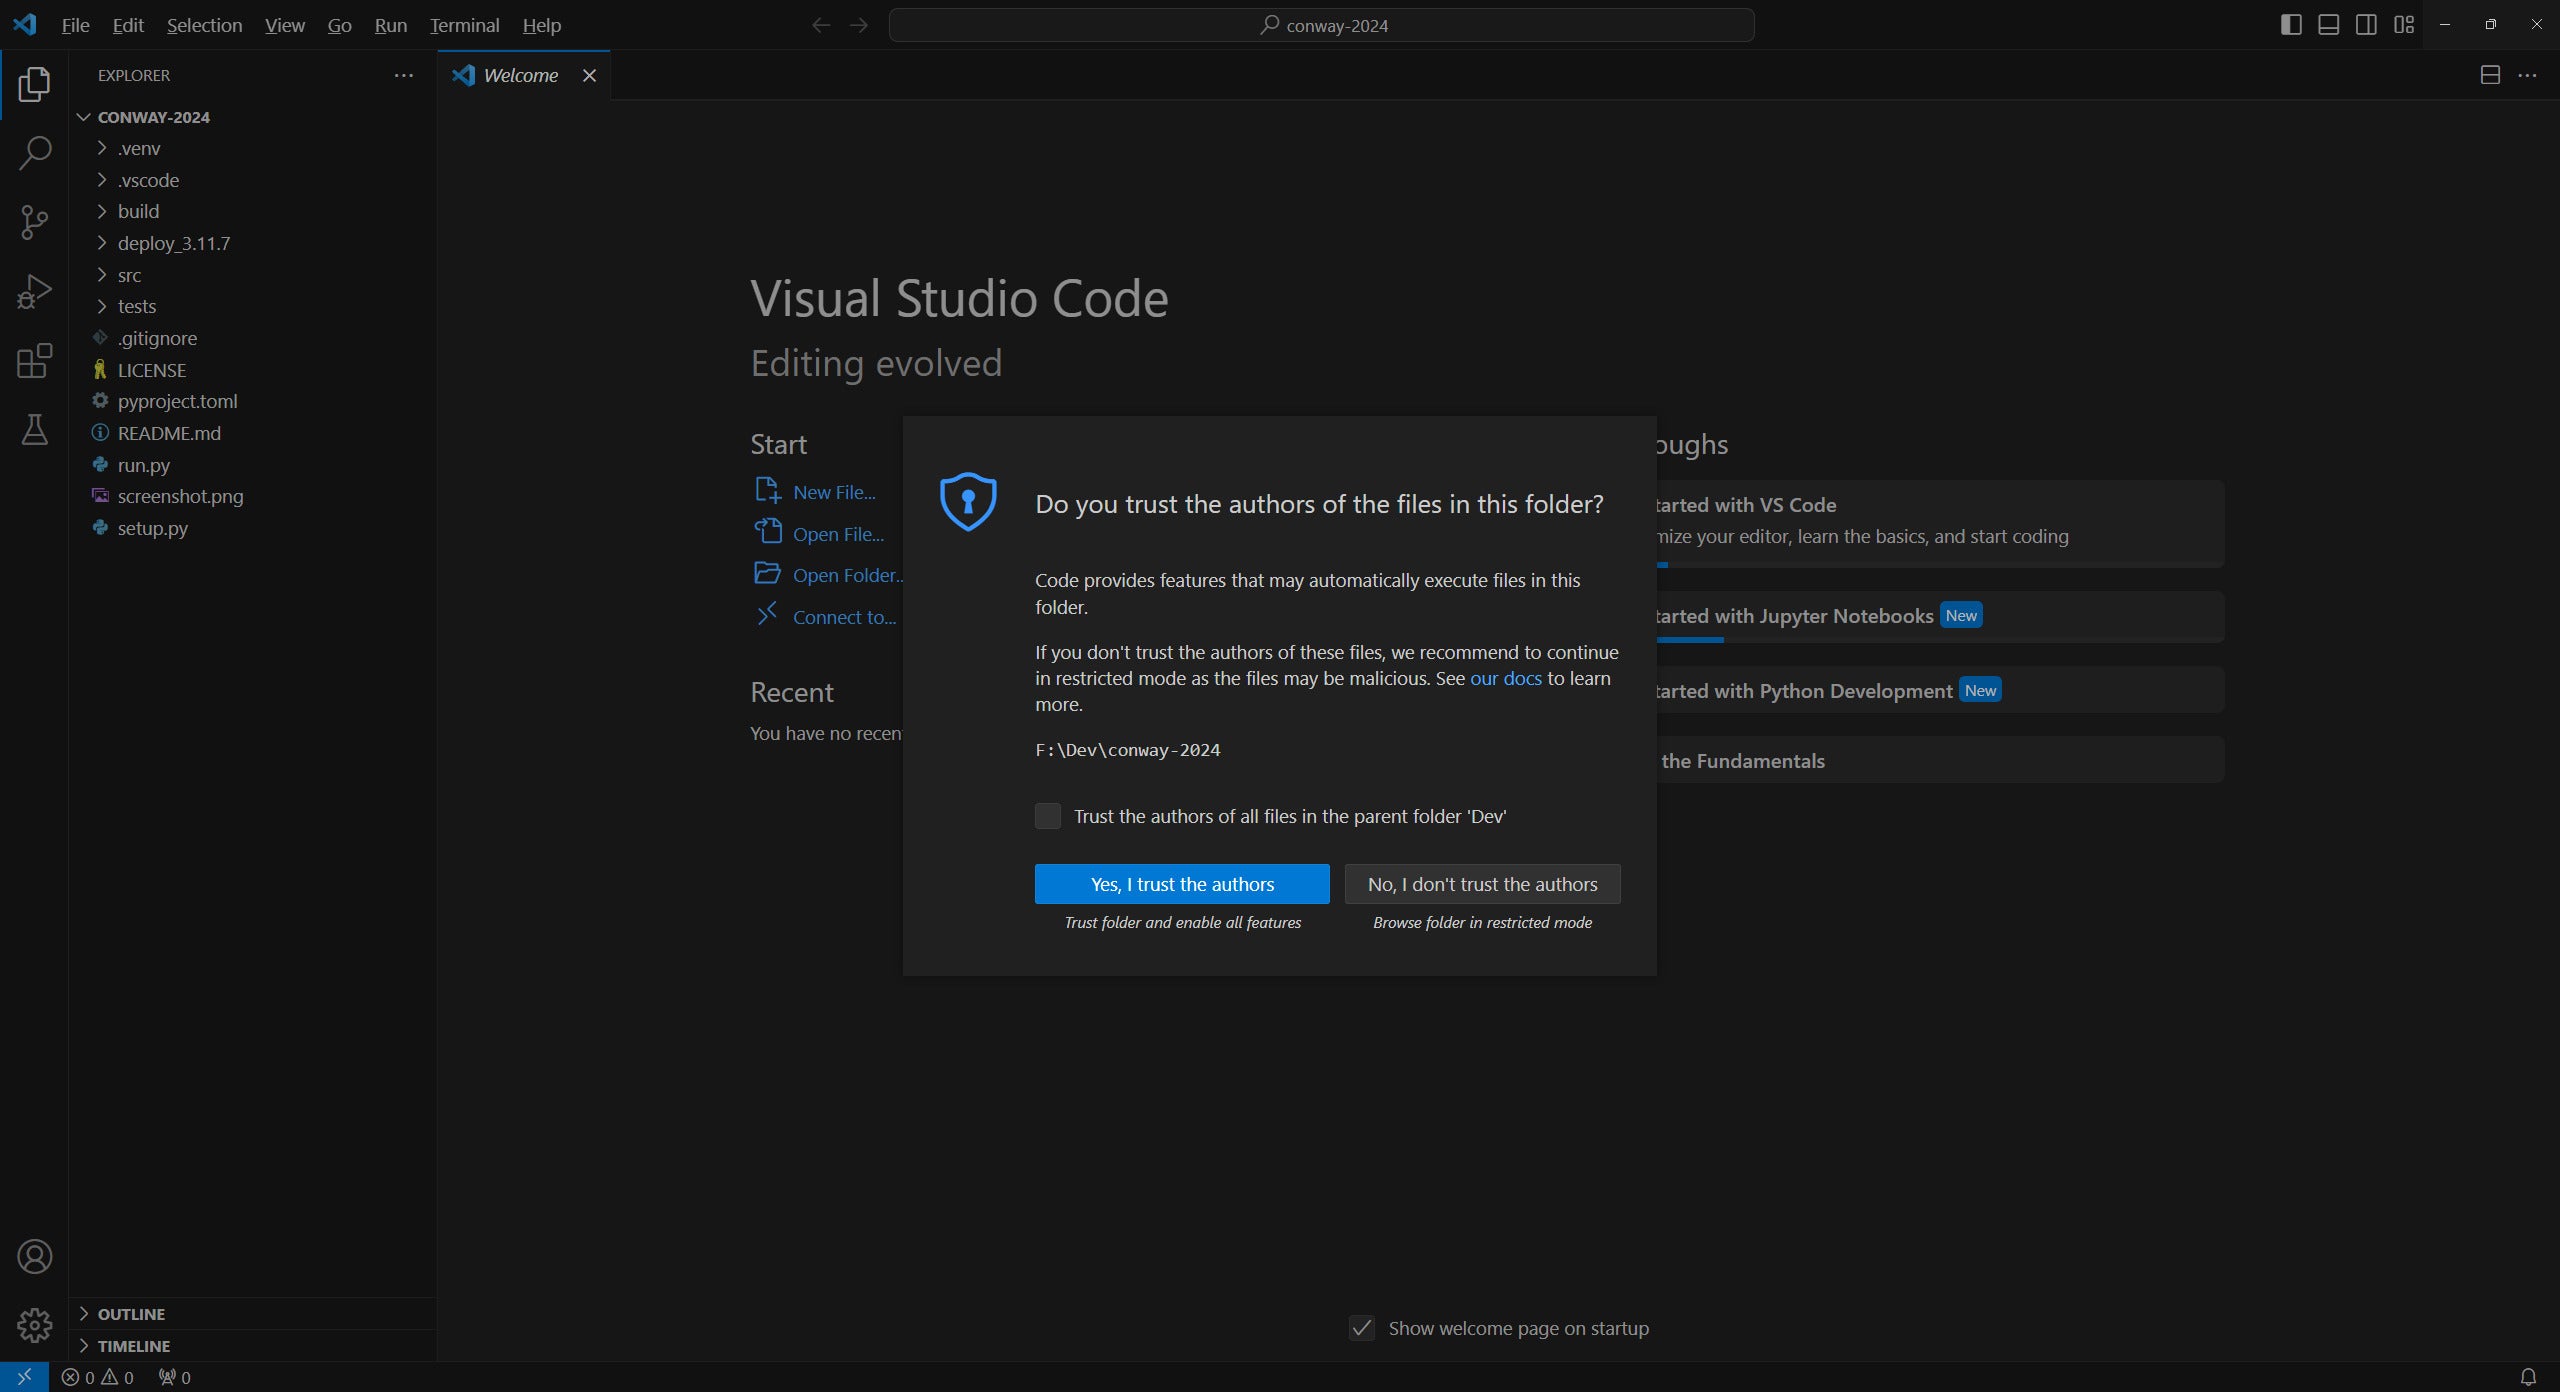
The primary time you open a challenge listing with VS Code, you will be greeted with a dialog that asks if you happen to belief the authors of the recordsdata on this listing. Click on “Sure, I belief the authors.” This lets VS Code know you are not opening the listing provisionally—you need to use it as an precise challenge listing.
For those who’re utilizing a software like hatch or poetry to handle tasks, create the challenge listing with these instruments first earlier than opening the listing in VS Code. That is extra as a result of it is higher to get that type of housekeeping out of the way in which first than since you’ll run into issues. It is simpler to configure a challenge for VS Code after the guide configuration work outdoors of VS Code is already accomplished.
 IDG
IDGDetermine 2. When opening a listing for the primary time with VS Code and the Python extension, you will have to affirm the contents may be trusted.
Python digital environments in VS Code
One key factor the Python extension can deal with for you is managing digital environments for Python tasks. You possibly can arrange a venv for a challenge, and routinely set up necessities for it relying on how you could have issues configured:
- Within the VS Code command palette (Ctrl-Shift-P), choose “Python: Create Setting”.
- Choose an atmosphere kind. That is usually
venvor Conda, the atmosphere utilized by the Anaconda Python distribution. Conda doesn’t seem except you could have Anaconda put in, and the overwhelming majority of the time you will usevenv. - If an present atmosphere is detected, you will be given the choice to make use of the present one as-is, or to delete it and create a brand new one.
- Select an interpreter. The Python extension will try and detect all of the accessible put in cases of Python in your system. If the Python model you need to use does not present up, it could have been put in incorrectly. Pay shut consideration to the trail to the interpreter you choose —this will prevent a number of confusion about which one you are really utilizing. You too can kind a path to an interpreter.
As soon as you’ve got accomplished this, the Python extension will create the digital atmosphere, replace pip inside the venv, and set up any necessities it detects (as an example, via a pyproject.toml file within the challenge). You possibly can click on the Output tab within the VS Code console pane to see the logs from the setup course of.
Organising an present Python challenge in VS Code
If you wish to arrange VS Code for an present Python challenge, you typically don’t have to do rather more than open the challenge listing in VS Code, grant permissions, and choose a digital atmosphere for it if wanted.
Choosing a digital atmosphere
When you could have a Python challenge open in VS Code, you possibly can freely swap between what digital atmosphere you employ for it. To do that, you possibly can:
- Click on on the model of the interpreter on the backside proper of the VS Code window.
- Within the command palette, select “Python: Choose Interpreter”.
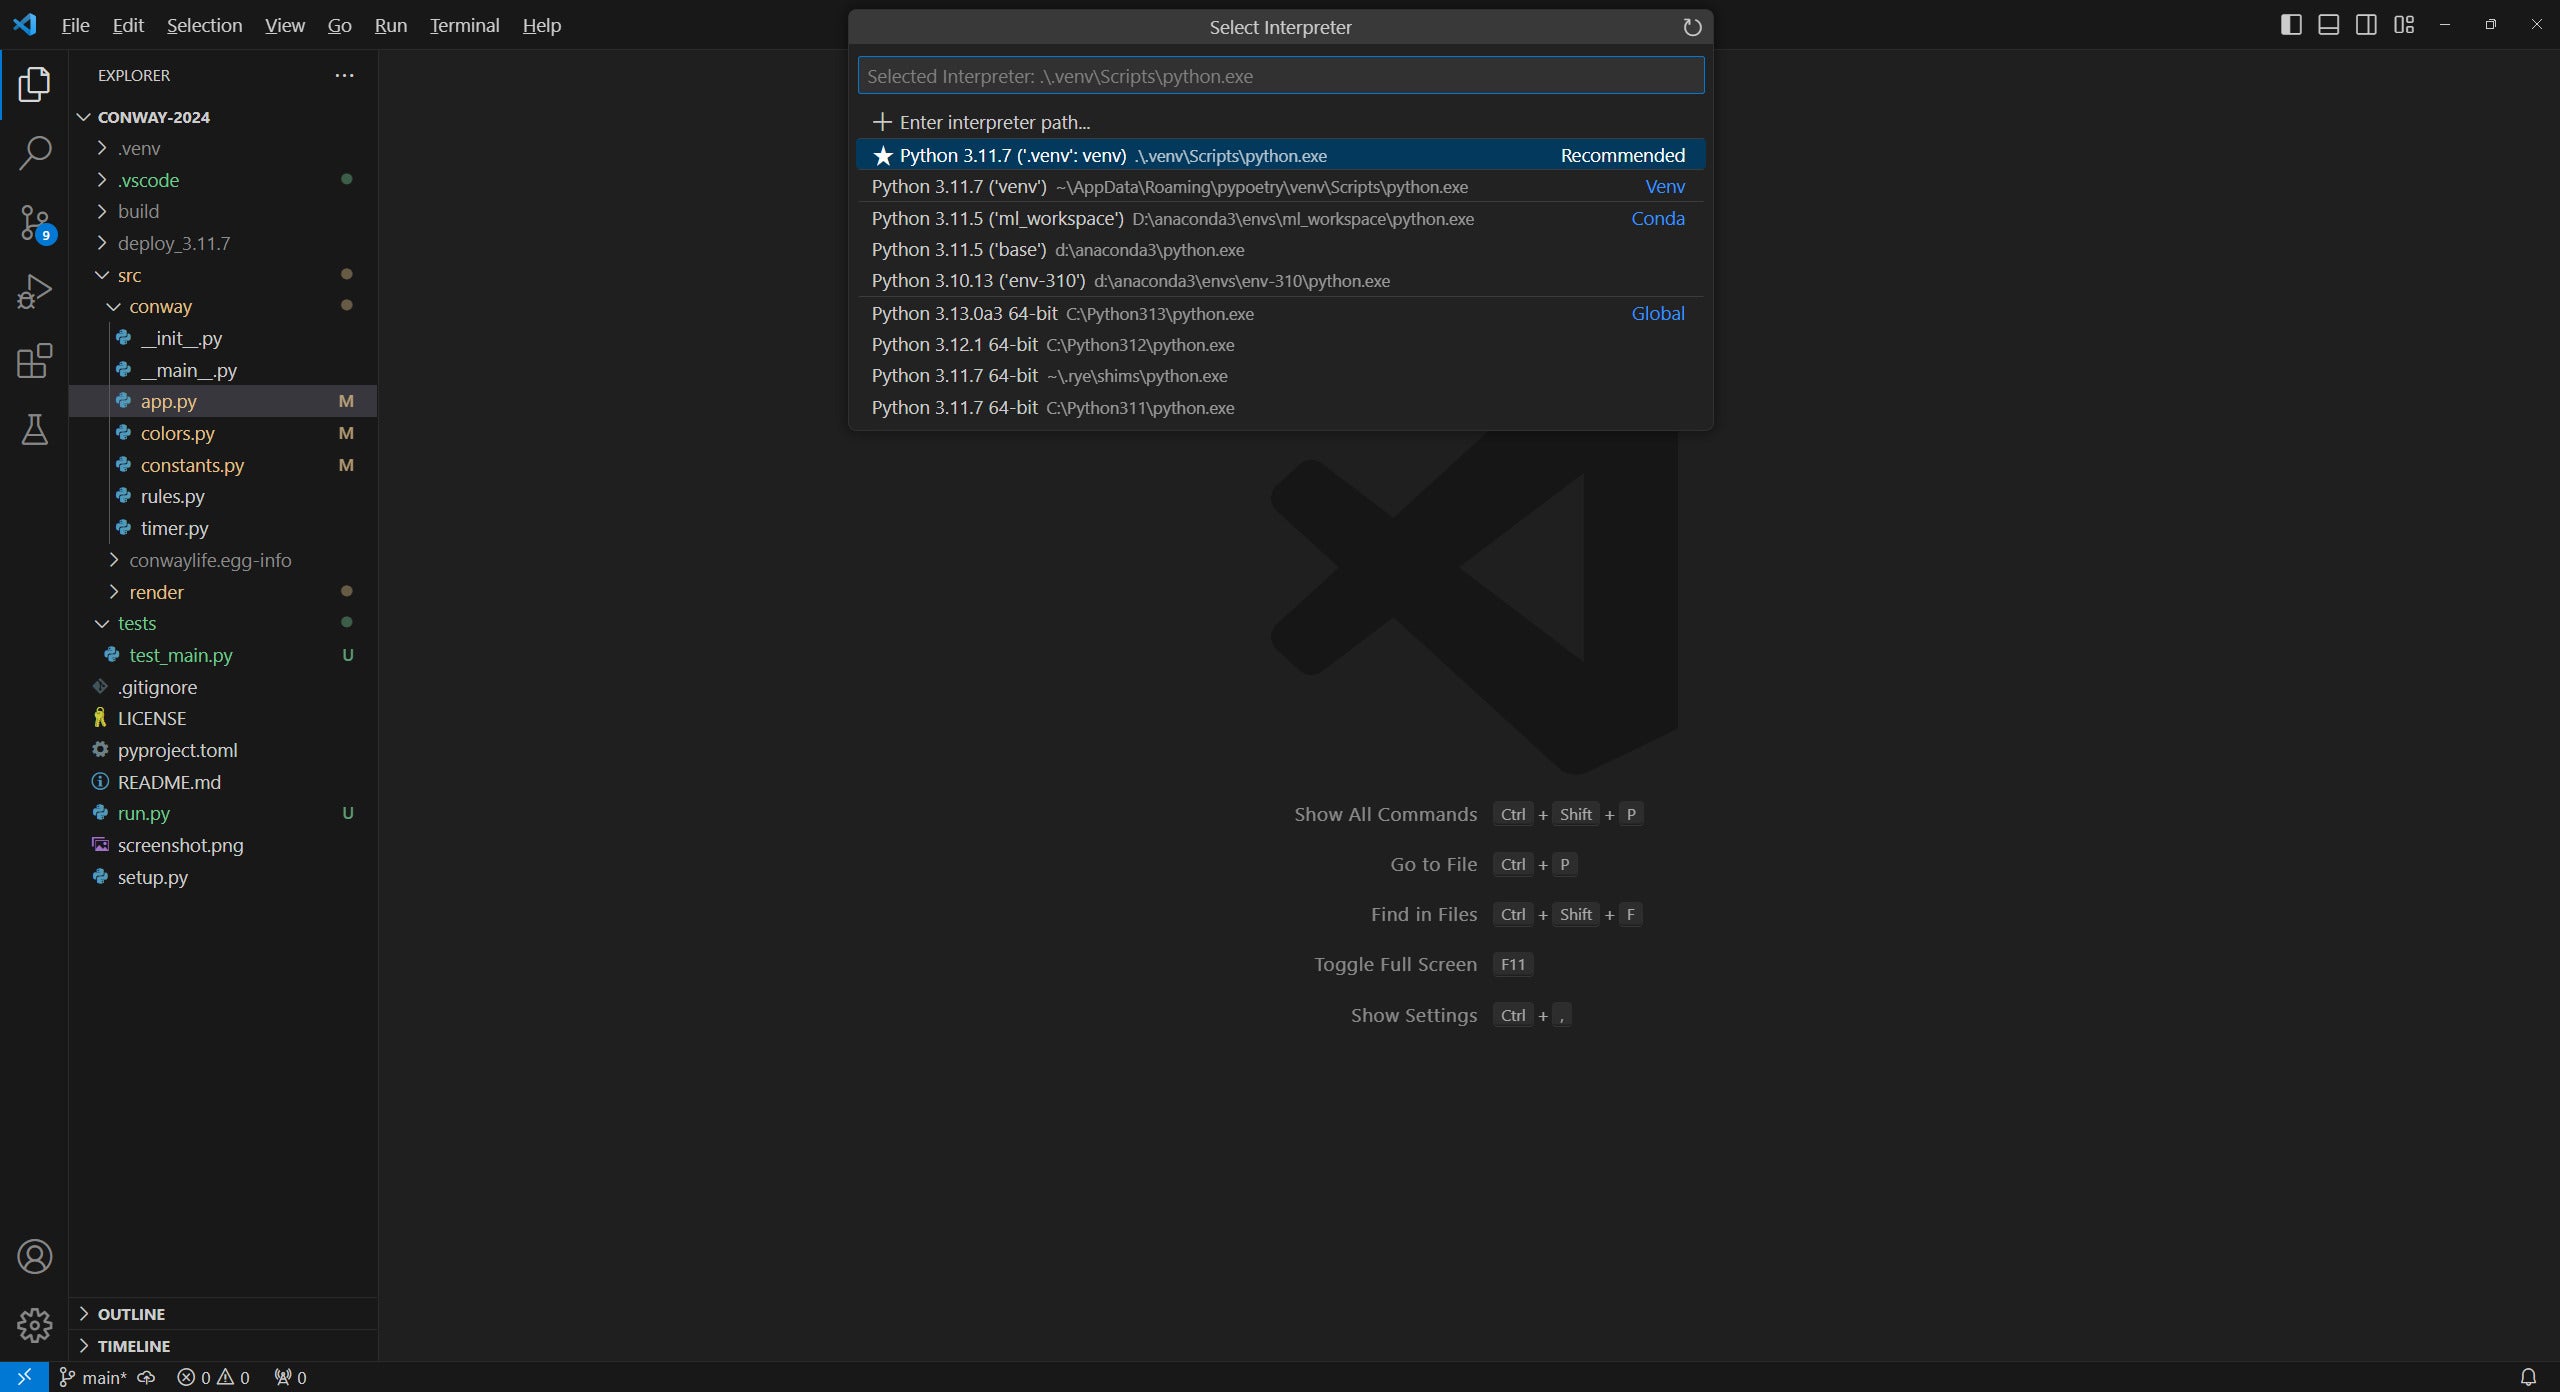
This brings up a listing of obtainable interpreters—each globally and in any digital environments configured along with your challenge. Once more, pay shut consideration to the paths for the interpreters! In any other case, it’s possible you’ll find yourself deciding on a worldwide Python occasion once you desire a venv, or vice versa.
 IDG
IDGDetermine 3. Python in VS Code detects digital environments routinely and permits you to select from present ones, create a brand new one, or provide a path manually to at least one.
Activate the Python extension earlier than activating venvs
The Python extension in VS Code has a refined habits involving digital environments which may journey you up if you happen to’re not conscious of it.
Once you open a Python challenge in VS Code, the Python extension doesn’t activate till you do one thing particularly Python-related. The most typical motion on this vein is opening a Python file in your challenge.
This is why this issues: When you have a digital atmosphere configured along with your Python challenge, it’s going to activate routinely in a terminal session once you open the VS Code terminal pane. But when the Python extension is not working once you do this, the venv is not going to activate, and any instructions typed in that window is not going to contain the venv. Additionally, the venv does not get activated on already present terminal classes—solely on newly opened ones.
To that finish, get into the behavior of opening a Python file of some sort once you open your Python challenge. This ensures the Python extension is lively. You too can do one thing with the Python extension from the command palette to activate it. Any motion will do in that case.
Launching VS Code for a Python challenge
Essentially the most primary strategy to run Python code in VS Code is to make use of the Run command on the file at present open in VS Code. This you are able to do from VS Code’s menu (Run | Run with out debugging), or by urgent Ctrl-F5, or by clicking the right-facing arrow on the prime proper of the code space.
 IDG
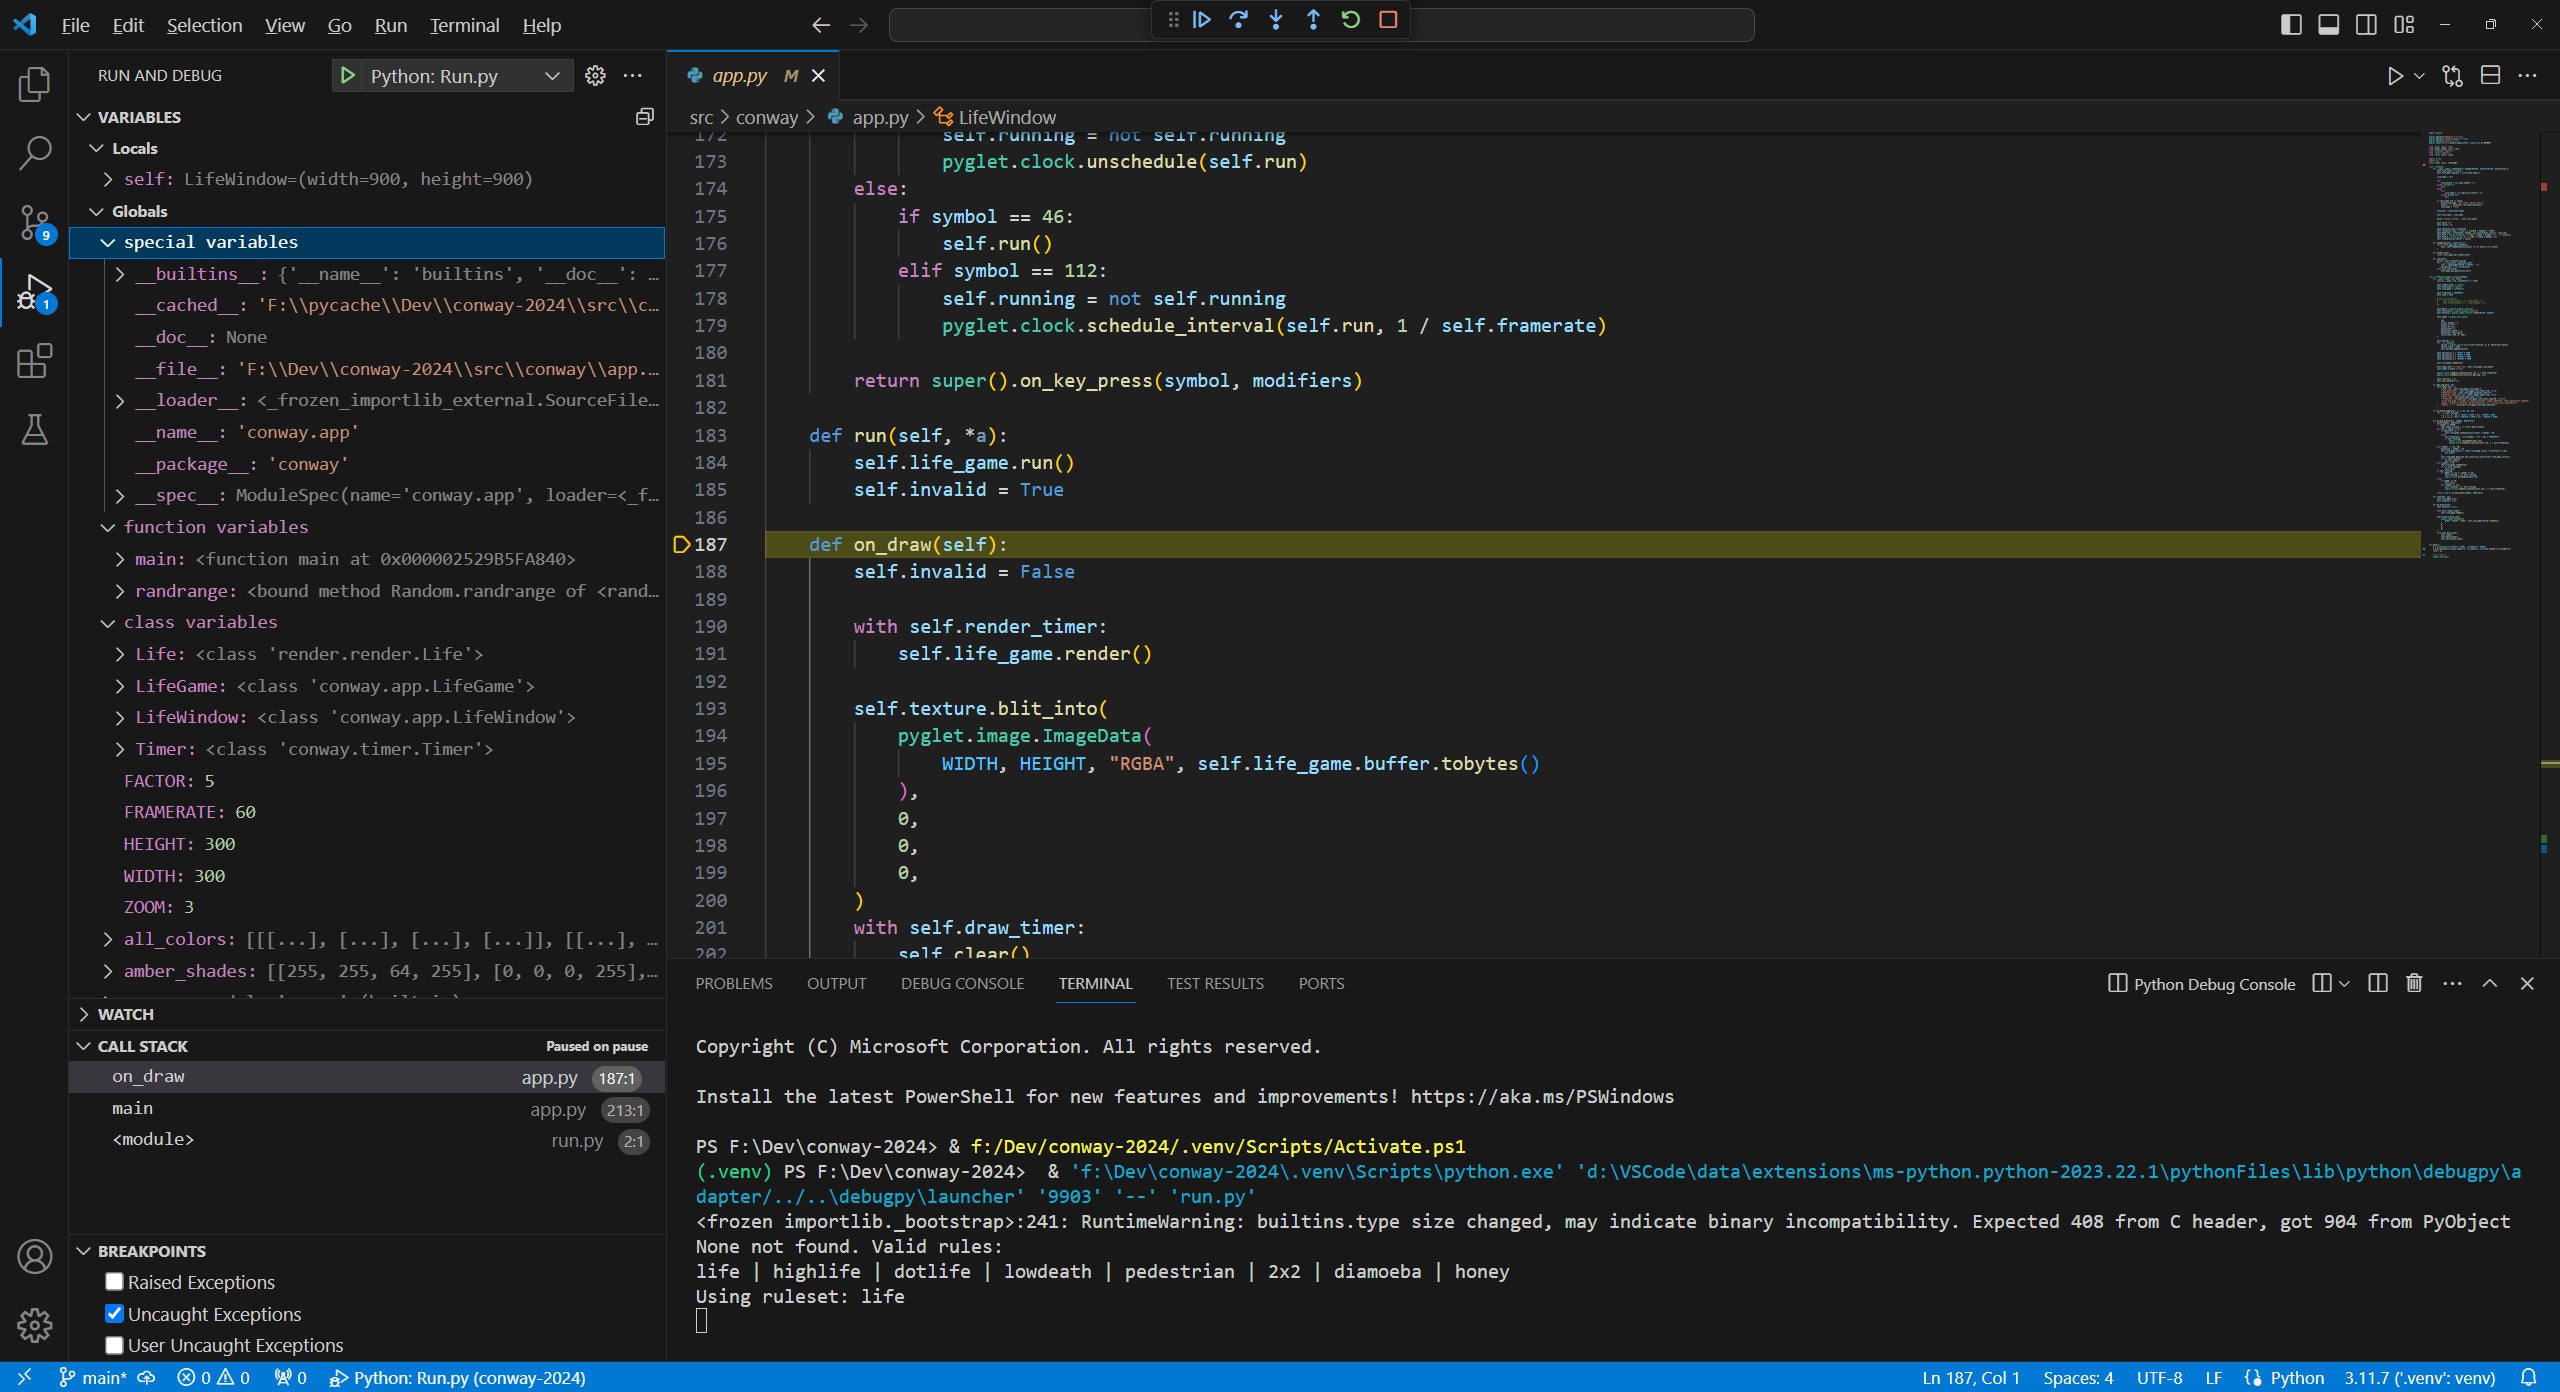
IDGDetermine 4. Launching Python code with the debugger helps you to pause execution and examine this system state interactively via VS Code’s GUI.
If you wish to arrange extra complicated situations for working your code, you possibly can choose the Run and Debug motion from the left-hand motion panel (or press Ctrl-Shift-D) to create a brand new program runner configuration. This offers you a drop-down menu of attainable methods to run your program within the Run and Debug part.
The configuration recordsdata are in .JSON format, and you’ll choose the gear icon to the best of the drop-down menu to edit the file in VS Code itself. You possibly can change which file to run, what sort of console to make use of, whether or not or to not connect a debugger, and so forth.
Working Python via the debugger offers you perception into precisely what’s occurring in your code at any given second. You possibly can examine the decision stack, study the state of native and world variables, and set breakpoints to routinely set off the debugger.
Word that working Python via VS Code’s debugger incurs a efficiency penalty. For those who’re gathering efficiency metrics in your code, make certain you run Python with debugging disabled (e.g., with Ctrl-F5).
Python linting and checking for VS Code
The Python VS Code extension consists of the Pylance extension for linting and type-checking Python code. It additionally gives stay suggestions on code via its language server, for the sake of autocompletion and tooltips. So long as the extension is lively and you’ve got a Python file loaded in VS Code, it ought to run routinely.
You too can configure two main choices for Pylance proper within the VS Code interface. At backside proper, click on on the {} icon subsequent to Python to show these choices:
- Auto Import Completions: For those who write code that is determined by one thing that must be imported, Pylance can add the
importstatements routinely. Nonetheless, this will result in imports being added accidentally, so it is off by default. - Kind Checking performs stringent kind checks in your Python code. If you’re engaged on a big challenge the place kind checking helps hold issues appropriate, allow this. However it may be left off (the default) if you happen to’re solely engaged on one thing small the place correctness is not important.
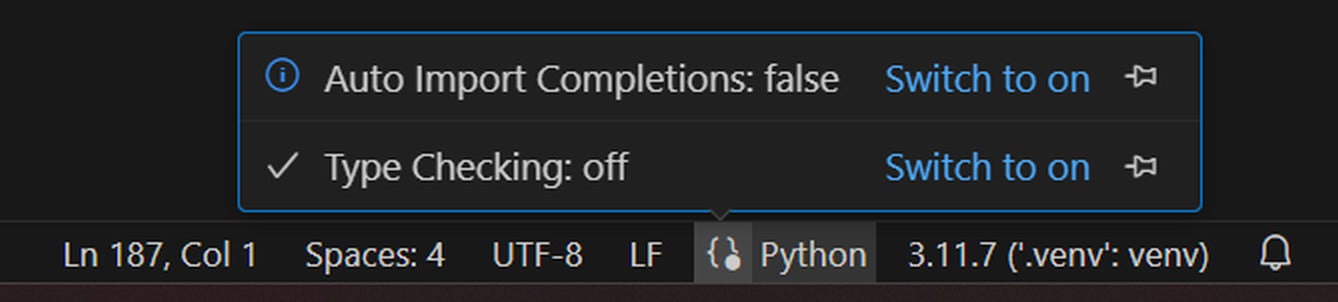 iDG
iDGDetermine 5. Auto-import completions and kind checking may be toggled on or off via this factor within the VS Code GUI.
Creating and managing Python assessments with VS Code
Python take a look at frameworks are typically written utilizing one among two libraries—unittest in the usual library, and the third-party pytest. The Python VS Code extension can routinely uncover and configure take a look at runners for these libraries. You too can set up extensions to deal with different take a look at frameworks or testing for particular utility setups (e.g., Django).
- Click on the “testing” icon within the motion bar at left, then choose “Configure Python Assessments” within the panel that seems.
- Select both
unittestorpytestas your take a look at framework (or one other if an extension is there to deal with it). - Choose the listing the place your assessments reside (usually
assessments). - Select a filename sample to search out the assessments, or provide one manually (e.g.,
*.py). - To run all of the assessments configured, click on the double arrow on the prime of the
Testingpane at left. The outcomes shall be written to the “Take a look at Outcomes” tab within the terminal pane, and may also be examined as a tree or checklist within the Testing pane.
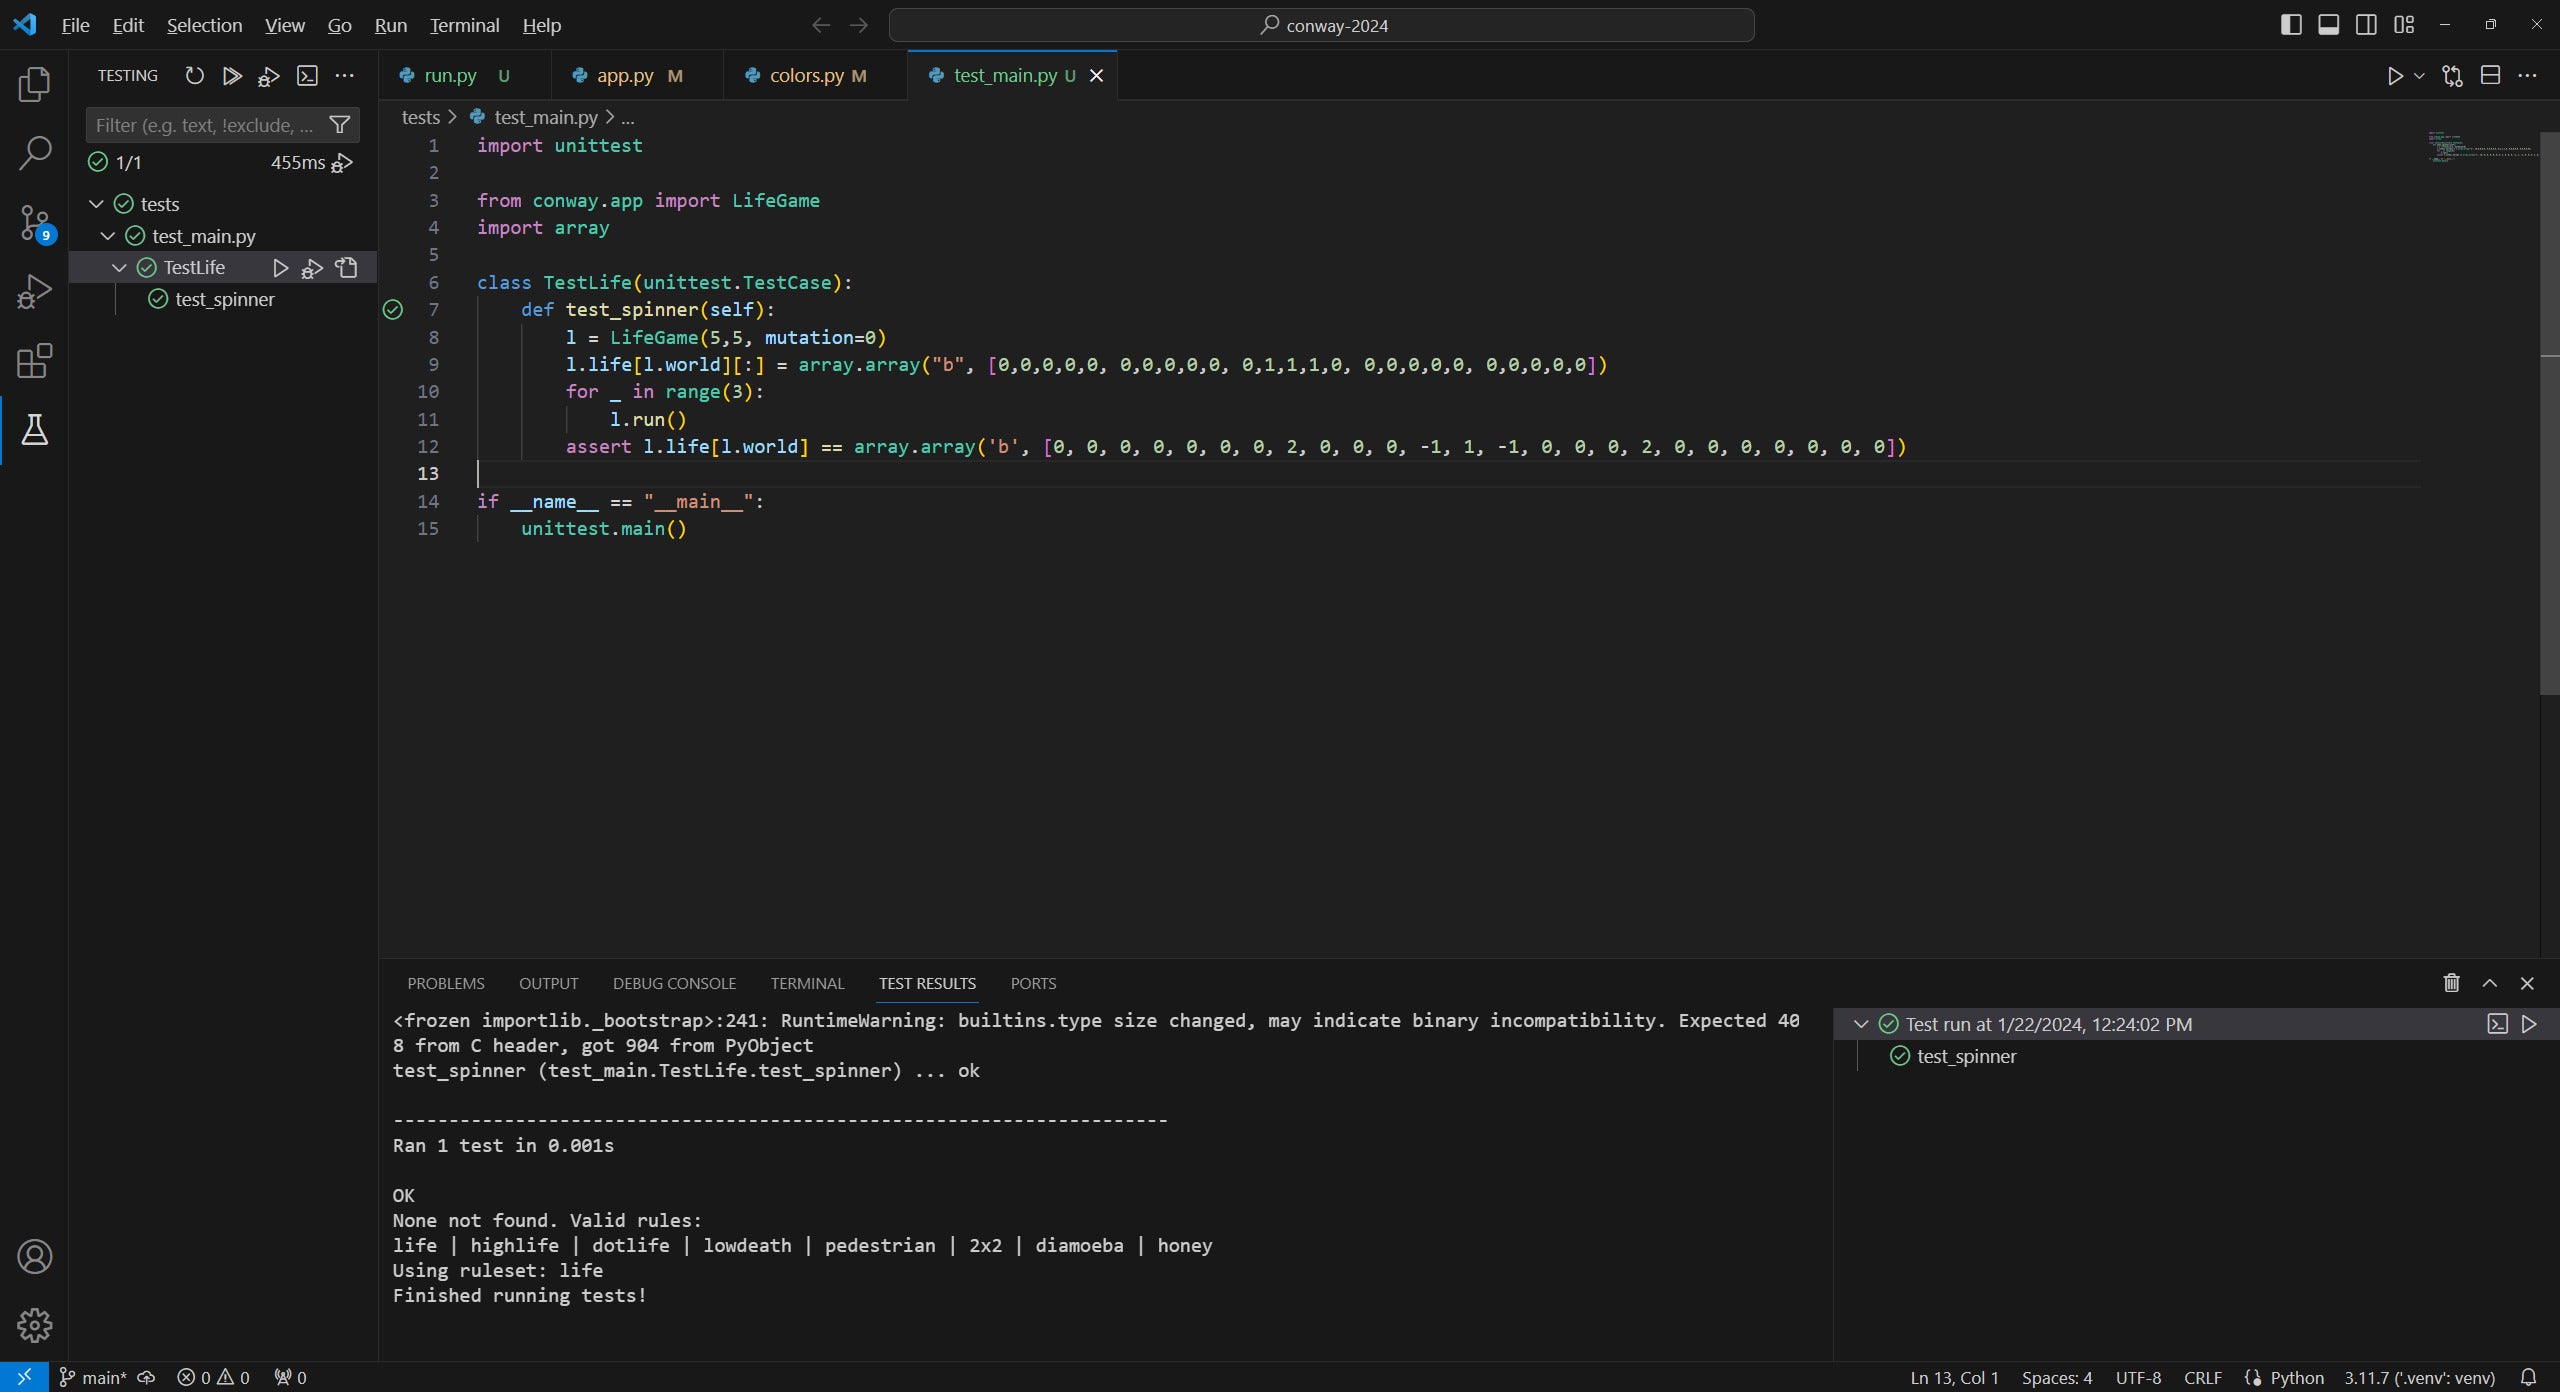 iDG
iDGDetermine 6. Take a look at suites for Python tasks may be auto-discovered and executed via the Python extension.
Copyright © 2024 IDG Communications, Inc.