
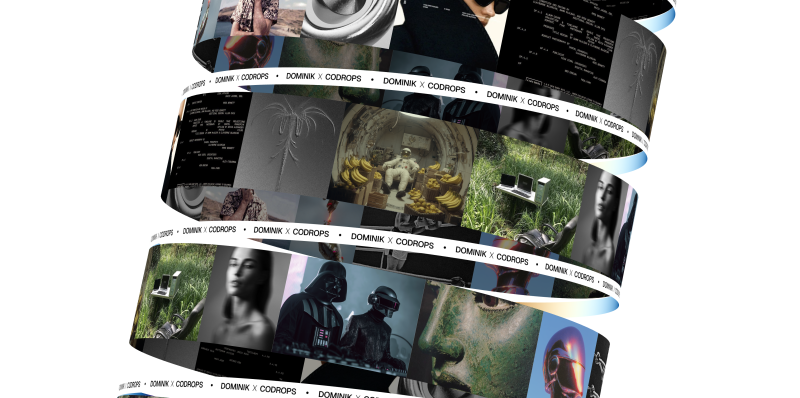
For the previous few months, I’ve been exploring completely different kinetic movement designs with textual content and pictures. The model seems very intriguing, so I made a decision to create some actually cool natural animations utilizing photographs and React Three Fiber.
On this article, we’ll discover ways to create the next animation utilizing Canvas2D and React Three Fiber.
Setting Up the View & Digital camera
The digicam’s area of view (FOV) performs an enormous function on this mission. Let’s hold it very low so it seems like an orthographic digicam. You may experiment with completely different views later. I desire utilizing a perspective digicam over an orthographic one as a result of we will at all times strive completely different FOVs. For extra detailed implementation test supply code.
<PerspectiveCamera makeDefault fov={7} place={[0, 0, 70]} close to={0.01} far={100000} />Setting Up Our 3D Shapes
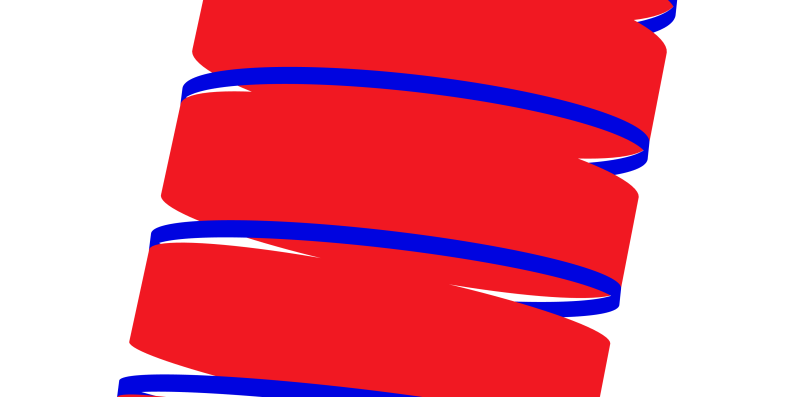
First, let’s create and place 3D objects that may show our photographs. For this instance, we have to make 2 elements:
Billboard.tsx – This can be a cylinder that may present our stack of photographs
'use shopper';

import { useRef } from 'react';
import * as THREE from 'three';

operate Billboard({ radius = 5, ...props }) {
    const ref = useRef(null);

    return (
        <mesh ref={ref} {...props}>
            <cylinderGeometry args={[radius, radius, 2, 100, 1, true]} />
            <meshBasicMaterial coloration="purple" aspect={THREE.DoubleSide} />
        </mesh>
    );
}
Banner.tsx – That is one other cylinder that may work like a transferring banner
'use shopper';

import * as THREE from 'three';
import { useRef } from 'react';

operate Banner({ radius = 1.6, ...props }) {
    const ref = useRef(null);

    return (
        <mesh ref={ref} {...props}>
            <cylinderGeometry
            args={[radius, radius, radius * 0.07, radius * 80, radius * 10, true]}
            />
            <meshBasicMaterial
            coloration="blue"
            aspect={THREE.DoubleSide}
            />
        </mesh>
    );
}

export default Banner;
As soon as we have now our elements prepared, we will use them on our web page.
Now let’s construct the entire form:
1. Create a wrapper group – We’ll make a gaggle that wraps all our elements. This can assist us rotate every part collectively later.
web page.jsx
'use shopper';

import types from './web page.module.scss';
import Billboard from '@/elements/webgl/Billboard/Billboard';
import Banner from '@/elements/webgl/Banner/Banner';
import { View } from '@/webgl/View';
import { PerspectiveCamera } from '@react-three/drei';

export default operate Dwelling() {
    return (
        <div className={types.web page}>
            <View className={types.view} orbit={false}>
            <PerspectiveCamera makeDefault fov={7} place={[0, 0, 70]} close to={0.01} far={100000} />
                <group>

                </group>
            </View>
        </div>
    );
}
2. Render Billboard and Banner elements within the loop – Inside our group, we’ll create a loop to render our Billboards and Banners a number of instances.
web page.jsx
'use shopper';

import types from './web page.module.scss';
import Billboard from '@/elements/webgl/Billboard/Billboard';
import Banner from '@/elements/webgl/Banner/Banner';
import { View } from '@/webgl/View';
import { PerspectiveCamera } from '@react-three/drei';

export default operate Dwelling() {
    return (
        <div className={types.web page}>
            <View className={types.view} orbit={false}>
            <PerspectiveCamera makeDefault fov={7} place={[0, 0, 70]} close to={0.01} far={100000} />
                <group>
                    {Array.from({ size: COUNT }).map((_, index) => [
                        <Billboard
                        key={`billboard-${index}`}
                        radius={5}
                        />,
                        <Banner
                        key={`banner-${index}`}
                        radius={5}
                        />,
                    ])}
                </group>
            </View>
        </div>
    );
}
3. Stack them up – We’ll use the index from our loop and the y place to stack our objects on prime of one another. Right here’s the way it seems thus far:
web page.jsx
'use shopper';

import types from './web page.module.scss';
import Billboard from '@/elements/webgl/Billboard/Billboard';
import Banner from '@/elements/webgl/Banner/Banner';
import { View } from '@/webgl/View';
import { PerspectiveCamera } from '@react-three/drei';

const COUNT = 10;
const GAP = 3.2;

export default operate Dwelling() {
    return (
        <div className={types.web page}>
            <View className={types.view} orbit={false}>
            <PerspectiveCamera makeDefault fov={7} place={[0, 0, 70]} close to={0.01} far={100000} />
                <group>
                    {Array.from({ size: COUNT }).map((_, index) => [
                        <Billboard
                        key={`billboard-${index}`}
                        radius={5}
                        position={[0, (index - (Math.ceil(COUNT / 2) - 1)) * GAP, 0]}
                        />,
                        <Banner
                        key={`banner-${index}`}
                        radius={5}
                        place={[0, (index - (Math.ceil(COUNT / 2) - 1)) * GAP - GAP * 0.5, 0]}
                        />,
                    ])}
                </group>
            </View>
        </div>
    );
}
4. Add some rotation – Let’s rotate issues a bit! First, I’ll hard-code the rotation of our banners to make them extra curved and match properly with the Billboard part. We’ll additionally make the radius a bit greater.
web page.jsx
'use shopper';

import types from './web page.module.scss';
import Billboard from '@/elements/webgl/Billboard/Billboard';
import Banner from '@/elements/webgl/Banner/Banner';
import { View } from '@/webgl/View';
import { PerspectiveCamera } from '@react-three/drei';

const COUNT = 10;
const GAP = 3.2;

export default operate Dwelling() {
    return (
        <div className={types.web page}>
            <View className={types.view} orbit={false}>
            <PerspectiveCamera makeDefault fov={7} place={[0, 0, 70]} close to={0.01} far={100000} />
                <group>
                    {Array.from({ size: COUNT }).map((_, index) => [
                        <Billboard
                        key={`billboard-${index}`}
                        radius={5}
                        position={[0, (index - (Math.ceil(COUNT / 2) - 1)) * GAP, 0]}
                        rotation={[0, index * Math.PI * 0.5, 0]} // <-- rotation of the billboard
                        />,
                        <Banner
                        key={`banner-${index}`}
                        radius={5}
                        rotation={[0, 0, 0.085]} // <-- rotation of the banner
                        place={[0, (index - (Math.ceil(COUNT / 2) - 1)) * GAP - GAP * 0.5, 0]}
                        />,
                    ])}
                </group>
            </View>
        </div>
    );
}
5. Tilt the entire thing – Now let’s rotate our whole group to make it appear like the Leaning Tower of Pisa.
web page.jsx
'use shopper';

import types from './web page.module.scss';
import Billboard from '@/elements/webgl/Billboard/Billboard';
import Banner from '@/elements/webgl/Banner/Banner';
import { View } from '@/webgl/View';
import { PerspectiveCamera } from '@react-three/drei';

const COUNT = 10;
const GAP = 3.2;

export default operate Dwelling() {
    return (
        <div className={types.web page}>
            <View className={types.view} orbit={false}>
            <PerspectiveCamera makeDefault fov={7} place={[0, 0, 70]} close to={0.01} far={100000} />
                <group rotation={[-0.15, 0, -0.2]}> // <-- rotate the group
                    {Array.from({ size: COUNT }).map((_, index) => [
                        <Billboard
                        key={`billboard-${index}`}
                        radius={5}
                        position={[0, (index - (Math.ceil(COUNT / 2) - 1)) * GAP, 0]}
                        rotation={[0, index * Math.PI * 0.5, 0]}
                        />,
                        <Banner
                        key={`banner-${index}`}
                        radius={5}
                        rotation={[0, 0, 0.085]}
                        place={[0, (index - (Math.ceil(COUNT / 2) - 1)) * GAP - GAP * 0.5, 0]}
                        />,
                    ])}
                </group>
            </View>
        </div>
    );
}
6. Excellent! – Our 3D shapes are all arrange. Now we will add our photographs to them.
Making a Texture from Our Pictures Utilizing Canvas
Right here’s the cool half: we’ll put all our photographs onto a canvas, then use that canvas as a texture on our Billboard form.

To make this simpler, I created some helper features that simplify the entire course of.
getCanvasTexture.js
import * as THREE from 'three';

/**
* Preloads a picture and calculates its dimensions
*/
async operate preloadImage(imageUrl, axis, canvasHeight, canvasWidth) {
    const img = new Picture();

    img.crossOrigin = 'nameless';

    await new Promise((resolve, reject) => {
        img.onload = () => resolve();
        img.onerror = () => reject(new Error(`Didn't load picture: ${imageUrl}`));
        img.src = imageUrl;
    });

    const aspectRatio = img.naturalWidth / img.naturalHeight;

    let calculatedWidth;
    let calculatedHeight;

    if (axis === 'x') {
        // Horizontal format: scale to suit canvasHeight
        calculatedHeight = canvasHeight;
        calculatedWidth = canvasHeight * aspectRatio;
        } else {
        // Vertical format: scale to suit canvasWidth
        calculatedWidth = canvasWidth;
        calculatedHeight = canvasWidth / aspectRatio;
    }

    return { img, width: calculatedWidth, peak: calculatedHeight };
}

operate calculateCanvasDimensions(imageData, axis, hole, canvasHeight, canvasWidth) {
    if (axis === 'x') {
        const totalWidth = imageData.scale back(
        (sum, knowledge, index) => sum + knowledge.width + (index > 0 ? hole : 0), 0);

        return { totalWidth, totalHeight: canvasHeight };
    } else {
        const totalHeight = imageData.scale back(
        (sum, knowledge, index) => sum + knowledge.peak + (index > 0 ? hole : 0), 0);

        return { totalWidth: canvasWidth, totalHeight };
    }
}

operate setupCanvas(canvasElement, context, dimensions) {
    const { totalWidth, totalHeight } = dimensions;
    const devicePixelRatio = Math.min(window.devicePixelRatio || 1, 2);

    canvasElement.width = totalWidth * devicePixelRatio;
    canvasElement.peak = totalHeight * devicePixelRatio;

    if (devicePixelRatio !== 1) context.scale(devicePixelRatio, devicePixelRatio);

    context.fillStyle = '#ffffff';
    context.fillRect(0, 0, totalWidth, totalHeight);
}

operate drawImages(context, imageData, axis, hole) {
    let currentX = 0;
    let currentY = 0;

    context.save();

    for (const knowledge of imageData) {
        context.drawImage(knowledge.img, currentX, currentY, knowledge.width, knowledge.peak);

        if (axis === 'x') currentX += knowledge.width + hole;
        else currentY += knowledge.peak + hole;
    }

    context.restore();
}

operate createTextureResult(canvasElement, dimensions) {
    const texture = new THREE.CanvasTexture(canvasElement);
    texture.needsUpdate = true;
    texture.wrapS = THREE.RepeatWrapping;
    texture.wrapT = THREE.ClampToEdgeWrapping;
    texture.generateMipmaps = false;
    texture.minFilter = THREE.LinearFilter;
    texture.magFilter = THREE.LinearFilter;

    return {
        texture,
        dimensions: {
            width: dimensions.totalWidth,
            peak: dimensions.totalHeight,
            aspectRatio: dimensions.totalWidth / dimensions.totalHeight,
        },
    };
}

export async operate getCanvasTexture({
    photographs,
    hole = 10,
    canvasHeight = 512,
    canvasWidth = 512,
    canvas,
    ctx,
    axis = 'x',
})  doc.createElement('canvas');
    const context = ctx
Then we will additionally create a useCollageTexture hook that we will simply use in our elements.
useCollageTexture.jsx
import { useState, useEffect, useCallback } from 'react';
import { getCanvasTexture } from '@/webgl/helpers/getCanvasTexture';

export operate useCollageTexture(photographs, choices = {}) {
const [textureResults, setTextureResults] = useState(null);
const [isLoading, setIsLoading] = useState(true);
const [error, setError] = useState(null);

const { hole = 0, canvasHeight = 512, canvasWidth = 512, axis = 'x' } = choices;

const createTexture = useCallback(async () => {
    strive {
        setIsLoading(true);
        setError(null);

        const consequence = await getCanvasTexture({
            photographs,
            hole,
            canvasHeight,
            canvasWidth,
            axis,
        });

        setTextureResults(consequence);

    } catch (err) {
        setError(err instanceof Error ? err : new Error('Didn't create texture'));
    } lastly {
        setIsLoading(false);
    }
}, [images, gap, canvasHeight, canvasWidth, axis]);

    useEffect(() => {
        if (photographs.size > 0) createTexture();
    }, [images.length, createTexture]);

    return  null,
        dimensions: textureResults?.dimensions ;
}
Including the Canvas to Our Billboard
Now let’s use our useCollageTexture hook on our web page. We’ll create some easy loading logic. It takes a second to fetch all the pictures and put them onto the canvas. Then we’ll cross our texture and dimensions of canvas into the Billboard part.
web page.jsx
'use shopper';

import types from './web page.module.scss';
import Billboard from '@/elements/webgl/Billboard/Billboard';
import Banner from '@/elements/webgl/Banner/Banner';
import Loader from '@/elements/ui/modules/Loader/Loader';
import photographs from '@/knowledge/photographs';
import { View } from '@/webgl/View';
import { PerspectiveCamera } from '@react-three/drei';
import { useCollageTexture } from '@/hooks/useCollageTexture';

const COUNT = 10;
const GAP = 3.2;

export default operate Dwelling() {
    const { texture, dimensions, isLoading } = useCollageTexture(photographs); // <-- getting the feel and dimensions from the useCollageTexture hook

    if (isLoading) return <Loader />; // <-- exhibiting the loader when the feel is loading

    return (
        <div className={types.web page}>
            <View className={types.view} orbit={false}>
                <PerspectiveCamera makeDefault fov={7} place={[0, 0, 100]} close to={0.01} far={100000} />
                <group rotation={[-0.15, 0, -0.2]}>
                    {Array.from({ size: COUNT }).map((_, index) => [
                        <Billboard
                            key={`billboard-${index}`}
                            radius={5}
                            rotation={[0, index * Math.PI * 0.5, 0]}
                            place={[0, (index - (Math.ceil(COUNT / 2) - 1)) * GAP, 0]}
                            texture={texture} // <--passing the feel to the billboard
                            dimensions={dimensions} // <--passing the size to the billboard
                        />,
                        <Banner
                            key={`banner-${index}`}
                            radius={5.035}
                            rotation={[0, 0, 0.085]}
                            place={[
                                0,
                                (index - (Math.ceil(COUNT / 2) - 1)) * GAP - GAP * 0.5,
                                0,
                            ]}
                        />,
                    ])}
                </group>
            </View>
        </div>
    );
}
Contained in the Billboard part, we have to correctly map this texture to verify every part matches accurately. The width of our canvas will match the circumference of the cylinder, and we’ll middle the y place of the feel. This fashion, all the pictures hold their decision and don’t get squished or stretched.
Billboard.jsx
'use shopper';

import * as THREE from 'three';
import { useRef } from 'react';

operate setupCylinderTextureMapping(texture, dimensions, radius, peak) {
    const cylinderCircumference = 2 * Math.PI * radius;
    const cylinderHeight = peak;
    const cylinderAspectRatio = cylinderCircumference / cylinderHeight;

    if (dimensions.aspectRatio > cylinderAspectRatio) {
        // Canvas is wider than cylinder proportionally
        texture.repeat.x = cylinderAspectRatio / dimensions.aspectRatio;
        texture.repeat.y = 1;
        texture.offset.x = (1 - texture.repeat.x) / 2;
    } else {
        // Canvas is taller than cylinder proportionally
        texture.repeat.x = 1;
        texture.repeat.y = dimensions.aspectRatio / cylinderAspectRatio;
    }

    // Middle the feel
    texture.offset.y = (1 - texture.repeat.y) / 2;
}

operate Billboard({ texture, dimensions, radius = 5, ...props }) {
    const ref = useRef(null);

    setupCylinderTextureMapping(texture, dimensions, radius, 2);

    return (
        <mesh ref={ref} {...props}>
            <cylinderGeometry args={[radius, radius, 2, 100, 1, true]} />
            <meshBasicMaterial map={texture} aspect={THREE.DoubleSide} />
        </mesh>
    );
}

export default Billboard;
Now let’s animate them utilizing the useFrame hook. The trick to animating these photographs is to simply transfer the X offset of the feel. This offers us the impact of a rotating mesh, when actually we’re simply transferring the feel offset.
Billboard.jsx
'use shopper';

import * as THREE from 'three';
import { useRef } from 'react';
import { useFrame } from '@react-three/fiber';

operate setupCylinderTextureMapping(texture, dimensions, radius, peak) {
    const cylinderCircumference = 2 * Math.PI * radius;
    const cylinderHeight = peak;
    const cylinderAspectRatio = cylinderCircumference / cylinderHeight;

    if (dimensions.aspectRatio > cylinderAspectRatio) {
        // Canvas is wider than cylinder proportionally
        texture.repeat.x = cylinderAspectRatio / dimensions.aspectRatio;
        texture.repeat.y = 1;
        texture.offset.x = (1 - texture.repeat.x) / 2;
    } else {
        // Canvas is taller than cylinder proportionally
        texture.repeat.x = 1;
        texture.repeat.y = dimensions.aspectRatio / cylinderAspectRatio;
    }

    // Middle the feel
    texture.offset.y = (1 - texture.repeat.y) / 2;
}

operate Billboard({ texture, dimensions, radius = 5, ...props }) {
    const ref = useRef(null);

    setupCylinderTextureMapping(texture, dimensions, radius, 2);

    useFrame((state, delta) => {
        if (texture) texture.offset.x += delta * 0.001;
    });

    return (
        <mesh ref={ref} {...props}>
            <cylinderGeometry args={[radius, radius, 2, 100, 1, true]} />
            <meshBasicMaterial map={texture} aspect={THREE.DoubleSide} />
        </mesh>
    );
}

export default Billboard;
I believe it might look even higher if we made the again of the pictures a bit of darker. To do that, I created MeshImageMaterial – it’s simply an extension of MeshBasicMaterial that makes our backface a bit darker.
MeshImageMaterial.js
import * as THREE from 'three';
import { lengthen } from '@react-three/fiber';

export class MeshImageMaterial extends THREE.MeshBasicMaterial {
    constructor(parameters = {}) {
        tremendous(parameters);
        this.setValues(parameters);
    }

    onBeforeCompile = (shader) => {
        shader.fragmentShader = shader.fragmentShader.exchange(
            '#embrace <color_fragment>',
            /* glsl */ `#embrace <color_fragment>
            if (!gl_FrontFacing) {
            vec3 blackCol = vec3(0.0);
            diffuseColor.rgb = combine(diffuseColor.rgb, blackCol, 0.7);
            }
            `
        );
    };
}

lengthen({ MeshImageMaterial });
Billboard.jsx
'use shopper';

import * as THREE from 'three';
import { useRef } from 'react';
import { useFrame } from '@react-three/fiber';
import '@/webgl/supplies/MeshImageMaterial';

operate setupCylinderTextureMapping(texture, dimensions, radius, peak) {
    const cylinderCircumference = 2 * Math.PI * radius;
    const cylinderHeight = peak;
    const cylinderAspectRatio = cylinderCircumference / cylinderHeight;

    if (dimensions.aspectRatio > cylinderAspectRatio) {
        // Canvas is wider than cylinder proportionally
        texture.repeat.x = cylinderAspectRatio / dimensions.aspectRatio;
        texture.repeat.y = 1;
        texture.offset.x = (1 - texture.repeat.x) / 2;
    } else {
        // Canvas is taller than cylinder proportionally
        texture.repeat.x = 1;
        texture.repeat.y = dimensions.aspectRatio / cylinderAspectRatio;
    }

    // Middle the feel
    texture.offset.y = (1 - texture.repeat.y) / 2;
}

operate Billboard({ texture, dimensions, radius = 5, ...props }) {
    const ref = useRef(null);

    setupCylinderTextureMapping(texture, dimensions, radius, 2);

    useFrame((state, delta) => {
        if (texture) texture.offset.x += delta * 0.001;
    });

    return (
        <mesh ref={ref} {...props}>
            <cylinderGeometry args={[radius, radius, 2, 100, 1, true]} />
            <meshImageMaterial map={texture} aspect={THREE.DoubleSide} toneMapped={false} />
        </mesh>
    );
}

export default Billboard;
And now we have now our photographs transferring round cylinders. Subsequent, we’ll concentrate on banners (or marquees, no matter you like).
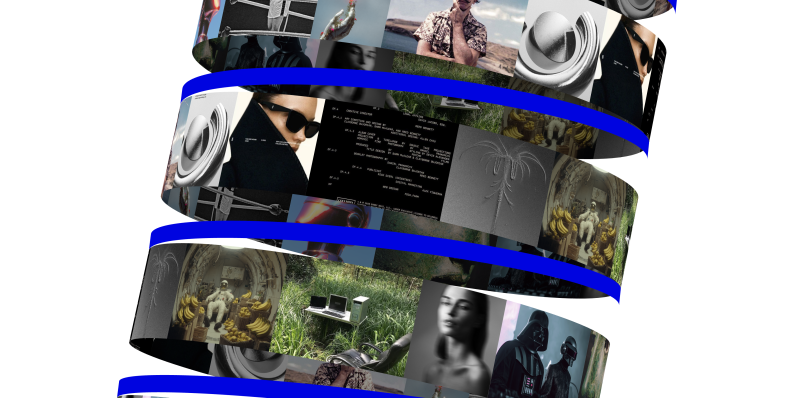
Including Texture to the Banner
The very last thing we have to repair is our Banner part. I wrapped it with this texture. Be happy to take it and edit it nevertheless you need, however bear in mind to maintain the right dimensions of the feel.

We merely import our texture utilizing the useTexture hook, map it onto our materials, and animate the feel offset identical to we did in our Billboard part.
Billboard.jsx
'use shopper';

import * as THREE from 'three';
import bannerTexture from '@/belongings/photographs/banner.jpg';
import { useTexture } from '@react-three/drei';
import { useFrame } from '@react-three/fiber';
import { useRef } from 'react';

operate Banner({ radius = 1.6, ...props }) {
    const ref = useRef(null);

    const texture = useTexture(bannerTexture.src);
    texture.wrapS = texture.wrapT = THREE.RepeatWrapping;

    useFrame((state, delta) => {
        if (!ref.present) return;
        const materials = ref.present.materials;
        if (materials.map) materials.map.offset.x += delta / 30;
    });

    return (
        <mesh ref={ref} {...props}>
            <cylinderGeometry
                args={[radius, radius, radius * 0.07, radius * 80, radius * 10, true]}
            />
            <meshBasicMaterial
                map={texture}
                map-anisotropy={16}
                map-repeat={[15, 1]}
                aspect={THREE.DoubleSide}
                toneMapped={false}
                backfaceRepeatX={3}
            />
        </mesh>
    );
}

export default Banner;
Good! Now we have now one thing cool, however I believe it might look even cooler if we changed the backface with one thing completely different. Possibly a gradient? For this, I created one other extension of MeshBasicMaterial known as MeshBannerMaterial. As you most likely guessed, we simply put a gradient on the backface. That’s it! Let’s use it in our Banner part.
We exchange the MeshBasicMaterial with MeshBannerMaterial and now it seems like this!
MeshBannerMaterial.js
import * as THREE from 'three';
import { lengthen } from '@react-three/fiber';

export class MeshBannerMaterial extends THREE.MeshBasicMaterial {
    constructor(parameters = {}) {
        tremendous(parameters);
        this.setValues(parameters);

        this.backfaceRepeatX = 1.0;

        if (parameters.backfaceRepeatX !== undefined)

        this.backfaceRepeatX = parameters.backfaceRepeatX;
    }

    onBeforeCompile = (shader) => {
        shader.uniforms.repeatX = { worth: this.backfaceRepeatX * 0.1 };
        shader.fragmentShader = shader.fragmentShader
        .exchange(
            '#embrace <widespread>',
            /* glsl */ `#embrace <widespread>
            uniform float repeatX;

            vec3 pal( in float t, in vec3 a, in vec3 b, in vec3 c, in vec3 d ) {
                return a + b*cos( 6.28318*(c*t+d) );
            }
            `
        )
        .exchange(
            '#embrace <color_fragment>',
            /* glsl */ `#embrace <color_fragment>
            if (!gl_FrontFacing) {
            diffuseColor.rgb = pal(vMapUv.x * repeatX, vec3(0.5,0.5,0.5),vec3(0.5,0.5,0.5),vec3(1.0,1.0,1.0),vec3(0.0,0.10,0.20) );
            }
            `
        );
    };
}

lengthen({ MeshBannerMaterial });
Banner.jsx
'use shopper';
import * as THREE from 'three';
import bannerTexture from '@/belongings/photographs/banner.jpg';
import { useTexture } from '@react-three/drei';
import { useFrame } from '@react-three/fiber';
import { useRef } from 'react';
import '@/webgl/supplies/MeshBannerMaterial';
operate Banner({ radius = 1.6, ...props }) {
const ref = useRef(null);
const texture = useTexture(bannerTexture.src);
texture.wrapS = texture.wrapT = THREE.RepeatWrapping;
useFrame((state, delta) => {
if (!ref.present) return;
const materials = ref.present.materials;
if (materials.map) materials.map.offset.x += delta / 30;
});
return (
<mesh ref={ref} {...props}>
<cylinderGeometry
args={[radius, radius, radius * 0.07, radius * 80, radius * 10, true]}
/>
<meshBannerMaterial
map={texture}
map-anisotropy={16}
map-repeat={[15, 1]}
aspect={THREE.DoubleSide}
toneMapped={false}
backfaceRepeatX={3}
/>
</mesh>
);
}
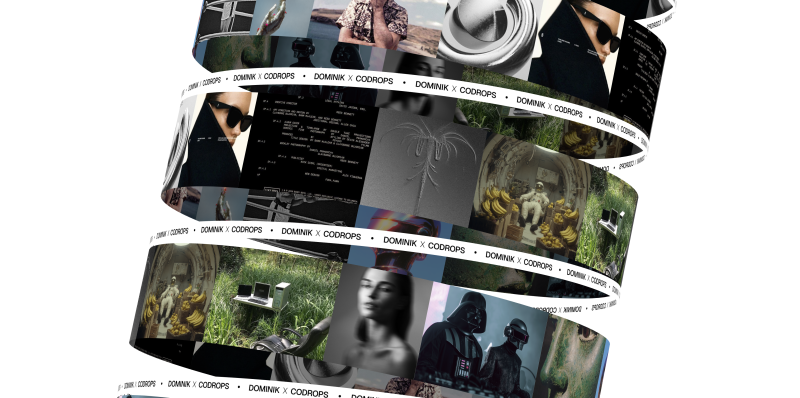
export default Banner;And now we have now it ✨
You may experiment with this methodology in a number of methods. For instance, I created 2 extra examples with shapes I made in Blender, and mapped canvas textures on them. You may test them out right here:
Closing Phrases
Try the ultimate variations of all demos:
I hope you loved this tutorial and realized one thing new!
Be happy to take a look at the supply code for extra particulars!