
Introduction
Think about being a medical pupil needing to visualise complicated anatomical constructions or an information scientist creating interactive 3D fashions. PyVista affords the precision and interactivity required to make these duties partaking and insightful. We’ll begin by exploring PyVista’s options and set up, then create beautiful human anatomy visualizations, such because the mind, chest, and complete human physique. Lastly, we’ll grasp superior methods to customise these visualizations. By the top of this weblog, you’ll be able to create detailed 3D visualizations with ease.
Studying Targets
- Perceive the principle options and modules of the PyVista library.
- Study all of the methods to put in this library in your system.
- Discover ways to visualize the assorted human anatomy visualizations PyVista offers.
- Perceive all of the customizations PyVista affords, equivalent to quantity rendering, shading, opacity changes, and extra.
This text was printed as part of the Knowledge Science Blogathon.
Introduction to PyVista
PyVista is without doubt one of the strongest 3D visualization libraries accessible on the market. It’s constructed on high of the Visualization Toolkit (VTK) and affords many customizations via numerous parameters to create detailed visualizations. Utilizing the PyVista interface, we are able to work together with our visualizations and study them intimately. One of many primary options of this library is that it has a ton of inbuilt 3D datasets, making it simple to make use of. This library affords a variety of options equivalent to lighting adjustment, filtering, including widgets to visualizations, creating mesh objects, and permitting customized changes in some options. It has many filter choices in order that we are able to visualize our object or plot in numerous methods and perceive it completely.
Key Options of PyVista
Allow us to now discover options of PyVista intimately.
Mesh Creation
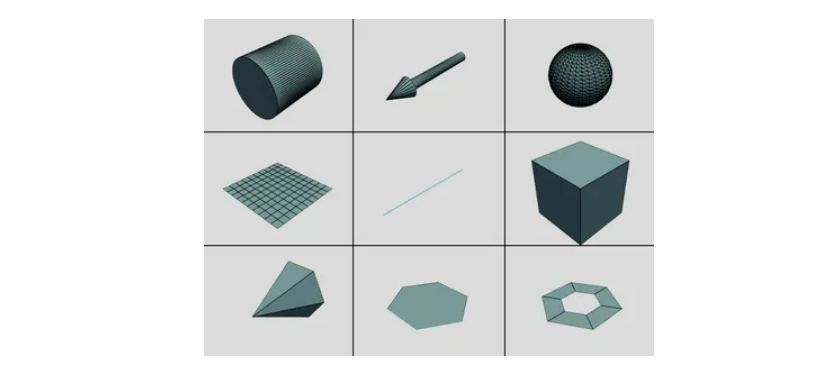
Creating and modifying 3D meshes is without doubt one of the primary options of PyVista. This library permits us to learn many file sorts into mesh objects, equivalent to creating meshes from NumPy arrays and creating widespread objects like cubes, arrows, spheres, and many others. As soon as we create a mesh object, we are able to plot and combine it into one other visualization with just some strains of code.
Filtering
PyVista offers a Filter module, which permits us to carry out a variety of duties, equivalent to analyzing and manipulating mesh knowledge, slicing and slicing meshes, computing mesh properties equivalent to space, and lowering the complexity of meshes.
PyVista additionally offers some superior filtering methods like eradicating particular components of 1 mesh and becoming a member of one other mesh in that place. It offers ray tracing, that means we are able to edit how the sunshine interacts with the item. Moreover, it helps interpolating scalar or vector values and integrating vector fields to generate streamlines, enabling us to visualise how air or fluid flows across the object.
Lighting
Adjusting lighting in a visualization may be very needed, therefore pyVista permits us to manage lighting by letting us select between preset lighting programs, customized gentle sorts, and extra. We are able to disable gentle on the mesh degree, or customise from which aspect the sunshine ought to come. These superior lighting methods assist customers to create the most effective visualizations potential.
Widgets
PyVista offers many interactive widgets that we are able to use in our visualizations. These widgets assist us render scenes to manage filters like clipping, slicing, and thresholding. All these widgets might be personalized utilizing customized callback features. Utilizing these widgets, we are able to management the positions of meshes, use slider bars for numerous duties, and even combine a number of widgets into one visualization. These widgets assist us carry out widespread duties in a straightforward and interactive manner.

Putting in PyVista
Earlier than we set up the PyVista library we have to set up the Visualization Toolkit (VTK) in our system, as I advised you, PyVista is constructed on high of VTK. Paste this beneath command in your terminal to put in VTK.
pip set up vtkWe are able to set up this library in any of the next methods:
Set up by way of PyPI
To put in it utilizing PyPI, paste this beneath command in your terminal:
pip set up pyvista['all']Set up by way of GitHub
To put in it utilizing GitHub, first clone the official PyVista repository utilizing the command beneath, then run the following command within the cloned folder’s terminal.
git clone https://github.com/pyvista/pyvista.git
python setup.py set up
Exploring Human Anatomy Visualizations with PyVista
We’ll discover numerous detailed 3D fashions of anatomical constructions such because the mind, chest, foot, and the complete human physique, showcasing PyVista’s highly effective capabilities and ease of use.
Mind Atlas With Sides
On this visualization, we are going to create the mind’s anatomical construction, exhibiting each the left and proper hemispheres. This visualization can be utilized to know the spatial relationships between completely different components of the mind, making it helpful within the area of medication.
To create this visualization, we are going to first import the examples module from PyVista, which accommodates the mind dataset. Then, we are going to obtain the information by calling examples.download_brain_atlas_with_sides(). Lastly, to view the visualization and open the PyVista interface, we are going to name the plot() perform. We’ll set the quantity parameter to True to fill the mind construction with color and set the cmap parameter to ‘bone’ to get a grey-blueish colormap. If you run this program, the PyVista interface will open with the visualization, permitting us to work together with it and achieve a deeper understanding of the mind.
from pyvista import examples

brain_atlas = examples.download_brain_atlas_with_sides()
brain_atlas.plot(quantity=True, cmap="bone")
Output:
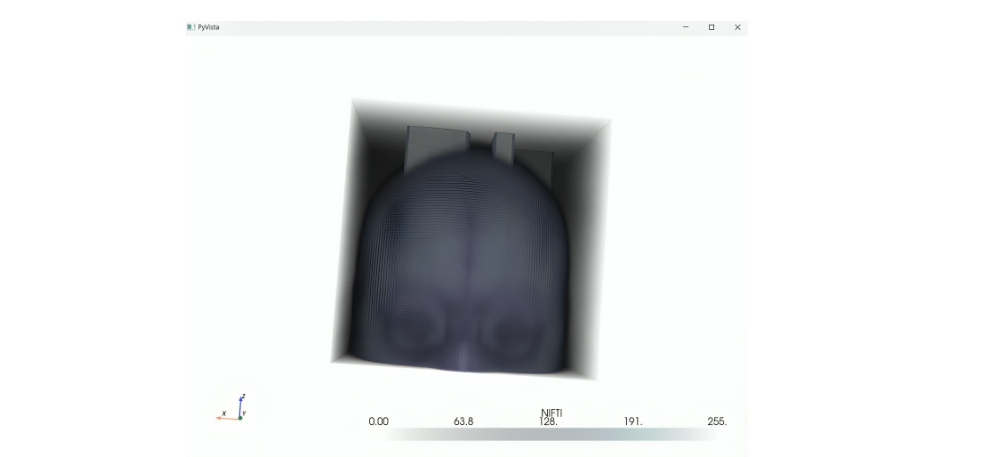
Chest Visualization
On this visualization, we are going to create a chest visualization, to look at the chest in a anatomical manner. This could possibly be useful for medical training and diagnostic functions. Identical to the earlier manner, to create this visualization, we are going to first import the examples modules from the Pyvista library. We’ll then obtain the chest dataset by calling examples.download_chest(). Lastly, to plot the visualization, we are going to name the plot() perform through which we are going to go the fashion parameter as floor and the background as white. If you run this code, you’re going to get the chest visualization.
from pyvista import examples

chest = examples.download_chest()
chest.plot(fashion="floor", background='white')
Output:

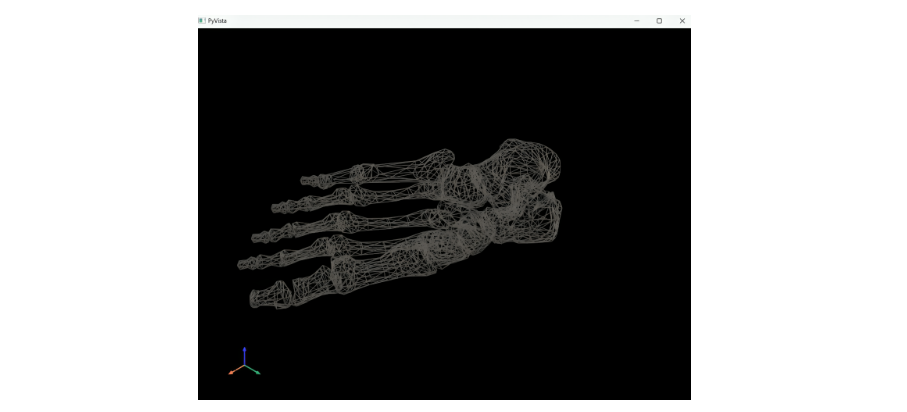
The ‘Foot’ visualization offers an in depth view of the bones within the foot, permitting us to look at the construction and identification of any fractures. This makes it a invaluable software within the area of medication.
To create this visualization, we are going to import the examples module from PyVista and obtain the information by calling examples.download_foot_bones(). Then, we are going to name the plot() perform, setting the fashion to wireframe to visualise the bone construction, the background to black, and the bone color to grey.
from pyvista import examples

foot_bones = examples.download_foot_bones()
foot_bones.plot(fashion="wireframe", coloration="grey", background='black', show_axes=True)
Output:
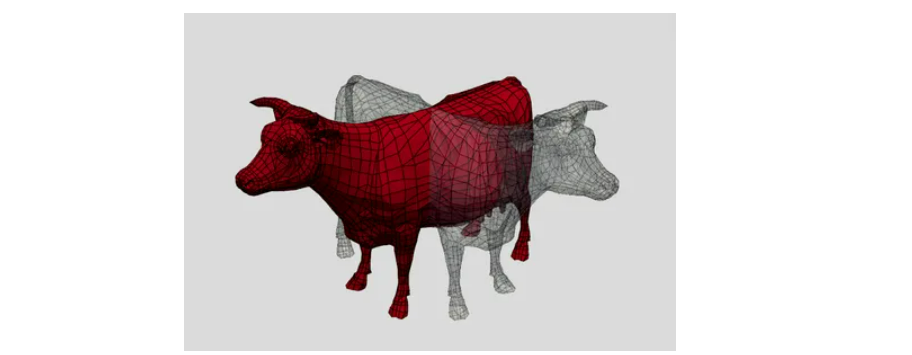
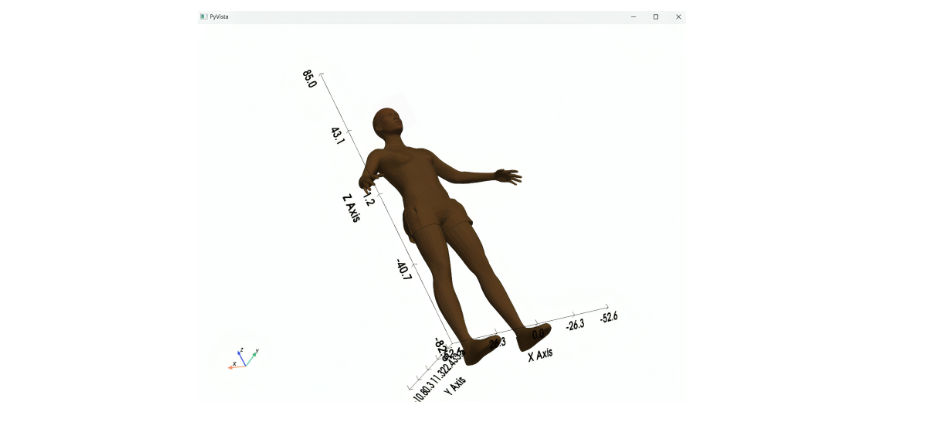
Complete Human Physique Visualization
On this visualization, we are going to construct a complete human 3d visualization, to look at the entire anatomical construction. To load and visualize this mannequin, we comply with an analogous course of to the earlier examples. We’ll first import the examples module from PyVista and obtain the information by calling the examples.download_human() perform. We are able to additionally create and import our personal 3D dataset for visualization. Then, to plot the visualization, we are going to name the plot() perform, set the fashion to floor, the human mannequin coloration to brown, the background coloration to white, and allow the show_bounds parameter to show the x, y, and z axes.
from pyvista import examples

human = examples.download_human()
human.plot(fashion="floor", coloration="brown", background='white', show_bounds=True)
Output:
Superior Visualization Methods
We’ll now discover the superior visualization methods provided by PyVista, together with quantity rendering, customized opacity settings, shading, and interactive widgets. These methods enable for a deeper and extra nuanced examination of 3D fashions, enhancing readability and offering richer insights into the visualized knowledge.
Quantity Rendering
Quantity rendering is a robust approach in PyVista that permits us to render complicated constructions throughout the human physique, offering an in depth view of inside anatomy. This methodology allows us to regulate opacity and coloration mapping (CMAP) to achieve deeper insights into the visualization.
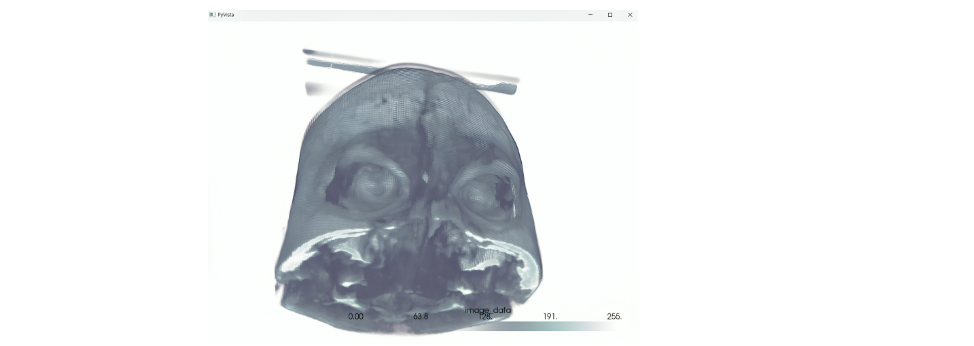
To construct this visualization, we are going to first import the examples module from PyVista, after which obtain the mind knowledge utilizing the examples.download_brain() perform. Subsequent, we are going to specify the digital camera place utilizing cpos. Then, we are going to plot the visualization utilizing the plot() perform, specifying quantity as True and colormap as ‘bone’, and importing the cpos. This code will create an in depth, interactive 3D mind visualization.
from pyvista import examples

knowledge =  examples.download_brain()
cpos = [(-381.74, -46.02, 216.54), (74.8305, 89.2905, 100.0), (0.23, 0.072, 0.97)]

knowledge.plot(quantity=True, cmap="bone", cpos=cpos)
Output:
Sigmoid Opacity
The sigmoid opacity is a parameter in quantity rendering that enhances the visibility of constructions by growing transparency, making it simpler to establish and study particular components of the mind.
To use this filter, first we are going to import the examples module, obtain the mind knowledge, and specify the digital camera place identical to above. Now we are going to create a plotter object from PyVista by calling Plotter(). Then we are going to use the add_volume() perform so as to add the information, specify the colormap as ‘bone’, and set the opacity as ‘sigmoid’. Subsequent, we are going to add the digital camera place (cpos) to the plot and use the present() perform to show the plot. You possibly can see the distinction in brightness in comparison with the earlier output.
import pyvista as pv
from pyvista import examples

knowledge =  examples.download_brain()
cpos = [(-381.74, -46.02, 216.54), (74.8305, 89.2905, 100.0), (0.23, 0.072, 0.97)]

pl = pv.Plotter()
pl.add_volume(knowledge, cmap="bone", opacity="sigmoid")
pl.camera_position = cpos
pl.present()
Output:
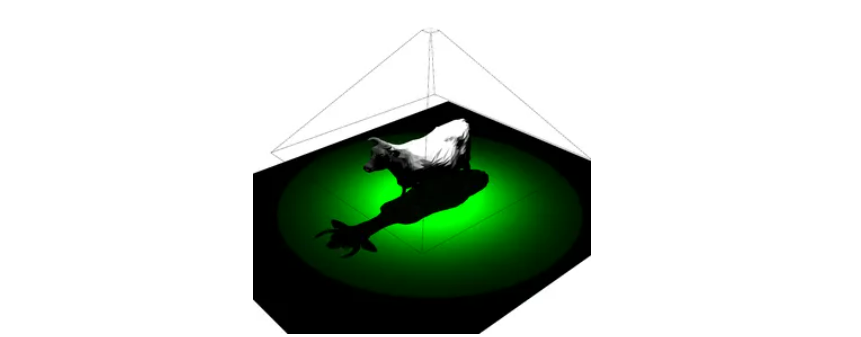
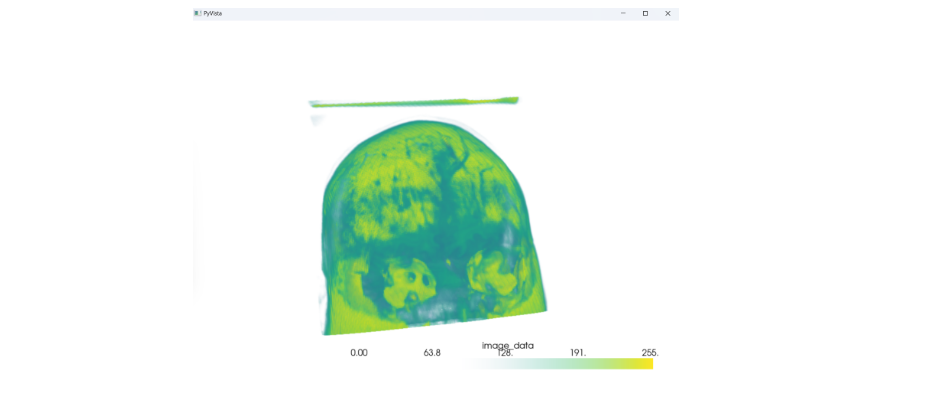
Customized Opacity
If we wish a customized opacity for the visualization reasonably than predefined choices like sigmoid, we are able to outline a customized record of values for opacity. By defining a customized opacity switch perform, we are able to management our visualization to a brand new degree.
To create this visualization, we are going to comply with the standard steps: importing the mandatory library, downloading the mind knowledge, and defining the digital camera place. Then, we are going to outline the opacity values in an inventory. Subsequent, we are going to create a Plotter object and add the information utilizing the add_volume() perform, through which we are going to go the information variable, set the colormap to ‘viridis’ to present shades of inexperienced to our mind, and go the opacity variable to the opacity parameter. Lastly, we are going to add the digital camera place (cpos) to the plot and use the present() perform to show the plot.
import pyvista as pv
from pyvista import examples

knowledge =  examples.download_brain()
cpos = [(-381.74, -46.02, 216.54), (74.8305, 89.2905, 100.0), (0.23, 0.072, 0.97)]

opacity = [0, 0, 0, 0.1, 0.3, 0.6, 1]

pl = pv.Plotter()
pl.add_volume(knowledge, cmap="viridis", opacity=opacity)
pl.camera_position = cpos
pl.present()
Output:
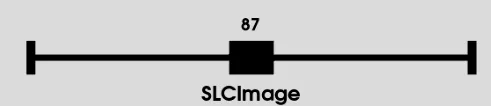
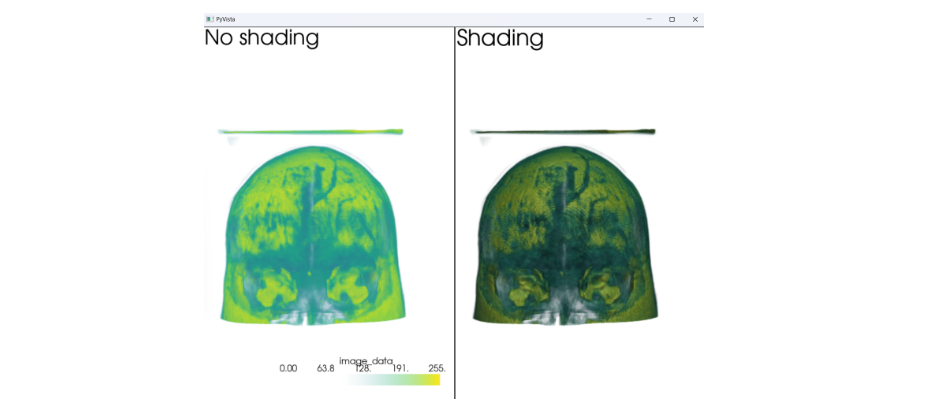
Shading
Shading is one other necessary parameter of the quantity perform, utilizing which we are able to improve the depth and floor particulars by including results of sunshine on the item’s floor. By including shading, we are able to create a extra practical visualization, making it simpler to look at our visualization.
On this instance, we are going to create two plots: one with shading and one other with out shading. An awesome characteristic of PyVista’s visualizations is that interacting with one plot will synchronize the actions within the different, permitting us to visualise each plots in the identical area concurrently.
To create this visualization, we are going to first create a standard visualization of the mind with out shading. For this, we are going to comply with the identical course of as above. Moreover, we are going to use the add_text() perform so as to add a title. For the primary plot, the title will likely be “No Shading”. Then, to create a second plot, we are going to name the subplot() perform and add the quantity with shading by setting shade=True. Lastly, we are going to use the link_views() perform to hyperlink each plots, permitting synchronized interactions. We’ll view the plots utilizing the present() perform.
import pyvista as pv
from pyvista import examples

knowledge =  examples.download_brain()
cpos = [(-381.74, -46.02, 216.54), (74.8305, 89.2905, 100.0), (0.23, 0.072, 0.97)]

opacity = [0, 0, 0, 0.1, 0.3, 0.6, 1]

pl = pv.Plotter(form=(1, 2))
pl.add_volume(knowledge, cmap="viridis", opacity=opacity, shade=False)
pl.add_text("No shading")
pl.camera_position = cpos

pl.subplot(0, 1)
pl.add_volume(knowledge, cmap="viridis", opacity=opacity, shade=True)
pl.add_text("Shading")
pl.link_views()
pl.present()
Output:
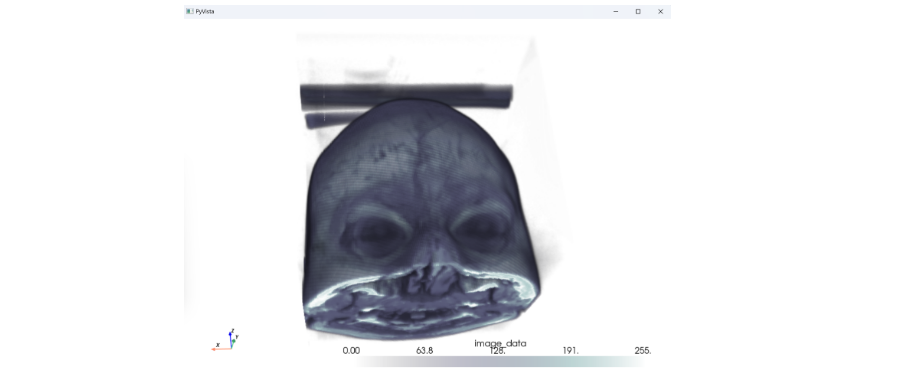
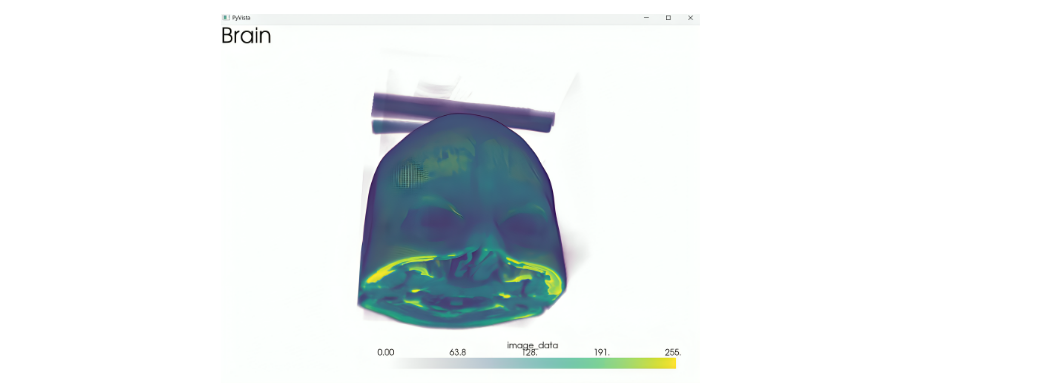
Visualizing Customized Knowledge
Docs can use PyVista to visualise their affected person’s medical knowledge to establish if there are any abnormalities or damages. By utilizing the volumetric rendering approach, medical doctors can create detailed 3D fashions of their affected person’s medical imaging knowledge from codecs equivalent to .vtk, .vti, or .nii.
On this instance, let’s load a affected person’s mind knowledge to see if there are any damages. First, we are going to import the PyVista library with an alias as pv, then we are going to name the learn() perform of PyVista to load the medical picture knowledge from a file. On this instance, we are going to use a mind.vtk file (https://github.com/pyvista/vtk-data/blob/grasp/Knowledge/mind.vtk). Subsequent, we are going to create a Plotter object and add quantity to the mind knowledge utilizing the add_volume() perform. After including a title, we are going to name the present() perform to visualise our knowledge.
import pyvista as pv

knowledge = pv.learn("C:CustomersananyasmDesktoppyVistamind.vtk")

pl = pv.Plotter()
pl.add_volume(knowledge)
pl.add_text("Mind")

pl.present()
Output:
Conclusion
In conclusion, PyVista is a superb 3D visualization Python library. It affords a clear interface that permits customers to create and render complicated visualizations with minimal code. PyVista offers many built-in datasets that can be utilized to create visualizations immediately. On this weblog, we targeted on using the medical examples and datasets accessible in PyVista, creating completely different anatomical visualizations such because the mind, chest, foot, and the entire human physique. We then explored numerous filters accessible, which might be personalized utilizing parameters with the mind instance. By now, it’s best to have a very good understanding of the fundamental process to create any visualization utilizing PyVista. So, subsequent time you wish to visualize a 3D plot, do strive PyVista.
Key Takeaways
- PyVista offers a user-friendly interface for creating complicated 3D visualizations with minimal code.
- It affords completely different modules equivalent to Mesh Creation, Filtering, Lighting, Widgets, and many others.
- PyVista’s built-in datasets make the method of making detailed 3D visualizations simple.
- It offers many customization methods like quantity rendering, shading, and opacity changes to boost the readability and element of 3D fashions.
Continuously Requested Questions
A. Being able so as to add customized opacity to our visualizations helps us management the transparency of the visualization, enhancing the readability and element.
A. We are able to create visualizations of the mind, chest, foot, complete human physique, torso, knee, and lots of extra.
A. Sure, we are able to create widespread 3D objects equivalent to cubes, spheres, arrows, and lots of extra.
A. PyVista permits us to decide on between preset lighting programs, customized gentle sorts, and we are able to management the path and depth of the lights.
The media proven on this article is just not owned by Analytics Vidhya and is used on the Creator’s discretion.