SvelteKit is an formally supported framework, constructed round Svelte. It provides key options to a Svelte app — similar to routing, layouts and server-side rendering — and makes frontend improvement outrageously easy.
On this tutorial, we’ll take a beginner-friendly have a look at each Svelte and SvelteKit and construct out a easy net app displaying profile pages of imaginary customers. Alongside the way in which, we’ll have a look at all the primary options that SvelteKit has to supply.
Key Takeaways
The Advantages of Working with Svelte
Svelte is rising in recognition, and that’s for purpose. Growing apps with Svelte is predicated on writing reusable and self-contained elements — much like different fashionable JavaScript frameworks similar to React.
The massive distinction comes with its build-time compilation — versus a run-time interpretation of the code. In different phrases, Svelte already compiles our code in the course of the construct course of and the ultimate bundle solely comprises JavaScript that our software truly wants. This leads to quick net apps with small bundle sizes.
Different frameworks solely parse and bundle up the code we’ve written, primarily taking the part tree as is and transport it to the consumer. To ensure that the browser to have the ability to interpret it and replace the UI, much more code must be delivered and extra work is finished on the consumer facet. (You possibly can learn right here how React handles this course of below the hood.)
Aside from that, Svelte is a perfect framework for rookies. Everybody who is aware of find out how to write HTML and find out how to embody <model> and <script> tags with primary JavaScript and CSS can already begin writing Svelte elements.
So, Why Do I Want SvelteKit?
Whereas Svelte alone offers us an excellent improvement expertise, we nonetheless should resolve how we wish to ship our software to the consumer. The classical method can be to take our favourite module bundler like webpack or Rollup and bundle our code into one large, fats JavaScript file. Then, we’d name it from a really primary HTML doc, like so:
<!DOCTYPE html>
<html>
  <head>
    <meta charset="UTF-8" />
    ...
  </head>

  <physique>

    <div id="app" />

    <script src="dist/bundle.js"></script>
  </physique>
</html>
Whereas that is completely legit, the consumer’s expertise may not be preferrred. There are various touchpoints for enchancment and that is the place SvelteKit comes into play.
To begin with, as an alternative of serving an virtually empty HTML file to the consumer, SvelteKit already comes with all of the HTML parts we’d like for the primary web page view. The advantages are quicker web page hundreds and Website positioning boosts. There are two methods SvelteKit does this: prerendering and server-side rendering. I’ll clarify each in additional element beneath. What stays the identical is that, as soon as the JavaScript has been loaded, it takes over and allows typical options of a single web page software, like client-side routing. It’s price noting that we will additionally inform SvelteKit to omit the primary render on the server and behave like a classical single web page software. The framework may be very versatile.
The second apparent distinction between SvelteKit and a classical single JavaScript bundle is code-splitting. As a substitute of serving your complete app in a single single JavaScript file, SvelteKit splits the code into separate, smaller chunks. Every chunk represents a route of our software. For instance, all the things that must be fetched for the /dwelling and for the /about routes shall be loaded as soon as the consumer truly wants it — or slightly bit earlier if we make use of SvelteKit’s prefetching performance (like we’ll do beneath).
One other excellent advantage of SvelteKit is that we will resolve which deployment setting our app goes to run in. These days, frontend builders have quite a lot of totally different platforms the place purposes can run. There are internet hosting suppliers for easy static information, extra superior serverless choices similar to Vercel, or server environments the place Node servers may be executed, and so forth. With tiny plugins known as adapters, we inform SvelteKit to optimize our output for a selected platform. This significantly facilitates app deployment.
Nonetheless, the largest benefit SvelteKit has to supply is its ease of use. After all, we will manually arrange our construct course of from scratch with all these options, however this may be tedious and irritating. SvelteKit makes it as straightforward as doable for us, and one of the simplest ways to expertise that is by truly utilizing it.
That is why we’ll create a easy net app displaying profile pages of made-up customers. And alongside the way in which, we’ll have a look at all of the options I’ve talked about above in additional element.
Stipulations
No earlier data is required, though some expertise with Svelte is likely to be useful. The article Meet Svelte 3, a Highly effective, Even Radical JavaScript Framework gives introduction.
To work with SvelteKit, we’ll want a working model of Node on our system. We will set up it utilizing the Node Model Supervisor (nvm). (You will discover some setup directions right here.)
You will discover all of the code for this tutorial on GitHub.
Getting Began
To start with, we provoke a brand new SvelteKit challenge. Execute the next instructions within the terminal:
npm init svelte@newest svelteKit-example-app
We’ll be requested a couple of questions in order that we will customise our challenge. For our functions, reply the next:
- Which Svelte app template? -> SvelteKit demo app
- Use TypeScript elements -> no
- The rest? -> no
This may load a SvelteKit improvement setting, together with a useful instance software.
In our challenge route there are actually some configuration information: our bundle.json, the static folder, and the src folder. We’ll be working primarily contained in the src folder. It has the next construction:
src
├── app.html
├── lib
│   ├── pictures
│   │   └── (varied pictures ..)
└── routes
    ├── +format.svelte
    ├── +web page.js
    ├── +web page.svelte
    ├── Counter.svelte
    ├── Header.svelte
    ├── kinds.css
    ├── about
    │   ├── +web page.js
    │   └── +web page.svelte
    └── sverdle
        ├── +web page.server.js
        ├── +web page.svelte
        ├── recreation.js
        ├── reduced-motion.js
        ├── phrases.server.js
        └── how-to-play
            ├── +web page.js
            └── +web page.svelte
The /src/app.html file is our app-shell — a minimal HTML web page the place our rendered HTML shall be inserted and our bundle information linked from. Often we don’t have to the touch this file. We will insert some app-wide meta tags if we wish to, however this isn’t mandatory — as we’ll see in a second.
The /src/routes folder is the guts of our software. Any information inside which have a + prefix are particular to SvelteKit. To create a brand new web page, we create a Svelte part named +web page.svelte. The folders main as much as this file make up the URL path. For instance, /src/routes/take a look at/+web page.svelte can be served below the URL /take a look at.
Svelte elements can have youngster elements. For instance, the route part /src/routes/take a look at/+web page.svelte may import a part named Button.svelte. As a result of all information with no + prefix don’t have any that means to SvelteKit, we will place these elements proper subsequent to their routes, leading to good colocation. If we have now elements or utilities which can be reused in a variety of locations, we should always put them within the /src/lib folder.
Let’s see how all this works in motion. Grow to be the newly created listing, then set up the dependencies and begin the app in improvement mode:
cd svelteKit-example-app
npm set up
npm run dev -- --open
This may open the preexisting instance app in a brand new browser tab. Click on by means of the app and guarantee your self it’s working.
Some preparation
As polished because the demo app is, it comprises a bunch of information that we gained’t want. Let’s do away with these.
Delete the contents of the lib folder:
rm src/lib/*
Delete the routes/sverdle folder:
rm -rf src/routes/sverdle
Delete the counter and header part:
rm -rf src/routes/Counter.svelte
rm -rf src/routes/Header.svelte
We will do with out the demo app’s styling. Within the root of the routes folder, open kinds.css and exchange the contents with the next:
:root {
  font-family: -apple-system, BlinkMacSystemFont, 'Segoe UI', Roboto, Oxygen, Ubuntu, Cantarell,
    'Open Sans', 'Helvetica Neue', sans-serif;
}
physique {
  margin: 0;
}
Lastly, open src/routes/+web page.svelte and exchange the contents with the next:
<primary>
  <h1>HOME</h1>
</primary>
With that carried out, let’s get to constructing out our demo.
Layouts and Consumer-side Routing
As talked about above, each +web page.svelte part within the routes folder defines one route. However what about code that ought to apply to many pages directly? For this, we have now the format part, named +format.svelte. This part comprises code that applies to each web page subsequent to it and beneath it.
Let’s open the present /src/routes/+format.svelte file. All it does for now could be import some app-wide CSS code, present navigation and a <slot> ingredient that wraps the remainder of the appliance. Let’s exchange the content material with the next:
<script>
  import './kinds.css';
</script>

<svelte:head>
  <meta title="robots" content material="noindex" />
</svelte:head>

<nav>
  <a href=".">HOME</a>
  <a href="/about">ABOUT</a>
</nav>

<slot />

<model>
  nav {
    padding: 1rem;
    box-shadow: -1px 1px 11px 4px #898989;
  }
  a {
    text-decoration: none;
    coloration: grey;
    margin-right: 1rem;
  }
</model>
Be aware: if you wish to have syntax highlighting for Svelte information, there are extensions you possibly can set up. This one is nice for VS Code.
On this instance, we used the <svelte:head> ingredient to outline meta tags that shall be inserted within the <head> of our doc. Since we did this within the format part on the root, it is going to be utilized to your complete app. The robots tag is simply an instance.
Moreover, we created a navbar. This can be a typical use case for the format part, because it’s often meant to be proven on each web page of our software.
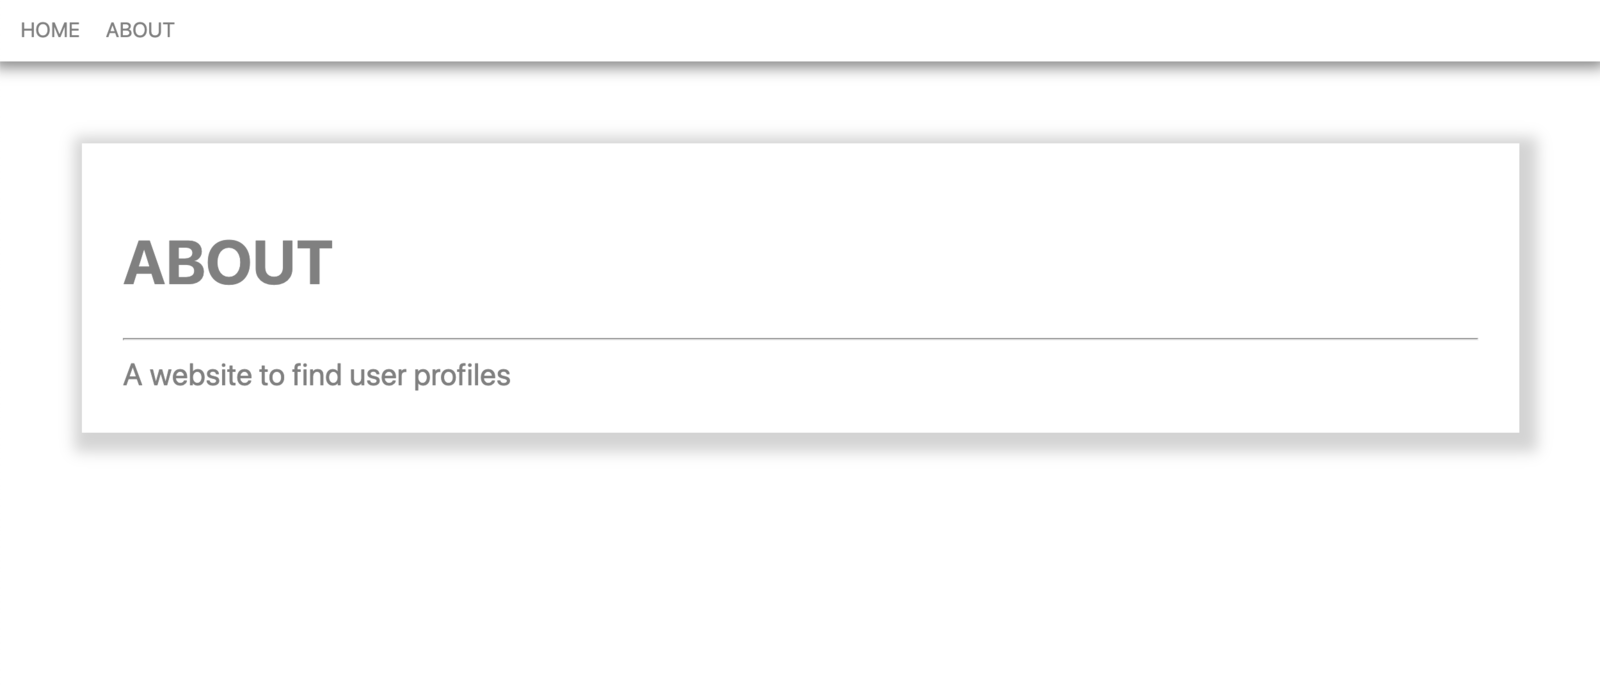
The navbar has two hyperlinks: one to the basis of the appliance — which already has content material served by the /src/routes/+web page.svelte part — and one to the about web page. The about web page was additionally created by the demo app. Open it and exchange its content material with the next:
<primary>
  <h1>ABOUT</h1>
  <hr />
  <div>An internet site to search out consumer profiles</div>
</primary>

<model>
  primary {
    font-size: 1.5rem;
    margin: 4rem;
    padding: 2rem;
    coloration: grey;
    justify-content: heart;
    box-shadow: 4px 5px 11px 10px lightgray;
  }
</model>
This web page is fairly primary. We included some HTML and utilized some styling.
Let’s return to the browser and navigate to the brand new web page. Our modifications ought to already be seen and we should always see one thing like what’s pictured beneath.
Let’s navigate between the touchdown web page and the about web page. We’ll see that altering the web page doesn’t refresh your complete software. The navigation feels clean and immediate. It’s because SvelteKit applies Consumer-Aspect Routing out of the field. Though we used regular <a> tags in our navbar, SvelteKit identifies these as inside hyperlinks and intercepts them utilizing its built-in consumer router.
Static Pages and Prerendering
As famous above, SvelteKit makes use of the idea of adapters to construct apps for various environments. Adapters are imported within the svelte.config.js file.
After we open this configuration file, we will see that our software presently makes use of the auto adapter. This may optimize the construct output for sure deployment targets similar to Vercel or Netlify and, by default, each web page of our software shall be rendered upon request by a Node server. Nonetheless, this appears slightly bit an excessive amount of, contemplating the present state of our app. Additionally, we would not wish to run a server for our software.
As our app doesn’t presently depend upon any dynamic information, it might consist solely of static information. And there’s an adapter-static that we will set up, which turns SvelteKit right into a static web site generator. It could render our total app into a set of static information in the course of the construct course of. Nonetheless, this is able to stop us from creating extra pages that depend upon server-side rendering.
As we don’t wish to flip all our pages into static information, we’ll make use of one other SvelteKit function which allows us to prerender particular person information of our software. In our case, we’d just like the about web page to be prerendered, because it consists of static content material and rendering the web page on each request can be pointless. We will obtain this by including the next code snippet to our /src/routes/about/+web page.svelte web page:
export const prerender = true;
We will take a look at this out by switching the adapter to adapter-node. For this, we exchange @sveltejs/adapter-auto with @sveltejs/adapter-node each in our bundle.json (additionally change the model to ^1.0.0) and our svelte.config.js. After putting in it with npm set up, run npm run construct. This may generate a functioning Node server contained in the /construct folder. As you possibly can see, there’s an HTML file /construct/prerendered/about.html containing the prerendered HTML for the about web page.
We will run the generated Node server with node construct/index.js.
Endpoints
Now it’s time to fill our web page with some dynamic content material. We’ll modify the touchdown web page such that it exhibits an inventory of consumer avatars. To take action, we have to fetch an inventory of consumer data from an API endpoint. Most growing groups have a separate backend. That might be the place to go. Nonetheless, SvelteKit makes it straightforward to show our software full stack utilizing endpoints by creating +server.js information. Since we have now no backend, we’ll create such an endpoint.
As a substitute of utilizing an actual database, we’ll generate some mock consumer information. To take action, we’ll use the faker library. Let’s set up it with npm set up -D faker.
Now, create a file /src/routes/api/+server.js in a brand new /api folder. Because the file known as +server.js, it is going to be handled as an endpoint. The endpoint will turn out to be accessible below /api. Insert the next code:
import faker from 'faker';
import { json } from '@sveltejs/package';

const generateCovers = () =>
  [...Array(50)].map(() => {
    const lastName = faker.title.lastName();
    return { avatar: `https://avatars.dicebear.com/api/human/${lastName}.svg`, lastName };
  });

export operate GET() {
  return json(generateCovers());
}
This file exports a GET operate. As you may have already got guessed, it corresponds to the HTTP technique GET. All it does is return a JSON object that holds an array of consumer information created with generateUsers.
The operate generateUsers returns an array of fifty objects with properties lastName and avatar. lastName is generated utilizing faker. avatar shops a URL that factors to the free DiceBear Avatar API. It generates random avatars utilizing a seed worth, which in our case is lastName.
If we had an actual database, we might exchange generateUsers with one thing like findUsers and entry the database inside this operate.
That’s all it wants. Return to the browser (ensure the app continues to be operating in dev mode npm run dev) and navigate to http://localhost:5173/api. This may load the uncooked information. Be aware that creating an endpoint like we did is barely mandatory if we don’t have a separate backend API to fetch information.
Fetching Knowledge with the load Operate
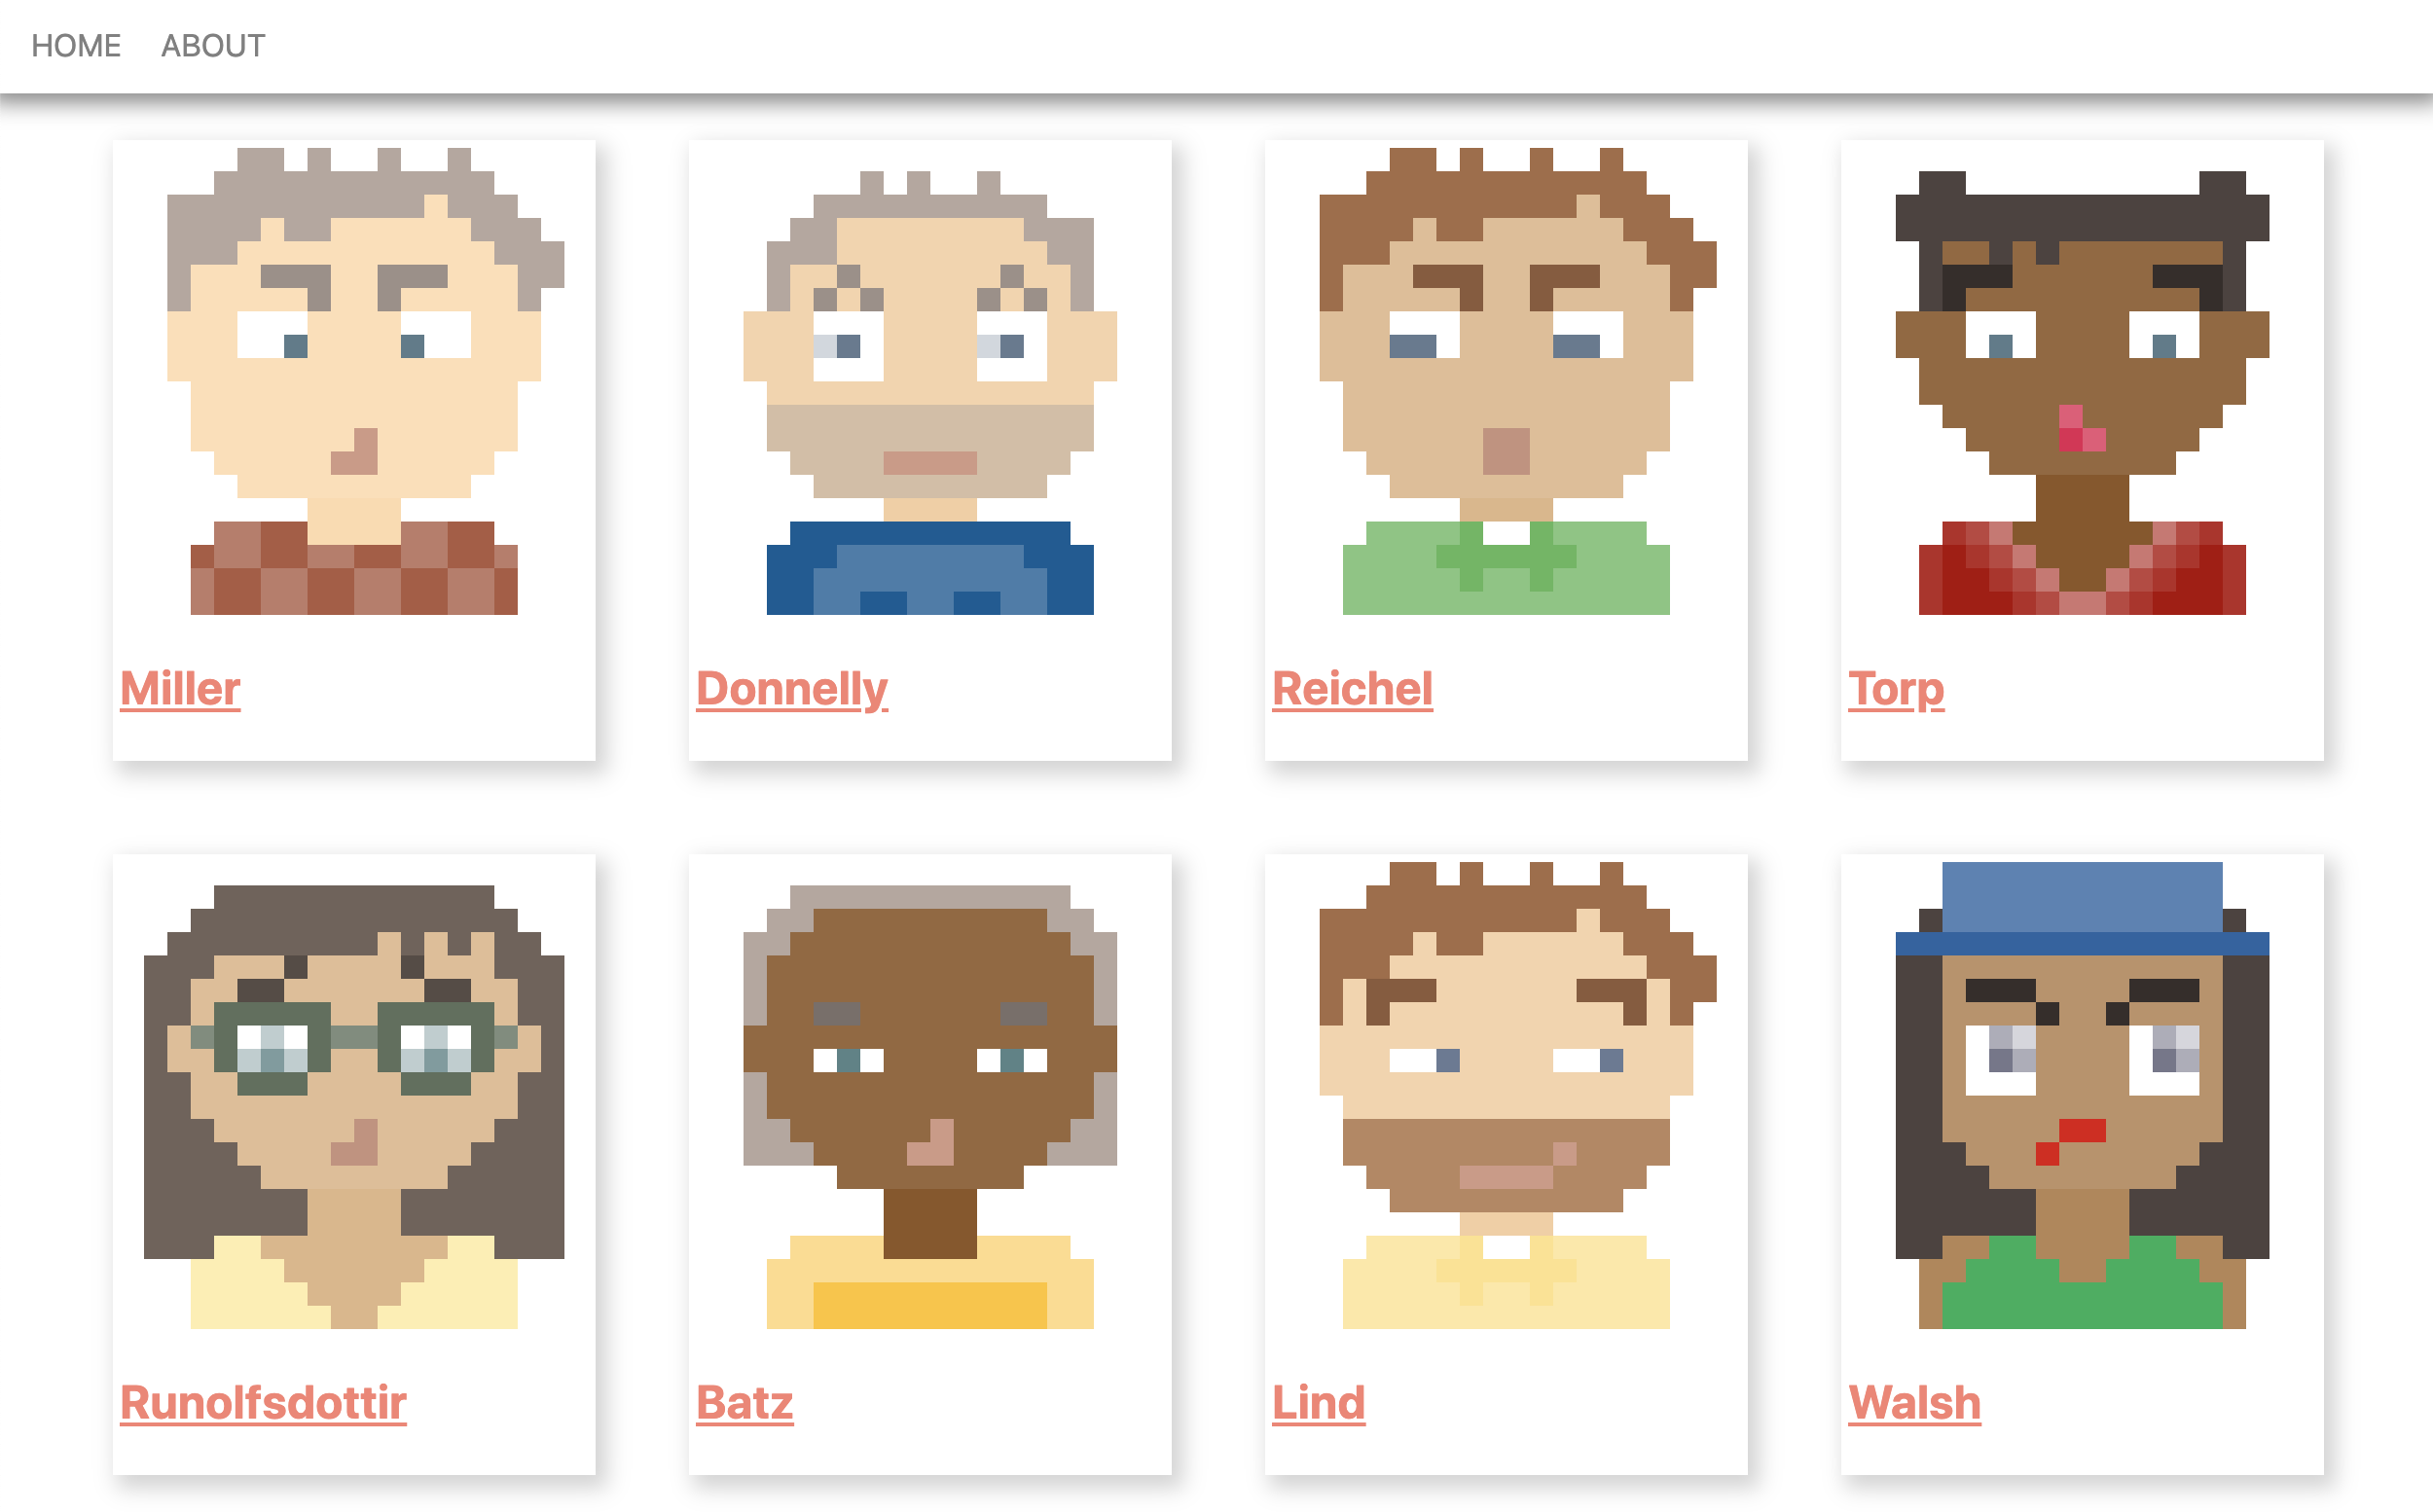
Subsequent, we’ll use the brand new endpoint to show consumer information on our touchdown web page. Open the present /src/routes/+web page.svelte web page and exchange its content material with the next:
<script>
  export let information;
</script>

<primary>
  {#every information.customers as { avatar, lastName }}
    <a href={`/${lastName}`} class="field">
      <img src={avatar} alt={lastName} />
      <h2>{lastName}</h2>
    </a>
  {/every}
</primary>

<model>
  primary {
    show: flex;
    flex-wrap: wrap;
    justify-content: heart;
  }
  .field {
    padding: 0.25rem;
    margin: 1.5rem;
    coloration: salmon;
    box-shadow: 4px 5px 11px 2px lightgray;
  }
  .field:hover {
    box-shadow: 4px 5px 11px 10px lightgray;
  }
  img {
    width: 15rem;
    object-fit: comprise;
  }
</model>
The information property that the web page receives is crammed from the load operate contained in the sibling +web page.js, which we’ll create subsequent. Copy the next code into it:
import { error } from '@sveltejs/package';

export async operate load({ fetch }) {
  const res = await fetch('/api');

  if (res.okay) return { customers: await res.json() };
  throw error(500);
}
The important thing problem to fetching information for dynamic content material on a web page is that there are two methods a consumer can navigate to it. The primary approach is from exterior sources or after a web page refresh. This could trigger the appliance to be loaded from scratch and the web page to be served by the server. The second approach is from inside navigation, during which case the web page can be served by the JavaScript bundle on the consumer facet. Within the former, the information is fetched by the server, whereas within the latter, it’s fetched by the consumer.
SvelteKit presents a really elegant answer for this — the load operate. The load operate inside a +web page.js can run each on the consumer and on the server, and in each instances shall be executed earlier than the part renders.
load receives an object with a fetch property that we will use to fetch information. It behaves identically to the native fetch API. On this instance, we use our new endpoint /api to fetch the array of consumer objects. To go this information to our part, we return an object with the customers property, which shops our consumer array.
If we had a separate backend API, as an alternative of fetching information from our /api endpoint, we’d fetch it inside the load operate from the backend.
In case load runs on the server, the consumer will understand that the information has already been fetched and won’t make a further request.
We’ve returned an object from the load operate; now we have to retrieve it inside +web page.svelte someway. SvelteKit palms this object to the information prop, so we will entry it with export let information inside a <script> tag. That is what we do to entry our customers.
Subsequent, we visualize all our 50 customers utilizing the #every syntax that we all know from Svelte. Contained in the every block, we have now entry to a consumer’s avatar and lastName properties. We use avatar as the worth for the src attribute of an <img> tag.
Now our touchdown web page ought to appear to be the picture beneath.
To this point, we’ve created an endpoint to simulate a database and used load in +web page.js to retrieve information from it. The benefit is that we now have an API to entry straight by means of /api, and we will additionally use the information from it inside our similar app to visualise it on our touchdown web page. What if we don’t want a standalone /api endpoint, although? What if that information from the server is barely meant for use on that touchdown web page?
On this case, SvelteKit can simplify issues significantly for us by offering the information for a web page by means of a load operate, inside a +web page.server.js file as an alternative of a +web page.js file. The extra .server within the file signifies that this load operate all the time runs on the server. This implies we will entry our database or comparable straight inside it. SvelteKit will wire all the things up in order that we don’t want to vary something on the buyer facet in +web page.svelte. On preliminary server-side rendering, it would execute the load operate earlier than returning the HTML, and on consumer navigation it would do a fetch request below the hood. Let’s use this method for our subsequent web page!
Dynamic Parameters
Every consumer field on our touchdown web page is an inside hyperlink with a /[lastName] route. That is the place dynamic parameters come into play. Underneath the /[lastName] route, we’ll show extra data for the respective consumer.
Create a brand new /src/routes/[lastName]/+web page.server.js file with the next content material:
import faker from 'faker';

export async operate load({ params }) {
  const { lastName } = params;

  return {
    consumer: {
      lastName,
      firstName: faker.title.firstName(),
      avatar: `https://avatars.dicebear.com/api/human/${lastName}.svg`,
      title: faker.title.title(),
      telephone: faker.telephone.phoneNumber(),
      electronic mail: faker.web.electronic mail()
    }
  };
}
Discover the dynamic parameter [lastName] within the folder title. We will entry this parameter from the params property of the load operate. We use it to return the right values for lastName and avatar within the response. Since we’re inside a +web page.server.js file that all the time runs on the server, we generate some extra mock information for this consumer with faker straight contained in the load operate; no want for a further API endpoint!
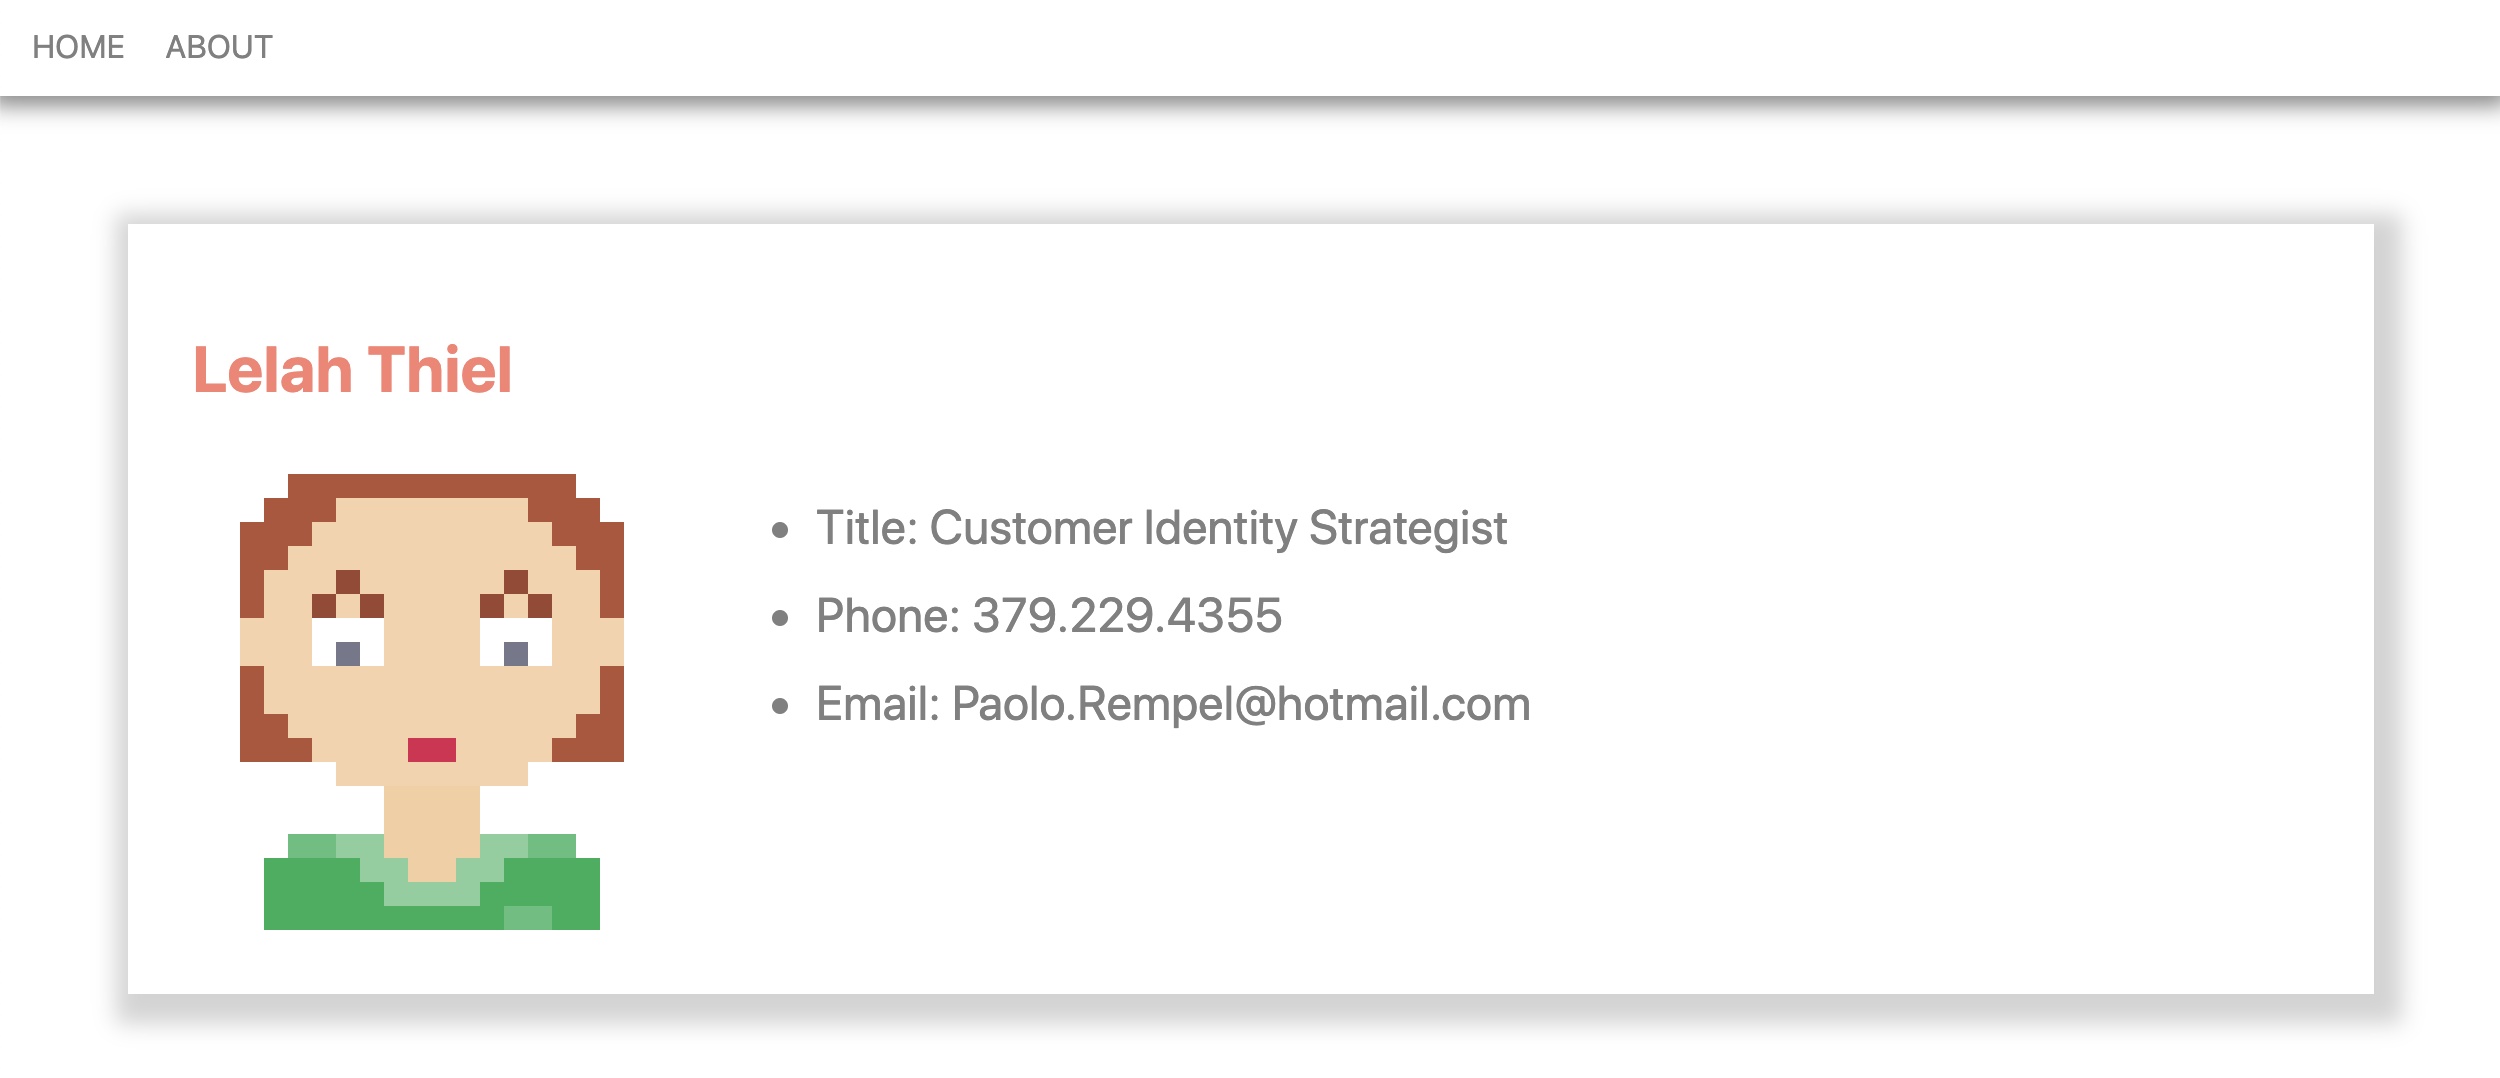
Subsequent, we create the UI for that web page — /src/routes/[lastName]/+web page.svelte — with the next content material:
<script>
  export let information;
</script>

<primary>
  <h1>{information.consumer.firstName} {information.consumer.lastName}</h1>
  <div class="field">
    <img src="{information.consumer.avatar}" alt="{information.consumer.astName}" />
    <ul>
      <li>Title: {information.consumer.title}</li>
      <li>Telephone: {information.consumer.telephone}</li>
      <li>E mail: {information.consumer.electronic mail}</li>
    </ul>
  </div>
</primary>

<model>
  primary {
    margin: 4rem;
    padding: 2rem;
    coloration: grey;
    justify-content: heart;
    box-shadow: 4px 5px 11px 10px lightgray;
  }
  h1 {
    coloration: salmon;
  }
  .field {
    show: flex;
    font-size: 1.5rem;
  }
  img {
    width: 15rem;
    object-fit: comprise;
    margin-right: 2rem;
  }
  li {
    margin-bottom: 1rem;
  }
</model>
Like on the house web page, we entry the return worth of the load operate with export let information and visualize the information with some primary Svelte syntax.
Now we should always be capable of navigate again to the touchdown web page and click on on any consumer field. This may open the corresponding consumer web page. We should always see one thing like what’s pictured beneath.
Prefetching
There’s one final function that I’d like to indicate, and I’m actually enthusiastic about it. SvelteKit presents the power to prefetch information for particular person pages.
Let’s return to our /src/routes/+web page.svelte web page and add the data-sveltekit-preload-data="hover" attribute to the <a> tag, like so:
<a data-sveltekit-preload-data="hover" href={`/${lastName}`} class="field">
This tells SvelteKit to execute the load operate of the corresponding web page upon hovering the <a> ingredient.
Attempt it out by opening the community tab in your browser (see beneath). Each time you hover over one of many consumer bins, a request to /api/[lastName] is made and the information for the corresponding consumer web page is fetched. This protects extra milliseconds and ensures a greater consumer expertise.
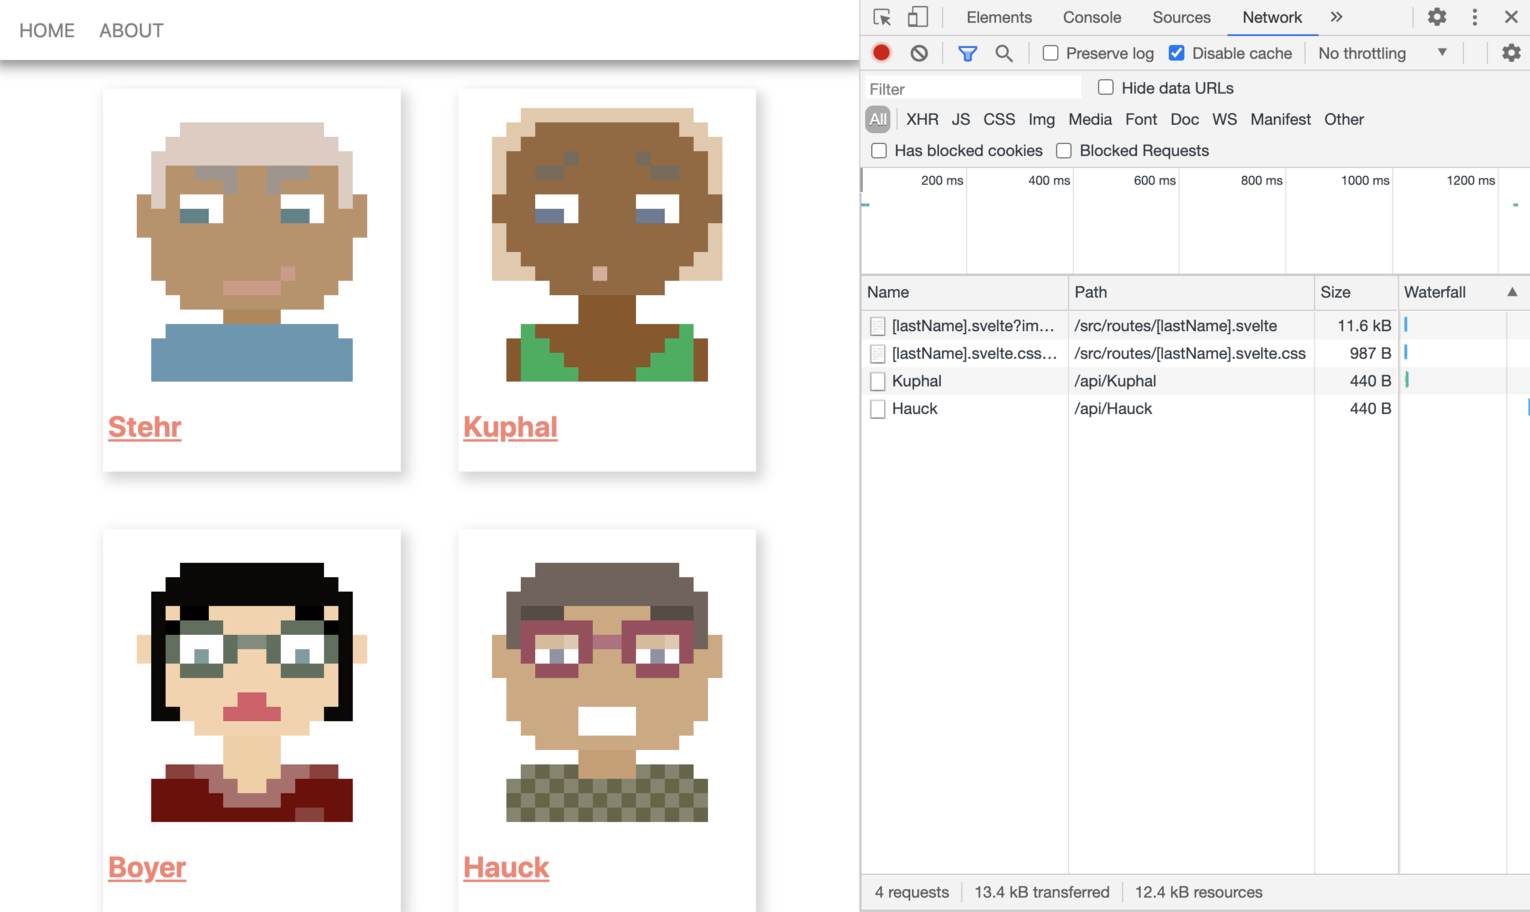
By the way in which, that is additionally a good way to see how SvelteKit applies code splitting out of the field. Reload the web page and clear the Community log. Be aware that the very first time you hover over an avatar, one JavaScript and one CSS file is being loaded. That is the code chunk equivalent to our /src/routes/[lastName]/+web page.svelte web page. It will get loaded solely as soon as per web page session. In case you hover over one other avatar, solely the corresponding information will get loaded, however not once more the JavaScript and CSS.
We don’t should essentially apply the prefetching attribute to the <a> tag. We might additionally place this attribute on a father or mother ingredient and even the physique ingredient in app.html to prefetch all routes within the app like this. In actual fact, the Svelte demo app already did it this fashion! If we favor, we will additionally do the prefetching programmatically utilizing the preloadData operate of SvelteKit’s $app/navigation module.
Conclusion
Working with SvelteKit feels very intuitive. All in all, it took me solely about an hour to be taught all the primary options and the outcomes are completely astonishing. We get blazing-fast, Website positioning-optimized net apps that present the very best consumer expertise that fashionable construct instruments can presumably ship.
By default, SvelteKit renders our web page on the server. On the consumer it will get progressively enhanced by a extremely optimized JavaScript bundle to allow client-side routing. With a couple of strains of code we will prerender particular person pages or prefetch information to allow immediate web page load and navigation. Options like code splitting make sure that Svelte’s benefit of small compilation output doesn’t get mitigated by giant, app-wide bundles.
Final however not least, SvelteKit offers us full freedom with respect to all its options. There’s all the time a option to exclude a function if we favor to. We might, for instance, choose out of server-side rendering solely and create a traditional single web page software.
SvelteKit along with Svelte itself is an actual recreation changer to me. And I imagine it could possibly be so for a lot of others.
The creator has donated his charge for this text to the Svelte Open Collective.
FAQs about SvelteKit
SvelteKit is an internet framework for constructing purposes and web sites with Svelte, a JavaScript framework for constructing consumer interfaces. It gives a set of instruments and conventions to streamline the event course of.
Whereas Svelte focuses on constructing consumer interfaces, SvelteKit is a extra complete framework that features routing, server-side rendering, and different options wanted for constructing full net purposes.
SvelteKit presents options similar to automated code splitting, server-side rendering, file-based routing, adapters for various deployment targets (e.g., Node.js, Vercel, and extra), and straightforward integration with Svelte elements.
SvelteKit goals to be as suitable as doable with present Svelte purposes. You possibly can usually migrate or incorporate Svelte elements into SvelteKit tasks seamlessly.
File-based routing is a function of SvelteKit that lets you outline routes by creating information and folders in your challenge’s listing construction. The file’s location corresponds to the route, making it straightforward to arrange and handle routes.
Sure, SvelteKit helps server-side rendering (SSR) out of the field, enabling you to construct purposes that render content material on the server earlier than sending it to the consumer.
SvelteKit makes use of a mixture of HTML, CSS, and JavaScript to outline elements. It lets you use customary HTML and JavaScript, making it accessible and acquainted to builders.
SvelteKit gives straightforward methods to fetch information utilizing the $session object or by utilizing server endpoints. For state administration, you need to use shops, that are reactive information constructions.